Product
Introducing Module Reachability: Focus on the Vulnerabilities That Matter
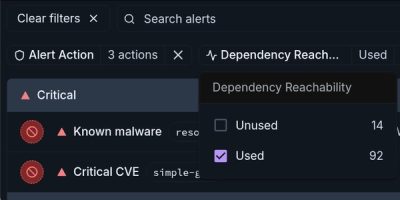
Module Reachability filters out unreachable CVEs so you can focus on vulnerabilities that actually matter to your application.
@blockv/sdk
Advanced tools
This is the official BLOCKv Web SDK. It allows you to easily integrate your own web apps into the BLOCKv Platform.
If you have not already done so, you can sign up for free on developer.blockv.io and get an App ID. You will need this App ID to run the endpoints explored in the examples below.
You can import the SDK with or without Face Module support, which provides utilities for rendering vatoms in the browser.
Install from npm
npm install @blockv/sdk
In Node.js
const Blockv = require('@blockv/sdk')
In the browser via ES6 imports
// Core SDK only
import Blockv from '@blockv/sdk'
// Core SDK plus Face Module support
import Blockv, { VatomView } from '@blockv/sdk/face'
In the browser from a script tag
<!-- Core SDK only -->
<script src="https://npmcdn.com/@blockv/sdk/dist/blockv-sdk.min.js"></script>
<!-- Core SDK plus Face Module support -->
<script src="https://npmcdn.com/@blockv/sdk/dist/blockv-faces.min.js"></script>
Before running any of the web APIs you need to initialise the BLOCKv application. Place the following code in your opening script tag.
let bv = new Blockv({
  "appID" : {{APPID}},
  "server" : "https://api.blockv.io/",
  "websocketAddress" : "wss://ws.blockv.io",
  "prefix" : "blockv"
});
The SDK supports multiple instances of Blockv to be initialised.
IMPORTANT NOTE:
The prefix attribute is critical if you are using multiple instances with the same appID.
Leaving the prefix out will force the sdk to use the appID as the prefix for any stored data, Using multiple instance with the same appID and the prefix omitted will result in data override.
Registration can be done in two ways:
let payload = {
    firstName : 'John',
    lastName : 'Smith',
    birthday : '1970-12-23',
    language : 'en',
    password : '',
    tokens : [
      {
        token : '+44 123 9876',
        token_type : 'phone_number',
        isPrimary : true
      },
      {
        token : 'example@example.com',
        token_type : 'email',
        isPrimary : false
      }
    ],
    namePublic : true,
    avatarPublic : true
}

bv.UserManager.register(payload).then(data =>{
  //do something here
}).catch(err => {
  console.error(err.message);
})
bv.UserManager.login("example@example.com", "email", "test").then(data => {
  //proceed with logged in user
}).catch(err => {
  console.error(err.message);
})
bv.UserManager.loginGuest(guest_id).then(data => {
  //proceed with code
}).catch(err => {
  console.error(err.message);
})
Logs out the current user
bv.UserManager.logout().then(data => {
  //proceed to redirect after logout
}).catch(err => {
  console.error(err.message);
})
Returns the current Access Token
bv.UserManager.getAccessToken().then(data => {
  // Access Token returned is a String

}).catch(err => {
  console.error(err.message)
})
Returns the current user information
bv.UserManager.getCurrentUser().then(data => {
  //do something with the returned user data
}).catch(err => {
  console.error(err.message);
});
Checks the current URI that was supplied against the logged in Asset Provider URI and if it is a match, builds a encoded link with the matching params
bv.UserManager.encodeAssetProvider("https://cdndev.blockv.net/blockv/avatars/b9e6581c-bb70-48d1-85eb-6657ee1a3bef.1521806344051057018").then(data => {
  //proceed to use the newly returned url
}).catch(err => {
  console.error(err.message);
});
returns a list of the current user's tokens (emails / phone numbers)
bv.UserManager.getCurrentUserTokens().then(data => {
  //do something here
}).catch(err => {
  console.error(err.message);
});
function doUpload(){
  let f = document.getElementById('avatar');
  let file = f.files[0];
  let fData = new FormData();
  fData.append('avatar', file);
  bv.UserManager.uploadAvatar(fData);
}
updates the current user with an object containing the new details of the user
let payload = {
    'first_name' : 'Jane',
    'last_name' : 'Smith',
    tokens : [
      {
        token : 'jane@example.com',
        token_type : 'email'
      }
    ]
}

bv.UserManager.updateUser(payload).then(data => {
  //do something here after update
}).catch(err => {
  console.error(err.message);
})
resends the verification token to the user
bv.UserManager.sendTokenVerification(token, token_type).then(data => {
  //verify the token
}).catch(err => {
  console.error(err.message);
})
returns the current refresh token
bv.UserManager.getRefreshToken().then(data => {
  //do something with the refresh token
}).catch(err => {
  console.error(err.message);
})
verifies the user token that was supplied
let payload = {

    "token": "jane@example.com",
    "token_type": "email",
    "verify_code": "1234"
}
bv.UserManager.verifyUserToken(payload).then(data => {
    // do something after verified
}).catch(err => {
   console.error(err.message);
})
Sends a login OTP , The OTP may only be used for the .login() API
bv.UserManager.resetPassword("+44 123 4569", "phone_number").then(data => {
     //do something after password is deleted
}).catch(err => {
     console.error(err.message)
})
bv.Vatoms.performAction(vatomId, action, payload).then(data =>{
  //do something after performing an action with a vAtom
}).catch(err => {
  console.error(err.message);
})
Retrieves a list of the current vAtoms, actions and faces in the users inventory
bv.Vatoms.getUserInventory().then(data =>{
  // do something with the returned inventory
  // data.vatoms (array of vatoms)
  // data.faces (array of faces)
  // data.actions (array of actions)
}).catch(err => {
  console.error(err.message);
})
Deletes a vAtom in the users inventory
bv.Vatoms.deleteVatom(vatomID).then(data =>{
  //do something after the vAtom has been deleted
}).catch(err => {
  console.error(err.message);
})
With the discover method you can search for vAtoms on the BLOCKv Platform. The search will cover all the vAtoms within your current user's inventory as well as those of other users on the Platform. When searching for vAtoms owned by other users, only those vAtoms with their visibility set as public will appear.
You construct a discover query using a DiscoverQueryBuilder. This class helps you to easily compose queries using a few components:
A scope must always be supplied. Scopes are defined using a key and value. The key specifies the property of the vAtom to search. The value is the search term.
Filter elements, similar to scopes, are defined using a field and value. However, filters offer more flexibility because they allow a filter operator to be supplied, e.g. Gt which filters those vAtoms whose value is 'greater than' the supplied value. The combine operator is applied between filter elements.
Return type controls the response payload of the query:
let filter = new Blockv.Discover(bv);
filter.setScope("vAtom::vAtomType.owner", "$currentuser");
filter.appendFilter("vAtom::vAtomType.template", "vatomic::v1::vAtom::Avatar", "Match", "And");
filter.execute();
Important to note, the Web socket connection can only be established if the current user is authenticated. Thus, connect() should only be called after the user has successfully logged in.
The Web socket class is used to provide realtime feedback for the user when they perform certain actions on the BLOCKv platform.
A connection to the Web socket should be established before invoking any of the listeners on the socket.
bv.WebSockets.connect().then(()=>{
		//Do something with the connected sockets
}).catch(err => {
		console.error(err.message);
});
To use the information returned from the Web socket, You will need to add a few event listeners to the established connection.
There are four different event listeners you can monitor:
| Listener | Description |
|---|---|
| inventory | Updates on the current user's inventory (vAtom addition/removal) |
| stateUpdate | Updates on the state of any of the current user's vAtoms (vAtom diff) |
| activity | Updates on the general platform events (user actions, chat, etc.) |
| all | All of the above together |
bv.WebSockets.connect().then(()=>{

  //adding a listener for state Updates
  bv.WebSockets.addEventListener('stateUpdate', function(data){
		//Do something with returned state updates
	})

  //adding a listener for inventory calls
	bv.WebSockets.addEventListener('inventory', function(data){
		//Do something with returned inventory updates
	})

	//adding a listener for activity
	bv.WebSockets.addEventListener('activity', function(data){
		//Do something with the returned activity updates
	})

	//adding a listener for all
	bv.WebSockets.addEventListener('all', function(data){
		//Do something with the returned data
	})

}).catch(err => {
		console.error(err.message);
});
The caller can manually force a socket connection to close by using the close() function. This will prevent the Web socket from trying to auto-connect.
bv.WebSockets.close();
Fetch the activity threads of the current user.
Each thread represents an activity feed between two users. The BLOCKv platform will automatically create and update threads when sending or receiving a vAtom.
//returns a list of threads
bv.Activity.threads().then(data => {
		//do something with the returned threads
}).catch(err => {
		console.error(err.message);
})
Fetch the event messages for an activity thread belonging to the current user.
To get the id required to specify the activity thread see Threads function above.
//Fetches a list of messages from the specified activity thread.
let id = 'id-of-thread'
bv.Activity.threadMessages(id).then(data => {
	//do something with the returned activity thread
}).catch(err => {
		console.error(err.message)
})
Send a text message to a user on the BLOCKv platform. This will create a new activity thread or update the existing one between the two users.
//send a message to a user on the BLOCKv platform
let id = "id-of-the-user-to-send-to"
bv.Activity.sendMessage(id).then(data =>{
	//do something with the returned message here
}).catch(err => {
		console.error(err.message);
})
In order to visually display a vAtom, you would need to create a VatomView instance and add its element to the DOM.
let vv = new VatomView(bv, << vAtom >>, FaceSelection.Icon);
document.body.append(vv.element);
In order to register a native face, you would need to create a class and register is at app startup.
// create your face class.
class MyFace {
  constructor(vatomView, vatom, faceSpec) {
    // Create element
    this.element = document.createElement('div');
    this.element.style.position = 'relative';
    this.element.style.width = '100%';
    this.element.style.height = '100%';
  }

  onResize() {}

  onLoad() {}

  onUnload() {}

  onVatomUpdated() {}

  static get url() {
    return 'native://my-face';
  }
}
// register face on app startup
VatomView.registerFace(MyFace);
The BLOCKv SDK for JavaScript is currently in public beta. Breaking changes may still be introduced in the coming months. This is important to consider if you are planning on releasing your application using the JavaScript SDK.
If you believe you have identified a security vulnerability with BLOCKv, you should report it as soon as possible via email to support@blockv.io. Please do not post it to a public issue tracker.
BLOCKv is available under the BLOCKv AG license. See the LICENSE file for more info.
FAQs
Allows web apps to display and interact with vatoms.
The npm package @blockv/sdk receives a total of 51 weekly downloads. As such, @blockv/sdk popularity was classified as not popular.
We found that @blockv/sdk demonstrated a not healthy version release cadence and project activity because the last version was released a year ago. It has 3 open source maintainers collaborating on the project.
Did you know?

Socket for GitHub automatically highlights issues in each pull request and monitors the health of all your open source dependencies. Discover the contents of your packages and block harmful activity before you install or update your dependencies.

Product
Module Reachability filters out unreachable CVEs so you can focus on vulnerabilities that actually matter to your application.

Company News
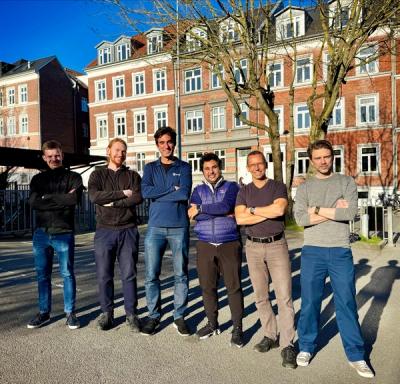
Socket is bringing best-in-class reachability analysis into the platform — cutting false positives, accelerating triage, and cementing our place as the leader in software supply chain security.

Product
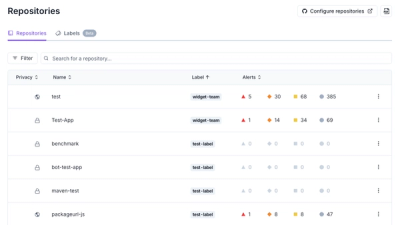
Socket is introducing a new way to organize repositories and apply repository-specific security policies.