Product
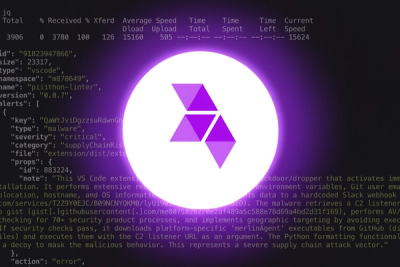
Introducing Socket Scanning for OpenVSX Extensions
Socket now scans OpenVSX extensions, giving teams early detection of risky behaviors, hidden capabilities, and supply chain threats in developer tools.
@civic/auth-mcp
Advanced tools
🔐 The Fastest Way to Add Authorization to MCP Servers
This is the fastest way to add authorization to MCP servers, enabling secure tool use in LLMs and providing confidence and security for you and your customers.
It works with any compliant OAuth2/OIDC provider, while being optimized for Civic Auth's lightning-fast authentication experience.
Civic Auth delivers the fastest, most flexible authentication experience for modern applications:
Ready to experience the fastest auth? Get your Client ID at auth.civic.com and be up and running in minutes.
Install the dependencies:
npm install @civic/auth-mcp @modelcontextprotocol/sdk
Add the middleware to your express app:
app.use(await auth());
Out of the box, this uses Civic Auth as an authentication provider, which is the fastest way to get started.
Once you are ready to go live, obtain a client ID from auth.civic.com and replace the default client ID in the middleware:
app.use(await auth({
    clientId: "...", // Get your client ID from auth.civic.com
}));
That's it!
The fastest way to secure an MCP server. Works smoothly with Anthropic's SDK.
import express from "express";
import {auth} from "@civic/auth-mcp";
import {StreamableHTTPServerTransport} from "@modelcontextprotocol/sdk/server/streamableHttp.js";
import {McpServer} from "@modelcontextprotocol/sdk/server/mcp.js";

// Create your Express app
const app = express();

// Add auth middleware
app.use(await auth());

// Create your MCP server
async function getServer() {
    const server = new McpServer({
        name: "my-mcp-server",
        version: "0.0.1",
    });

    // Register your tools
    server.tool(
        "tool-name",
        "Example tool",
        {},
        async (_, extra) => {
            // Access the authenticated user's information
            const user = extra.authInfo?.extra?.sub;
            return {
                content: [
                    {
                        type: "text",
                        text: `Hello ${user}!`,
                    },
                ],
            };
        }
    );

    // Set up the transport layer
    // In production you may need session management
    const transport = new StreamableHTTPServerTransport({
        sessionIdGenerator: undefined,
    });

    await server.connect(transport);

    return { transport, server };
}

// Set up MCP endpoint
app.post("/mcp", async (req, res) => {
    const { transport, server } = await getServer();
    await transport.handleRequest(req, res, req.body);
    res.on('close', () => {
        transport.close();
        server.close()
    })
});
app.use(await auth({
  // Use a different auth server:
  wellKnownUrl: 'https://accounts.google.com/.well-known/openid-configuration',

  // Or specify additional options
  issuerUrl: 'https://my-mcp-server.com',
  scopesSupported: ['openid', 'profile', 'email', 'custom:scope'],

  // Protect a different route (defaults to '/mcp')
  mcpRoute: '/api',

  // Enrich auth info with custom data from your database
  onLogin: async (authInfo, request) => {
    // Look up user data based on the JWT subject claim
    const userData = await db.users.findOne({ sub: authInfo?.extra?.sub });
    // Return enriched auth info
    return {
      ...authInfo,
      extra: { ...authInfo.extra, ...userData }
    };
  },

  // Legacy OAuth options
  enableLegacyOAuth: true, // Defaults to true
  stateStore: customStateStore, // Custom state store for OAuth flows
}));
For non-Express frameworks, use the McpServerAuth class directly:
import { McpServerAuth } from "@civic/auth-mcp";

// Initialize the auth server
const mcpServerAuth = await McpServerAuth.init();

// Or with custom data enrichment
const mcpServerAuth = await McpServerAuth.init({
  onLogin: async (authInfo, request) => {
    const userData = await db.users.findOne({ sub: authInfo?.extra?.sub });
    return {
      ...authInfo,
      extra: { ...authInfo.extra, ...userData }
    };
  },
});

// In your framework's route handler:
// 1. Expose the protected resource metadata
if (path === '/.well-known/oauth-protected-resource') {
  const metadata = mcpServerAuth.getProtectedResourceMetadata('https://my-server.com');
  return json(metadata);
}

// 2. Validate bearer tokens
try {
  const authInfo = await mcpServerAuth.handleRequest(request);
  // User data will be in authInfo.extra
} catch (error) {
    return unauthorized('Authentication failed');
}
This library includes a client SDK for easy integration with MCP servers, supporting various authentication methods.
The CLI client allows you to authenticate and connect to MCP servers directly from the command line. When authentication is required, it will automatically open a browser window for the user to complete the authentication flow.
import { CLIAuthProvider, RestartableStreamableHTTPClientTransport, CLIClient } from "@civic/auth-mcp/client";

// Create the auth provider
const authProvider = new CLIAuthProvider({
  clientId: "your-client-id", // Get your client ID from auth.civic.com
  // clientSecret: "your-secret", // Optional: only for non-PKCE auth servers
  // successHtml: "<html><body><h1>Success!</h1></body></html>", // Optional: custom success page
  // errorHtml: "<html><body><h1>Error: {{error}}</h1></body></html>", // Optional: custom error page
});

// Create the restartable transport with auth provider
// This transport allows restarting the connection after authorisation is granted
const transport = new RestartableStreamableHTTPClientTransport(
  new URL("http://localhost:33006/mcp"),
  { authProvider }
);

// Create and connect client
const mcpClient = new CLIClient(
    { name: "cli-example", version: "0.0.1" },
    { capabilities: {} }
);

// Connect to the server
await mcpClient.connect(transport);
By default, tokens are stored in memory and lost when the process exits. You can configure persistent token storage by implementing the TokenPersistence interface.
Tokens are stored in memory and lost when the process exits:
import { CLIAuthProvider, InMemoryTokenPersistence } from "@civic/auth-mcp/client";

const authProvider = new CLIAuthProvider({
  clientId: "your-client-id",
  tokenPersistence: new InMemoryTokenPersistence(), // Explicit, but this is the default
});
Implement your own persistence strategy by implementing the TokenPersistence interface:
import { TokenPersistence } from "@civic/auth-mcp/client";
import type { OAuthTokens } from "@modelcontextprotocol/sdk/shared/auth.js";

class MyTokenPersistence implements TokenPersistence {
  async saveTokens(tokens: OAuthTokens): Promise<void> { ... }

  async loadTokens(): Promise<OAuthTokens | undefined> { ... }

  async clearTokens(): Promise<void> { ... }
}

const authProvider = new CLIAuthProvider({
  clientId: "your-client-id",
  tokenPersistence: new DatabaseTokenPersistence(),
});
The TokenAuthProvider simplifies connecting to MCP servers with pre-obtained JWT tokens. Use this if you have an app that already handles authentication, e.g. via Civic Auth.
import { TokenAuthProvider, RestartableStreamableHTTPClientTransport } from "@civic/auth-mcp/client";
import { Client } from "@modelcontextprotocol/sdk/client/index.js";
import { StreamableHTTPClientTransport } from "@modelcontextprotocol/sdk/client/streamableHttp.js";

// Create with pre-obtained token
const authProvider = new TokenAuthProvider("your-jwt-token");

// Create transport and client
const transport = new StreamableHTTPClientTransport(
  new URL("http://localhost:33006/mcp"),
  { authProvider }
);

const mcpClient = new Client(
  { name: "example-client", version: "0.0.1" },
  { capabilities: {} }
);

await mcpClient.connect(transport);
Some MCP Clients use OAuth 2.0 Dynamic Client Registration to automatically register with the auth server.
This means that the client ID sent to your MCP server will not match your client ID, as a new client ID is generated dynamically during the registration process for each client.
Civic-Auth, and the @civic/auth-mcp library support this. To enable it, set the allowDynamicClientRegistration option to true in the MCP server configuration:
app.use(await auth({
    allowDynamicClientRegistration: true,
}));
This will ensure that your client ID is passed to the auth server during client registration, and resultant tokens will be valid for your MCP server only.
Note - this feature is available for the Civic Auth provider only. Behaviour may differ for other providers.
This library includes support for the legacy MCP OAuth specification to ensure compatibility with existing clients while they transition to the latest specification.
Important: This legacy support will be removed in a future version once all major clients have updated to the current MCP specification.
The legacy OAuth mode:
/authorize, /token)To disable legacy OAuth support (recommended once your clients are updated):
app.use(await auth({
    enableLegacyOAuth: false,
}));
We recommend monitoring your client usage and disabling legacy support once all clients have been updated to use the standard OAuth flow with authorization server discovery.
NOTE If testing with Claude (Web or Desktop), you will need to deploy your server to a remote environment using https first, as Claude does not support localhost MCP integrations.
NOTE When using the legacy OAuth flow behind a proxy, make sure to enable the "trust proxy" setting in Express. See details here. This ensures the oauth metadata correctly generates "https" urls.
app.enable('trust proxy');
By default, the legacy OAuth mode uses an in-memory state store for managing OAuth flow state between redirects. For production deployments with multiple servers or processes, you can provide a custom state store implementation:
// Implement a custom state store (e.g., using Redis)
class RedisStateStore implements StateStore {
  ...
}

// Use the custom state store
app.use(await auth({
  stateStore: new RedisStateStore(),
}));
The auth() middleware accepts the following configuration options:
| Option | Type | Default | Description |
|---|---|---|---|
clientId | string | Public Civic client ID | OAuth client ID / Tenant ID for token validation |
wellKnownUrl | string | https://auth.civic.com/oauth/.well-known/openid-configuration | URL to the auth server's OIDC configuration |
scopesSupported | string[] | ['openid', 'profile', 'email'] | OAuth scopes to support |
issuerUrl | string | URL | Server's base URL | Issuer URL for the resource server |
basePath | string | / | Base path for auth endpoints |
mcpRoute | string | /mcp | The MCP route to protect with authentication |
onLogin | function | - | Optional callback to enrich auth info with custom data |
allowDynamicClientRegistration | boolean | false | Enable dynamic client registration |
enableLegacyOAuth | boolean | true | Enable legacy OAuth proxy mode (deprecated) |
stateStore | StateStore | In-memory store | Custom state store for OAuth flow (legacy mode only) |
jwks | object | - | Local JWKS for testing (bypasses remote JWKS fetch) |
🚀 Zero-Friction Setup
🔒 Enterprise Security, Startup Speed
🎯 Developer Experience First
🌐 Production Ready
It is provided as-is, without warranty of any kind, express or implied. Civic makes no guarantees of fitness for a particular purpose or ongoing support. Use of this library is governed solely by the terms of the MIT License.
By using this software, you agree that Civic shall not be held liable for any damages arising from its use, performance, or integration.
Note: The @civic/auth-mcp library is released as an open-source project under the MIT License.
It is provided without warranty or support guarantees.
FAQs
Civic Auth integration for MCP servers
We found that @civic/auth-mcp demonstrated a healthy version release cadence and project activity because the last version was released less than a year ago. It has 13 open source maintainers collaborating on the project.
Did you know?

Socket for GitHub automatically highlights issues in each pull request and monitors the health of all your open source dependencies. Discover the contents of your packages and block harmful activity before you install or update your dependencies.

Product
Socket now scans OpenVSX extensions, giving teams early detection of risky behaviors, hidden capabilities, and supply chain threats in developer tools.

Product
Bringing supply chain security to the next generation of JavaScript package managers

Product
A safer, faster way to eliminate vulnerabilities without updating dependencies