Product
Introducing Webhook Events for Pull Request Scans
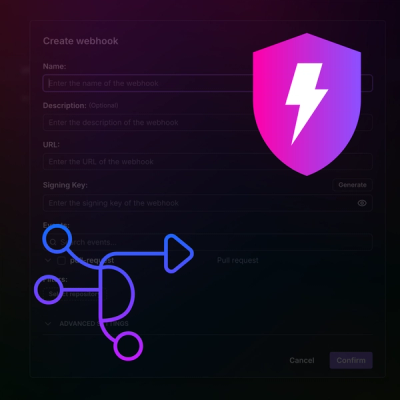
Add real-time Socket webhook events to your workflows to automatically receive pull request scan results and security alerts in real time.
By Jeppe Hasseriis - Oct 22, 2025
@crossmint/client-sdk-auth
Advanced tools
This SDK provides a set of tools for authenticating users in a Crossmint-powered application on the client-side. It simplifies the process of handling authentication tokens, managing user sessions, and integrating various authentication methods into your
This SDK provides a set of tools for authenticating users in a Crossmint-powered application on the client-side. It simplifies the process of handling authentication tokens, managing user sessions, and integrating various authentication methods into your web applications.
To install the SDK, you can use npm or yarn:
npm install @crossmint/client-sdk-auth
To use the SDK in your application, follow these steps:
import { createCrossmint, CrossmintAuth } from "@crossmint/client-sdk-auth";

const crossmint = createCrossmint({
    apiKey: process.env.CLIENT_CROSSMINT_API_KEY || "",
});

const crossmintAuth = CrossmintAuth.from(crossmint);
// Get the current user
const user = await crossmintAuth.getUser();

// Log out the user and clear cookies
crossmintAuth.logout();
By default, the SDK uses browser cookies for storing authentication materials. For environments where cookies are not available, such as React Native, you can provide a custom storage provider.
The SDK provides several secure storage implementations for React Native:
First install dependencies:
npx expo install expo-secure-store
For Expo applications, use SecureStore which provides a secure encrypted storage solution:
import * as SecureStore from 'expo-secure-store';
import { ExpoSecureStorage, CrossmintAuth } from "@crossmint/client-sdk-auth";

// Create a custom storage provider using Expo's SecureStore
const storageProvider = new ExpoSecureStorage(SecureStore);

// Initialize auth client with secure storage
const crossmintAuth = CrossmintAuth.from(crossmint, {
  storageProvider
});
First install dependencies:
npm install react-native-encrypted-storage
For vanilla React Native apps, use EncryptedStorage:
import EncryptedStorage from 'react-native-encrypted-storage';
import { RNEncryptedStorage, CrossmintAuth } from "@crossmint/client-sdk-auth";

// Create a custom storage provider using react-native-encrypted-storage
const storageProvider = new RNEncryptedStorage(EncryptedStorage);

// Initialize auth client with secure storage
const crossmintAuth = CrossmintAuth.from(crossmint, {
  storageProvider
});
You can implement any storage solution by implementing the StorageProvider interface:
export interface StorageProvider {
  get(key: string): string | undefined | Promise<string | undefined>;
  set(key: string, value: string, expiresAt?: string): void | Promise<void>;
  remove(key: string): void | Promise<void>;
}
To secure the authentication material, you can set up a custom endpoint in your backend that will handle refreshing the authentication material and storing it in HttpOnly cookies. This way, the authentication material is not accessible to JavaScript running in the browser.
In the client, provide the custom refresh route when creating the CrossmintAuth instance:
const crossmintAuth = CrossmintAuth.from(crossmint, {
    refreshRoute: "/api/refresh",
});
This way, the SDK will use the provided route to refresh the token instead of the default one and the authentication material can be stored in HttpOnly cookies that are tied to the domain of the provided route.
As you're now using HttpOnly cookies, logout can't happen client-side as it doesn't have access to the cookies. You can set up a custom logout route to handle the logout process.
In the client, provide the custom logout route when creating the CrossmintAuth instance:
const crossmintAuth = CrossmintAuth.from(crossmint, {
    logoutRoute: "/api/logout",
});
NOTE: Depending on the framework you're using, you might need to set the whole URL in the refreshRoute and logoutRoute options.
You can provide callbacks for token refresh and logout events when creating the CrossmintAuthClient:
const crossmintAuth = CrossmintAuth.from(crossmint, {
    callbacks: {
        onTokenRefresh: (authMaterial) => {
            // Handle new authentication material
        },
        onLogout: () => {
            // Handle logout
        },
    },
});
{
    "jwt": "...",
    "refreshToken": "...",
    "user": {
        "id": "...",
        "email": "..."
    }
}
These callbacks allow you to perform custom actions when tokens are refreshed or when the user logs out.
FAQs
This SDK provides a set of tools for authenticating users in a Crossmint-powered application on the client-side. It simplifies the process of handling authentication tokens, managing user sessions, and integrating various authentication methods into your
The npm package @crossmint/client-sdk-auth receives a total of 3,841 weekly downloads. As such, @crossmint/client-sdk-auth popularity was classified as popular.
We found that @crossmint/client-sdk-auth demonstrated a healthy version release cadence and project activity because the last version was released less than a year ago. It has 8 open source maintainers collaborating on the project.
Did you know?

Socket for GitHub automatically highlights issues in each pull request and monitors the health of all your open source dependencies. Discover the contents of your packages and block harmful activity before you install or update your dependencies.
Product
Add real-time Socket webhook events to your workflows to automatically receive pull request scan results and security alerts in real time.

Research
The Socket Threat Research Team uncovered malicious NuGet packages typosquatting the popular Nethereum project to steal wallet keys.

Product
A single platform for static analysis, secrets detection, container scanning, and CVE checks—built on trusted open source tools, ready to run out of the box.