Product
Rust Support Now in Beta
Socket's Rust support is moving to Beta: all users can scan Cargo projects and generate SBOMs, including Cargo.toml-only crates, with Rust-aware supply chain checks.
@getverdict/adminify
Advanced tools
Transform any CLI into a beautiful web interface in seconds. Oclif plugin that automatically generates modern web UIs for command-line tools.
Transform any CLI into a beautiful web interface in seconds.
Adminify is an oclif plugin that automatically generates modern web UIs for your command-line tools. No manual form building, no configuration files – just install, run, and get a fully functional web interface for all your CLI commands.
Add adminify-plugin to your existing oclif CLI:
# For oclif CLIs
npm install @getverdict/adminify
# or
yarn add @getverdict/adminify
# or
pnpm add @getverdict/adminify
# Then add to your CLI's package.json under "oclif.plugins"
Or install globally to use with any CLI:
npm install -g @getverdict/adminify
# Create an admin user account
your-cli create-user admin@yourcompany.com --password secure123
# Start the development server
your-cli dev
The web interface will be available at http://localhost:3000
http://localhost:3000Add @getverdict/adminify to your CLI project:
npm install @getverdict/adminify
Then add it to your package.json:
{
  "oclif": {
    "plugins": [
      "@getverdict/adminify"
    ]
  }
}
Install globally to use with any oclif-based CLI:
npm install -g @getverdict/adminify
create-user EMAILCreate a new user account for the web interface.
USAGE
  $ your-cli create-user EMAIL -p <password>

ARGUMENTS
  EMAIL  User email address

FLAGS
  -p, --password=<value>  User password (minimum 6 characters)

EXAMPLES
  $ your-cli create-user admin@example.com --password mypassword123
  $ your-cli create-user user@company.com -p securepassword
devStart the development web server.
USAGE
  $ your-cli dev [--port <value>]

FLAGS
  --port=<value>  [default: 3000] Port to run the server on

DESCRIPTION
  Starts a web server that provides a UI for all your CLI commands

EXAMPLES
  $ your-cli dev
  $ your-cli dev --port 8080
generateGenerate UI schemas for your commands (development utility).
USAGE
  $ your-cli generate

DESCRIPTION
  Outputs JSON schemas for all discovered commands
Set JWT Secret
export JWT_SECRET="your-super-secret-jwt-key-here"
Configure API URL (if frontend is served separately)
export VITE_API_URL="https://your-api-domain.com"
Deploy both API and frontend on the same server:
# Build the frontend
cd packages/adminify-ui
npm run build

# Start your CLI with the dev command
your-cli dev --port 3000
Deploy the API and frontend separately:
Backend (API Server)
your-cli dev --port 3000
Frontend (Static Files)
cd packages/adminify-ui
npm run build
# Serve the dist/ folder with your preferred static file server
FROM node:18-alpine

WORKDIR /app
COPY . .
RUN npm install
RUN npm run build

EXPOSE 3000
CMD ["your-cli", "dev", "--port", "3000"]
server {
    listen 80;
    server_name your-domain.com;

    location / {
        proxy_pass http://localhost:3000;
        proxy_http_version 1.1;
        proxy_set_header Upgrade $http_upgrade;
        proxy_set_header Connection 'upgrade';
        proxy_set_header Host $host;
        proxy_set_header X-Real-IP $remote_addr;
        proxy_set_header X-Forwarded-For $proxy_add_x_forwarded_for;
        proxy_set_header X-Forwarded-Proto $scheme;
        proxy_cache_bypass $http_upgrade;
    }
}
JWT_SECRET environment variable in productionpackages/adminify-plugin/
├── src/
│ ├── commands/ # Plugin commands
│ ├── hooks/ # oclif hooks for command discovery
│ ├── lib/ # Core libraries (auth, command parsing)
│ └── server/ # Fastify web server
└── README.md
packages/adminify-ui/ # React frontend
└── src/
├── components/ # React components
├── contexts/ # React contexts (auth)
└── pages/ # Application pages
# Clone and install dependencies
git clone <your-repo>
cd your-repo
pnpm install

# Start development
cd packages/adminify-plugin
pnpm dev
Problem: Your custom commands don't show up in the web interface.
Solution:
hidden: trueProblem: "Invalid token" errors or login failures.
Solutions:
JWT_SECRET is set consistentlycreate-userProblem: "Port 3000 is already in use" error.
Solution:
# Use a different port
your-cli dev --port 8080

# Or kill the process using port 3000
lsof -ti:3000 | xargs kill -9
Problem: Frontend build fails or styling issues.
Solutions:
rm -rf node_modules && npm installPOST /api/auth/login - User loginGET /api/auth/me - Get current user infoGET /api/commands - List all available commandsPOST /api/commands/execute - Execute a commandgit checkout -b feature/amazing-feature)git commit -m 'Add amazing feature')git push origin feature/amazing-feature)MIT License - see LICENSE file for details.
Made with ❤️ for the CLI community. Transform your command-line tools into beautiful web experiences with zero effort.
FAQs
Transform any CLI into a beautiful web interface in seconds. Oclif plugin that automatically generates modern web UIs for command-line tools.
We found that @getverdict/adminify demonstrated a healthy version release cadence and project activity because the last version was released less than a year ago. It has 1 open source maintainer collaborating on the project.
Did you know?

Socket for GitHub automatically highlights issues in each pull request and monitors the health of all your open source dependencies. Discover the contents of your packages and block harmful activity before you install or update your dependencies.

Product
Socket's Rust support is moving to Beta: all users can scan Cargo projects and generate SBOMs, including Cargo.toml-only crates, with Rust-aware supply chain checks.

Product
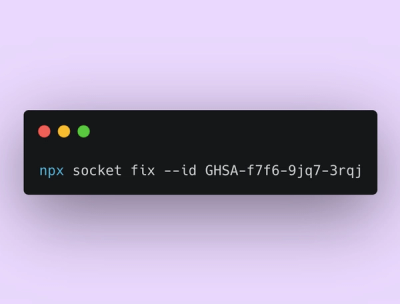
Socket Fix 2.0 brings targeted CVE remediation, smarter upgrade planning, and broader ecosystem support to help developers get to zero alerts.

Security News
Socket CEO Feross Aboukhadijeh joins Risky Business Weekly to unpack recent npm phishing attacks, their limited impact, and the risks if attackers get smarter.