Research
/Security News
9 Malicious NuGet Packages Deliver Time-Delayed Destructive Payloads
Socket researchers discovered nine malicious NuGet packages that use time-delayed payloads to crash applications and corrupt industrial control systems.
@mux/mux-background-video
Advanced tools
A super lightweight component and HLS engine for creating background videos using Mux HLS streams.
A super lightweight component and HLS engine for creating background videos using Mux HLS streams.
npm install @mux/mux-background-video
The easiest way to use Mux Background Video is with the custom element:
<!DOCTYPE html>
<html>
<head>
  <title>Background Video</title>
  <style>
    html,
    body {
      height: 100%;
    }

    body {
      margin: 0;
      padding: 0;
    }

    mux-background-video,
    img {
      display: block;
      width: 100%;
      height: 100%;
      object-fit: cover;
    }
  </style>
  <script type="module" src="http://cdn.jsdelivr.net/npm/@mux/mux-background-video/html/+esm"></script>
</head>
<body>
  <mux-background-video src="https://stream.mux.com/YOUR_PLAYBACK_ID.m3u8">
    <img src="https://image.mux.com/YOUR_PLAYBACK_ID/thumbnail.webp?time=0" alt="Mux Background Video" />
  </mux-background-video>
</body>
</html>
You can also import the custom element directly:
import '@mux/mux-background-video/html';

// The custom element is automatically registered
// You can now use <mux-background-video> in your HTML
For React applications, use the React component:
import { MuxBackgroundVideo } from '@mux/mux-background-video/react';

function HeroSection() {
  return (
    <MuxBackgroundVideo src="https://stream.mux.com/YOUR_PLAYBACK_ID.m3u8">
      <img src="https://image.mux.com/YOUR_PLAYBACK_ID/thumbnail.webp?time=0" alt="Mux Background Video" />
    </MuxBackgroundVideo>
  );
}
To enable Mux data collection for your background videos, include the Mux embed script in your HTML page before the Mux Background Video script:
<script defer src="https://cdn.jsdelivr.net/npm/mux-embed"></script>
Once this script is included, Mux data will automatically be enabled for all background videos on the page, providing you with detailed analytics and insights about video performance.
<mux-background-video>The <mux-background-video> element automatically handles HLS streaming.
src: The Mux HLS stream URL (required)max-resolution: Maximum resolution for the video (e.g., "720p", "1080p")audio: Enable audio track (default: false)preload: Controls video preloading behavior (default: auto)
"none": No preloading"metadata": Preload only metadata"auto": Preload video data<mux-background-video audio max-resolution="720p" src="YOUR_STREAM_URL">
<img src="https://image.mux.com/YOUR_PLAYBACK_ID/thumbnail.webp?time=0" alt="Mux Background Video" />
</mux-background-video>
You can also set attributes programmatically:
const element = document.querySelector('mux-background-video');

// Set maximum resolution
element.setAttribute('max-resolution', '1080p');

// Enable audio track
element.toggleAttribute('audio', true);

// Set preload behavior
element.setAttribute('preload', 'metadata');

// Set the stream URL
element.setAttribute('src', 'https://stream.mux.com/NEW_PLAYBACK_ID.m3u8');

// Get current values
console.log(element.getAttribute('src'));
console.log(element.getAttribute('max-resolution'));
console.log(element.hasAttribute('audio'));
console.log(element.getAttribute('preload'));
MuxBackgroundVideosrc: The Mux HLS stream URL (required)maxResolution: Maximum resolution for the video (e.g., "720p", "1080p")audio: Enable audio track (default: false)preload: Controls video preloading behavior (default: auto)
"none": No preloading"metadata": Preload only metadata"auto": Preload video data<MuxBackgroundVideo
src="https://stream.mux.com/YOUR_PLAYBACK_ID.m3u8"
maxResolution="720p"
audio={true}
>
<img src="https://image.mux.com/YOUR_PLAYBACK_ID/thumbnail.webp?time=0" alt="Mux Background Video" />
</MuxBackgroundVideo>
git clone <repository-url>
cd mux-background-video
npm install
npm start
npm start: Start development server with watch modenpm run build: Build the projectnpm run watch: Watch for changes and rebuildnpm test: Run tests locallynpm run test:browserstack: Run integration tests on BrowserStacknpm run setup:browserstack: Interactive setup for BrowserStack credentialsRun tests locally:
npm test
When running the dev server, you can use the following URL parameters:
PLAYBACK_ID: Set a custom Mux playback ID (defaults to demo video)max-resolution: Set maximum resolution for the background videoaudio: Enable or disable audio track (default: false)preload: Set preload behavior ("none", "metadata", or "auto")debug: Enable debug modenomuted: Disable muted attributenoloop: Disable loop attributenoautoplay: Disable autoplay attributeExample:
http://localhost:3000/PLAYBACK_ID?max-resolution=720p&audio=1&preload=metadata
MIT License - see LICENSE file for details.
Contributions are welcome! Please feel free to submit a Pull Request.
For issues and questions, please open an issue on GitHub.
FAQs
A super lightweight component and HLS engine for creating background videos using Mux HLS streams.
We found that @mux/mux-background-video demonstrated a healthy version release cadence and project activity because the last version was released less than a year ago. It has 1 open source maintainer collaborating on the project.
Did you know?

Socket for GitHub automatically highlights issues in each pull request and monitors the health of all your open source dependencies. Discover the contents of your packages and block harmful activity before you install or update your dependencies.

Research
/Security News
Socket researchers discovered nine malicious NuGet packages that use time-delayed payloads to crash applications and corrupt industrial control systems.

Security News
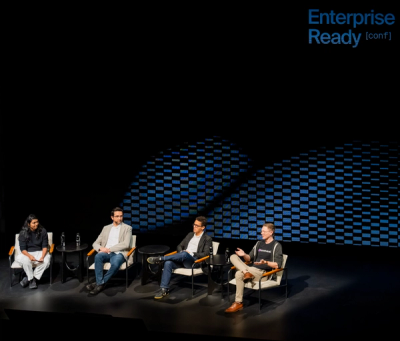
Socket CTO Ahmad Nassri discusses why supply chain attacks now target developer machines and what AI means for the future of enterprise security.

Security News
Learn the essential steps every developer should take to stay secure on npm and reduce exposure to supply chain attacks.