Security News
PodRocket Podcast: Inside the Recent npm Supply Chain Attacks
Socket CEO Feross Aboukhadijeh discusses the recent npm supply chain attacks on PodRocket, covering novel attack vectors and how developers can protect themselves.
@winner-fed/ftp-deploy
Advanced tools
一个简单易用的 FTP/SFTP 文件部署工具
@winner-fed/ftp-deploy 是一个专门用于将本地文件上传到远程服务器的工具库。它支持 FTP 和 SFTP 两种协议,提供了灵活的文件过滤和上传配置选项,适用于前端项目的自动化部署场景。
npm install @winner-fed/ftp-deploy
# 或
yarn add @winner-fed/ftp-deploy
# 或
pnpm add @winner-fed/ftp-deploy
const { FtpDeployer } = require('@winner-fed/ftp-deploy');
const path = require('path');

const ftpDeploy = new FtpDeployer();

// 基本配置
const config = {
  user: 'your-username',
  password: 'your-password',
  host: 'your-server.com',
  port: 21, // FTP 默认端口
  localPath: path.join(__dirname, 'dist'),
  remotePath: '/var/www/html',
  include: ['*'],
  exclude: [],
  deleteRemote: false,
  forcePasv: true,
  sftp: false
};

// 执行部署
ftpDeploy
  .deploy(config)
  .then((result) => {
    console.log('部署成功:', result);
  })
  .catch((error) => {
    console.error('部署失败:', error);
  });
const { FtpDeployer } = require('@winner-fed/ftp-deploy');
const path = require('path');

const ftpDeploy = new FtpDeployer();

const config = {
  user: 'root',
  password: 'your-password',
  host: '192.168.1.100',
  port: 22, // SFTP 默认端口
  localPath: path.join(__dirname, 'build'),
  remotePath: '/usr/local/nginx/html/my-app',
  include: ['*', '**/*'], // 包含所有文件和子目录
  exclude: [
    '**/*.map', // 排除 source map 文件
    'node_modules/**', // 排除 node_modules
    '.git/**', // 排除 git 文件
    '*.log' // 排除日志文件
  ],
  deleteRemote: true, // 上传前清空远程目录
  forcePasv: true,
  sftp: true // 使用 SFTP 协议
};

ftpDeploy
  .deploy(config)
  .then((result) => {
    console.log('SFTP 部署成功:', result);
  })
  .catch((error) => {
    console.error('SFTP 部署失败:', error);
  });
const ftpDeploy = new FtpDeployer();
执行文件部署操作。
参数:
config: 部署配置对象,详见下方配置说明返回值:
Promise<any>: 部署结果的 Promise 对象interface UserConfig {
/**
* 目标服务器登录用户名
* @example 'root', 'admin', 'deploy-user'
*/
user: string;
/**
* 目标服务器登录密码
* @example 'your-password'
*/
password: string;
/**
* 目标服务器主机地址
* 可以是 IP 地址或域名
* @example '192.168.1.100', 'example.com'
*/
host: string;
/**
* 目标服务器端口
* FTP 默认端口: 21
* SFTP 默认端口: 22
* @default 21 (FTP) | 22 (SFTP)
*/
port: number;
/**
* 本地文件路径
* 支持相对路径和绝对路径
* @example './dist', '/home/user/project/build'
*/
localPath: string;
/**
* 目标服务器上传路径
* 远程服务器的目标目录
* @example '/var/www/html', '/usr/local/nginx/html/my-app'
*/
remotePath: string;
/**
* 包含的文件模式
* 使用 glob 模式匹配文件
* @example ["*.html", "*.css", "*.js", "assets/**"]
*/
include: Array<string>;
/**
* 排除的文件模式
* 使用 glob 模式排除不需要上传的文件
* @example ["**/*.map", "node_modules/**", ".git/**"]
*/
exclude: Array<string>;
/**
* 上传前是否删除远程目录的所有文件
* true: 全量替换(先删除后上传)
* false: 增量上传(只上传变更文件)
* @default false
*/
deleteRemote: boolean;
/**
* 是否强制使用被动模式
* 建议保持为 true,避免防火墙问题
* @default true
*/
forcePasv: boolean;
/**
* 是否使用 SFTP 协议
* true: 使用 SFTP (SSH File Transfer Protocol)
* false: 使用 FTP (File Transfer Protocol)
* @default false
*/
sftp: boolean;
}
// 包含所有文件
include: ['*', '**/*'];

// 只包含特定类型文件
include: ['*.html', '*.css', '*.js'];

// 包含特定目录
include: ['dist/**', 'assets/**'];

// 混合匹配
include: ['index.html', 'static/**', '*.json'];
// 常见的排除配置
exclude: [
  '**/*.map', // 所有 source map 文件
  'node_modules/**', // node_modules 目录
  '.git/**', // git 相关文件
  '*.log', // 日志文件
  '.DS_Store', // macOS 系统文件
  'Thumbs.db', // Windows 系统文件
  '**/.env*', // 环境变量文件
  'coverage/**', // 测试覆盖率文件
  '**/*.test.js', // 测试文件
  '**/*.spec.js' // 测试文件
];
// 部署 React/Vue 等前端项目
const config = {
  user: 'deploy',
  password: 'deploy123',
  host: 'your-server.com',
  port: 22,
  localPath: './build', // 或 './dist'
  remotePath: '/var/www/html/my-app',
  include: ['*', '**/*'],
  exclude: ['**/*.map', '.env*'],
  deleteRemote: true, // 全量替换
  sftp: true
};
// 只上传静态资源文件
const config = {
  user: 'assets-user',
  password: 'password',
  host: 'cdn.example.com',
  port: 21,
  localPath: './assets',
  remotePath: '/cdn/assets',
  include: ['*.png', '*.jpg', '*.gif', '*.svg', '*.css', '*.js'],
  exclude: [],
  deleteRemote: false, // 增量上传
  sftp: false
};
const environments = {
  development: {
    host: 'dev.example.com',
    remotePath: '/var/www/dev'
  },
  staging: {
    host: 'staging.example.com',
    remotePath: '/var/www/staging'
  },
  production: {
    host: 'prod.example.com',
    remotePath: '/var/www/prod'
  }
};

const env = process.env.NODE_ENV || 'development';
const envConfig = environments[env];

const config = {
  user: 'deploy',
  password: process.env.DEPLOY_PASSWORD,
  host: envConfig.host,
  port: 22,
  localPath: './dist',
  remotePath: envConfig.remotePath,
  include: ['*', '**/*'],
  exclude: ['**/*.map'],
  deleteRemote: true,
  sftp: true
};
ftpDeploy
  .deploy(config)
  .then((result) => {
    console.log('部署成功:', result);
  })
  .catch((error) => {
    console.error('部署失败:', error);

    // 根据错误类型进行处理
    if (error.code === 'ECONNREFUSED') {
      console.error('连接被拒绝,请检查主机地址和端口');
    } else if (error.code === 'ENOTFOUND') {
      console.error('主机不存在,请检查主机地址');
    } else if (error.code === 530) {
      console.error('登录失败,请检查用户名和密码');
    } else if (error.code === 550) {
      console.error('权限不足或路径不存在');
    } else {
      console.error('未知错误:', error.message);
    }
  });
// 添加超时处理
const deployWithTimeout = (config, timeout = 30000) => {
  return Promise.race([
    ftpDeploy.deploy(config),
    new Promise((_, reject) => {
      setTimeout(() => {
        reject(new Error('部署超时'));
      }, timeout);
    })
  ]);
};

deployWithTimeout(config, 60000) // 60秒超时
  .then((result) => console.log('部署成功:', result))
  .catch((error) => console.error('部署失败:', error));
// 使用环境变量存储敏感信息
const config = {
  user: process.env.FTP_USER,
  password: process.env.FTP_PASSWORD,
  host: process.env.FTP_HOST,
  port: parseInt(process.env.FTP_PORT) || 22
  // ... 其他配置
};
// deploy.config.js
module.exports = {
  development: {
    user: 'dev-user',
    host: 'dev.example.com',
    remotePath: '/var/www/dev'
  },
  production: {
    user: 'prod-user',
    host: 'prod.example.com',
    remotePath: '/var/www/prod'
  }
};

// deploy.js
const config = require('./deploy.config.js');
const env = process.env.NODE_ENV || 'development';
const deployConfig = {
  ...config[env],
  password: process.env.DEPLOY_PASSWORD
  // ... 其他通用配置
};
// package.json
{
  "scripts": {
    "build": "npm run build:prod",
    "deploy:dev": "NODE_ENV=development node deploy.js",
    "deploy:prod": "NODE_ENV=production node deploy.js",
    "deploy": "npm run build && npm run deploy:prod"
  }
}
安全性:
网络连接:
文件权限:
大文件上传:
路径格式:
path.join() 处理路径详细的更新日志请查看 CHANGELOG.md。
MIT License
欢迎提交 Issue 和 Pull Request 来改进这个项目。
FAQs
FTP uploads local files to the target server
We found that @winner-fed/ftp-deploy demonstrated a healthy version release cadence and project activity because the last version was released less than a year ago. It has 1 open source maintainer collaborating on the project.
Did you know?

Socket for GitHub automatically highlights issues in each pull request and monitors the health of all your open source dependencies. Discover the contents of your packages and block harmful activity before you install or update your dependencies.

Security News
Socket CEO Feross Aboukhadijeh discusses the recent npm supply chain attacks on PodRocket, covering novel attack vectors and how developers can protect themselves.

Security News
Maintainers back GitHub’s npm security overhaul but raise concerns about CI/CD workflows, enterprise support, and token management.

Product
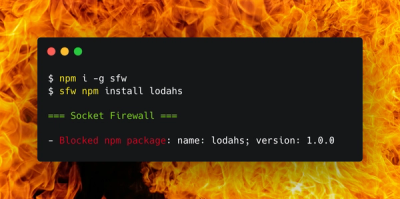
Socket Firewall is a free tool that blocks malicious packages at install time, giving developers proactive protection against rising supply chain attacks.