Research
Malicious fezbox npm Package Steals Browser Passwords from Cookies via Innovative QR Code Steganographic Technique
A malicious package uses a QR code as steganography in an innovative technique.
bluemix-helper-config
Advanced tools
nodejs helper library that makes it easier to access services bound to your application. It also lets you run and debug your application locally while running against services deployed on Bluemix.
You can easily access the services bound to your application by using the vcapServices object as follow:
...
var bluemixHelperConfig = require('bluemix-helper-config'); //helper config to locate sso service
var vcapServices = bluemixHelperConfig.vcapServices;
...
//Locate the cloudant service by using regular expression (The name doesn't have to match exactly and search is case insensitive)
var cloudantService = vcapServices.getService( "cloudant" );
if ( cloudantService ) {
//Use the service credentials to access the cloudant database
var cloudant = require('cloudant')({
"url" : cloudantService.credentials.url
});
....
}else{
throw new Error("Unable to find cloudant Service");
}
...
When building a Bluemix application that depends on services, it is recommended to not hard-code the name of the service as to allow the user to reuse services that have already been deployed. For this reason, the vcapServices is using regular expressions to loosen the requirements on the name. You could also let user specify the name of the service using configManager object (see next section for more details) e.g.
...
var bluemixHelperConfig = require('bluemix-helper-config');
var vcapServices = bluemixHelperConfig.vcapServices;
var configManager = bluemixHelperConfig.configManager;
...
var cloudantService = vcapServices.getService( configManager.get("SERVICE_NAME") || "cloudant" );
...
configManager provide an abstraction layer that enable the user to specify configuration variables in a flexible way. When searching for a configuration key, the framework will first look in the environment variables (For example, on linux you can use "export VAR=value" or on Windows "set VAR=value"). If not found, the system will look in the json configuration as defined by the nconf library.
Using nconfig json configuration, you can easily run and debug your application locally against the services running on Bluemix by importing the vcapServices json snippet as follow: (For a detailed example on how to set up the sample data pipes project to run locally see this page )
In the Bluemix instance, go to the Environment Variables page of your app.
Go to the VCAP_SERVICES tab and click on the copy icon on the top right (we'll use that in the step below)
In your local machine, create a folder of your choice (e.g. /Users/dtaieb/myConfig1 ).
Note: this folder is private to your environment, make sure to separate it from the project directory so you don't accidentally commit the data into a source repository.
Set an environment variable called NODE_CONFIG that point to the config directory e.g export NODE_CONFIG = /Users/dtaieb/myConfig1
Create a file called vcap.json in the private folder, create a JSON structure that has a field named DEV_VCAP_CONFIG with a value corresponding to the content of the VCAP_SERVICES you copied from the step above. eg:
	{"DEV_VCAP_CONFIG":
		{
		   "cloudantNoSQLDB": [
		      {
		         "name": "pipes-cloudant-service",
		         "label": "cloudantNoSQLDB",
		         "plan": "Shared",
		         "credentials": {
		            ...
		         }
		      }
		   ],
		   "dashDB": [
		      {
		         "name": "pipes-dashdb-service",
		         "label": "dashDB",
		         "plan": "Entry",
		         "credentials": {
		            ...
		         }
		      }
		   ],
		   "DataWorks": [
		      {
		         "name": "pipes-dataworks-service",
		         "label": "DataWorks",
		         "plan": "free",
		         "credentials": {
		           ...
		         }
		      }
		   ]
		}
	}
Create a file called myapp.json in the same directory with the configuration key/value pairs you application requires e.g:
{
	"DEV_PORT" : 8082,
	"CONFIG1" : "value1"
}
Note: you can also use a different name for the app by specifying an environment variable called APP_NAME e.g export APP_NAME=anotherName
7. Export the following variable: NODE_CONFIG=<path to your private directory> e.g. NODE_CONFIG=/Users/dtaieb/myConfig1
8. When running locally, you must export the following variable: HOME=<path to your home directory> e.g: HOME=/Users/dtaieb
You are now ready to use these variables in your code. Note that the vcapServices object is already using this framework, the call to vcapService.getService will look in vcap.json if defined, thus letting you run/debug your application against services deployed on Bluemix
...
var bluemixHelperConfig = require('bluemix-helper-config');
var configManager = bluemixHelperConfig.configManager;
...
var config1 = configManager.get("CONFIG1");
var port = configManager.get("DEV_PORT")
...
You can now define as many configuration directories as you'd like (say against multiple bluemix spaces) and easily switch between them using the NODE_CONFIG environment variable. This can be very useful when running automated tests.
FAQs
Bluemix Helper for managing config
We found that bluemix-helper-config demonstrated a not healthy version release cadence and project activity because the last version was released a year ago. It has 4 open source maintainers collaborating on the project.
Did you know?

Socket for GitHub automatically highlights issues in each pull request and monitors the health of all your open source dependencies. Discover the contents of your packages and block harmful activity before you install or update your dependencies.

Research
A malicious package uses a QR code as steganography in an innovative technique.

Research
/Security News
Socket identified 80 fake candidates targeting engineering roles, including suspected North Korean operators, exposing the new reality of hiring as a security function.

Application Security
/Research
/Security News
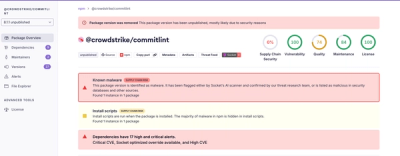
Socket detected multiple compromised CrowdStrike npm packages, continuing the "Shai-Hulud" supply chain attack that has now impacted nearly 500 packages.