Product
Rust Support Now in Beta
Socket's Rust support is moving to Beta: all users can scan Cargo projects and generate SBOMs, including Cargo.toml-only crates, with Rust-aware supply chain checks.

Conga.js is an MVC framework for node.js built on top of Express and is geared towards building anything from classic multi-page websites to more modern realtime and single page applications. It's architecture is heavy influenced by the Symfony2 framework for PHP, borrowing concepts such as built in dependency injection, annotations, and modular components (bundles) that can be used at will.
It's aim is to provide a solid foundation of components to ease the development of large-scale applications while providing the flexibility for you to extend it as you wish.
Some Highlights:
Install the global Conga installation
> npm install -g conga
Run the following command to generate a new project.
Note: This will automatically install all required npm dependencies, so it may take a little while to complete.
> conga create:project my-project
Change into the new project directory and launch the application.
> cd my-project
> conga play
Note: The first time the server is launched, it will automatically install any bower dependencies that are configured for the project, so these will take a little time to install.
The "conga play" command uses node-supervisor to check for file changes in the project and will automatically restart the server when changes are detected.
Alternatively, the server can manually be launched using:
> node app/app.js
You can also specify an environment to use:
> node app/app.js --env=production
Open up http://localhost:3000
|-- app
|   |-- app.js
|   |-- cache
|   |-- cli.js
|   |-- config
|   |-- logs
|   |-- public
|   |-- resources
|   `-- tmp
|-- src
|   `-- demo-bundle
The "app" directory contains all of the configuration files, logs, etc. for a single application. It is possible for your project to contain multiple application directories if you want.
The "src" directory contains all of the project specific bundles for your application. These bundles contain all of your application specific files such as models, templates, controllers, services, etc.
The following is an example structure of a bundle:
|-- demo-bundle
    `-- lib
        |-- controller
        |   |-- default.js
        |   `-- user.js
        |-- dependency-injection
        |   `-- configuration.js
        |-- model
        |   `-- user.js
        `-- resources
            |-- config
            |   `-- services.yml
            |-- public
            |   |-- css
            |   |   `-- styles.css
            |   `-- js
            |       `-- app.js
            `-- views
                |-- default
                |   `-- index.jade
                |-- includes
                |   `-- menu.jade
                `-- layout.jade
> conga create:bundle my-cool-bundle
To use a new bundle created in your project or one installed via npm, you will need to register it in your application. You can do this by simply adding the bundle name to the list in app/config/bundles.yml:
# app/config/bundles.yml

bundles:
    - my-cool-bundle
To create a controller, use the following command:
> conga create:controller my-bundle hello
This will generate the following file:
// src/my-bundle/lib/controller/default.js

/**
 * @Route("/hello")
 */
function HelloController(){};

HelloController.prototype = {

    /**
     * @Route("/")
     */
    index: function(req, res){
        res.return({
            message : 'Hello from HelloController!!!'
        });
    }

};

module.exports = HelloController;
Now, restart the server and open up: http://localhost:3000/hello
At this point you should see the JSON response from the index action!
The @Route annotation on the constructor defines the url prefix for all actions within the file. So, if you were to add another action such as the following:
/**
 * @Route("/world")
 */
world: function(req, res){
    res.return({
        message : "Hello World"
    });
}
This would be accessed by going to: http://localhost:3000/hello/world
By default, the @Route annotation will default to making an action respond to GET requests, but this can be changed by adding a "methods" attribute to the annotation, such as the following:
/**
 * @Route("/world", methods=["PUT", "POST"])
 */
world: function(req, res){
    res.return({
        message : "Hello World"
    });
}
If you want an action to render a template instead of returning a JSON response, you can simply use the @Template annotation on an action:
// src/my-bundle/lib/controller/default.js

/**
 * @Route("/hello")
 */
function HelloController(){};

HelloController.prototype = {

    /**
     * @Route("/")
     * @Template
     */
    index: function(req, res){
        res.return({
            title : "This is a template!!!"
            message : "Isn't cool?"
        });
    }

};

module.exports = HelloController;
Then create the corresponding template file:
// src/my-bundle/lib/resources/views/hello/index.jade

html
  body

    h1 #{title}

    div.
      #{message}
Create a new model using the following command:
> conga create:model my-bundle User --fields id:ObjectID,name:String,email:String
This will create the following file:
// src/my-bundle/lib/model/user.js

/**
 * @Bass:Document(name="User", collection="users")
 */
function User(){};

User.prototype = {

    /**
     * @Bass:Id
     * @Bass:Field(type="ObjectId", name="_id")
     */
    id: null,

    /**
     * @Bass:Field(type="String")
     */
    name: null,

    /**
     * @Bass:Field(type="String")
     */
    email: null

};

module.exports = User;
In order for Conga to locate your new model, you will need to make sure the application is configured to find models in your new bundle. To do this, simply add the path in the config.yml file under the bass->managers->[MANAGER]->documents section:
# app/config/config.yml

bass:

    managers:

        mongodb.default:

            documents:
                my-bundle: my-bundle:model
Using the User model created above, we will create a controller that automatically creates all the REST actions to get/create/update/delete Users in the database.
> conga create:controller my-bundle user --rest User
This creates an empty controller file with the @Rest:Controller annotation:
// src/my-bundle/lib/controller/user.js

/**
 * @Rest:Controller(adapter="conga-bass:rest/adapter", model="User", documentManager="mongodb.default")
 * @Route("/user")
 */
function UserController(){};

module.exports = UserController;
Now after restarting the server, we can start issuing requests to the API:
# create
> curl http://localhost:3000/user -X POST -H "Content-Type: application/json" -d '{"name":"John","email":"john@doe.com"}'

{
  "id": "51f56c1f1085439e1f000001",
  "name": "John",
  "email": "john@doe.com"
}

# get all
> curl http://localhost:3000/user

[
    {
      "id": "51f56c1f1085439e1f000001",
      "name": "John",
      "email": "john@doe.com"
    }
]

# get one
> curl http://localhost:3000/user/51f56c1f1085439e1f000001 -X GET

{
  "id": "51f56c1f1085439e1f000001",
  "name": "John",
  "email": "john@doe.com"
}

# update
> curl http://localhost:3000/user/51f56c1f1085439e1f000001 -X PUT -H "Content-Type: application/json" -d '{"name":"John New","email":"john@doe.com"}'

{
  "id": "51f56c1f1085439e1f000001",
  "name": "John New",
  "email": "john@doe.com"
}

# delete
> curl http://localhost:3000/user/51f56c1f1085439e1f000001 -X DELETE

{
  "success": true
}
Conga.js makes it easy to provide validation of your model objects and is automatically handled in the REST controllers.
First we need to configure the application to look for validation annotations on our models:
# app/config/config.yml

validation:
    paths:
        - my-bundle:model
Now we can add the validation annotations to a model:
// src/my-bundle/lib/model/user.js

/**
 * @Bass:Document(name="User", collection="users")
 */
function User(){};

User.prototype = {

    /**
     * @Bass:Id
     * @Bass:Field(type="ObjectId", name="_id")
     */
    id: null,

    /**
     * @Bass:Field(type="String")
     * @Assert:NotNull
     * @Assert:Length(min=2, max=50)
     */
    name: null,

    /**
     * @Bass:Field(type="String")
     * @Assert:NotNull
     * @Assert:Length(min=2, max=50)
     */
    email: null

};

module.exports = User;
Finally, test out a POST request with invalid data:
> curl http://localhost:3000/user -X POST -H "Content-Type: application/json" -d '{"name":"a"}'

{
  "success": false,
  "errors": [
    {
      "message": "This value must be between 2 and 50 characters long",
      "property": "name"
    },
    {
      "message": "This value should not be null",
      "property": "email"
    }
  ]
}
Conga.js allows you to easily manage your client side javascript dependecies through Bower by using the included conga-bower bundle.
To add a new dependency simply add it to the bower configuration in config.yml:
# app/config/config.yml

bower:

    directory: js/lib

    dependencies:

        jquery: 1.9.0
Now when the server is restarted, jquery will be installed through Bower into the app/public/js/lib directory.
FAQs
MVC framework for node.js
We found that conga demonstrated a not healthy version release cadence and project activity because the last version was released a year ago. It has 1 open source maintainer collaborating on the project.
Did you know?

Socket for GitHub automatically highlights issues in each pull request and monitors the health of all your open source dependencies. Discover the contents of your packages and block harmful activity before you install or update your dependencies.

Product
Socket's Rust support is moving to Beta: all users can scan Cargo projects and generate SBOMs, including Cargo.toml-only crates, with Rust-aware supply chain checks.

Product
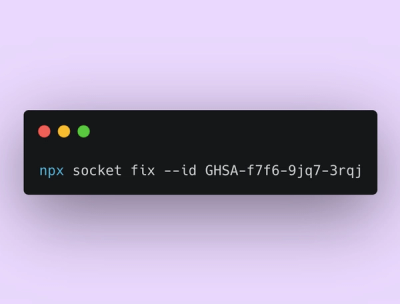
Socket Fix 2.0 brings targeted CVE remediation, smarter upgrade planning, and broader ecosystem support to help developers get to zero alerts.

Security News
Socket CEO Feross Aboukhadijeh joins Risky Business Weekly to unpack recent npm phishing attacks, their limited impact, and the risks if attackers get smarter.