Electron Virtual Keyboard
A themable JQuery virtual keyboard built to use Electron's webContent.sendInputEvent() api which minimizes input field event fighting with other libraries that might require modifying the input fields on the fly.
This project takes inspiration from https://github.com/Mottie/Keyboard
Installation
Through npm
npm install electron-virtual-keyboard
Through yarn
yarn add electron-virtual-keyboard
Run the demo
Through npm:
npm run demo
or through yarn:
yarn demo
Usage
The keyboard requires passing keys to the main process to mimic key input events. Therefore, you must set your main process to handle these requests
Main Process
Somewhere in you main electron process after you have created your window, pass the webContent object to the VirtualKeyboard class
const VirtualKeyboard = require('electron-virtual-keyboard');
let vkb;
function createWindow() {
vkb = new VirtualKeyboard(window.webContents);
}
Render Process
Then on your renderer process you can setup any supported element to use the virtual keyboard as follows:
<html>
<head>
<script>
var jQuery = $ = require('jquery');
require('electron-virtual-keyboard/client')(window, jQuery);
</script>
<link href="node_modules/electron-virtual-keyboard/virtual-keyboard.css" type="text/css" rel="stylesheet"/>
<link href="node_modules/electron-virtual-keyboard/themes/mac.css" rel="stylesheet" />
</head>
<body>
<input type="text" />
<script>
var keyboard = $('input:text').keyboard();
</script>
</body>
</html>
API
The api entry point:
var keyboard = $('input:text').keyboard();
You can pass an object to further customize the keyboard behaviour. See the next section.
The keyboard plugin returns a VirtualKeyboard instance which you can use to trigger your own behaviours on the keyboard. Including sending key press events.
Configuration
var keyboard = $('input:text').keyboard({
});
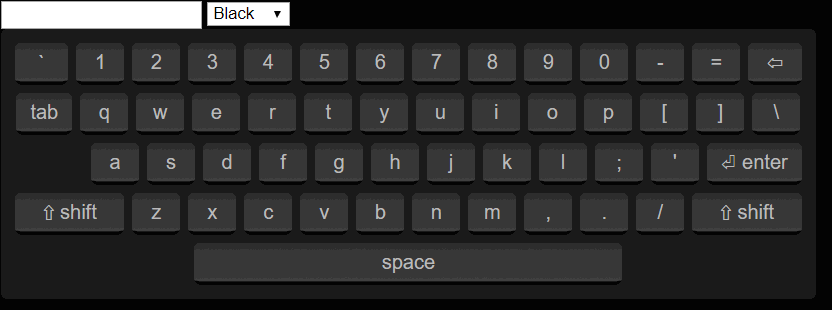
| theme | null | string | A theme class to apply to a keyboard. Available themes are "theme-black", "theme-mac" |
| layout | "us-en" | string | The predefined layout id to use |
| container | null | DomElement, JQueryElement or function($el) | A container to embed the virtual keyboard |
| show | false | bool | When true, displays keyboard after setup |
| displayOnFocus | true | bool | When true, auto displays/hides keyboard when the input field is in or out of focus. |
| autoPosition | true | bool or function($el, $kb) | When true, snaps the keyboard below the input field. If a function is passed, this function will be called to calculate the snap position instead. |
| keyTemplate | <span class="key"></span> | string | The default keyboard key container template to use. |
| customKeys | null | Object | An object defining custom keys to use in your keyouts or redefine existing ones |
show()
Displays the keyboard
hide()
Hides the keyboard
toggleLayout()
Displays the next layout state
showLayout(name)
| name | string | The name identifier of the state to display |
Displays a layout state by name
keyPress(key)
| key | string | The group of character keys to simulate |
Sends a keypress to the electron main process to simulate a key input event.
Customizations
Custom Keys
There are two ways to add custom keys:
- By adding a new key/value entry in
$.fn.keyboard_custom_keys
- by adding a custom_keys object to the keyboard config setup.
For either option the setup is identical:
$.fn.keyboard_custom_keys['^mykey$'] = {
render: function(kb, $key, modifier) {
$key.text('Special Key');
},
handler: function(kb, $key) {
kb.showLayout('special');
}
}
Custom keys are thus tied to keyboard layouts. Notice that the keys on $.fn.keyboard_custom_keys are regular expression patterns.
Keyboard Layouts
There are 4 built in keyboard layouts to use, plus you can setup your own custom layouts.
us-en

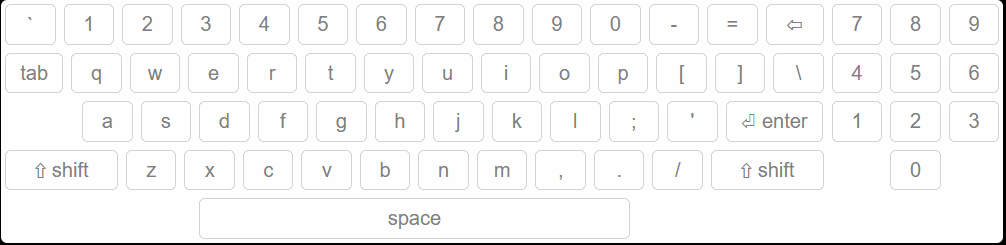
us-en:with-numpad
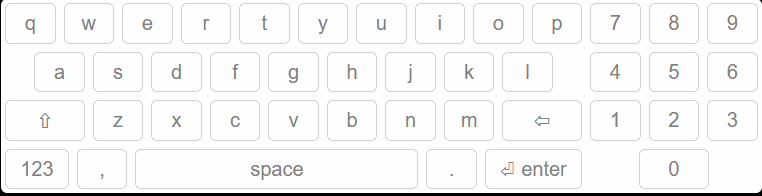
us-en:mobile

us-en:mobile-with-numpad
Custom Layouts
Defining layouts is straight forward, see the following example:
Below is a copy/paste of the us-en keyboard layout defined as a one use layout:
var keyboard = $('input:text').keyboard({
    layout: {
        'normal': [
            '` 1 2 3 4 5 6 7 8 9 0 - = {backspace:*}',
            ['{tab} q w e r t y u i o p [ ] \\', '7 8 9'],
            ['{sp:2} a s d f g h j k l ; \' {enter}', '4 5 6'],
            ['{shift:*} z x c v b n m , . / {shift:*}', '1 2 3'],
            ['{space}', '0']
        ],
        'shift': [
            '~ ! @ # $ % ^ & * ( ) _ + {backspace:*}',
            ['{tab} Q W E R T Y U I O P { } |', '7 8 9'],
            ['{sp:2} A S D F G H J K L : " {enter}', '4 5 6'],
            ['{shift:*} Z X C V B N M < > ? {shift:*}', '1 2 3'],
            ['{space}', '0']
    }
})
You can also define reusable layouts this way:
$.fn.keyboard_layouts['en-us:with-numpad'] = {
    'normal': [
        '` 1 2 3 4 5 6 7 8 9 0 - = {backspace:*}',
        ['{tab} q w e r t y u i o p [ ] \\', '7 8 9'],
        ['{sp:2} a s d f g h j k l ; \' {enter}', '4 5 6'],
        ['{shift:*} z x c v b n m , . / {shift:*}', '1 2 3'],
        ['{space}', '0']
    ],
    'shift': [
        '~ ! @ # $ % ^ & * ( ) _ + {backspace:*}',
        ['{tab} Q W E R T Y U I O P { } |', '7 8 9'],
        ['{sp:2} A S D F G H J K L : " {enter}', '4 5 6'],
        ['{shift:*} Z X C V B N M < > ? {shift:*}', '1 2 3'],
        ['{space}', '0']
}

var keyboard = $('input:text')
        .keyboard({ layout: 'en-us:with-numpad'});
Here is how layouts work:
- A layout object can contain multiple key/value pairs to define keyboard layouts used to swap display states.
- Layout objects require at least one layout key "normal" which is the default layout displayed.
- Custom key behaviours can be setup with squigly identifiers {custom-key}
- Each key row may be a string or an array of strings. If using the array version, the keyboard turn them into columns to group keys horizontally.
- Custom keys can be defined in
$.fn.keyboard_custom_keys


