Product
Introducing Socket Firewall: Free, Proactive Protection for Your Software Supply Chain
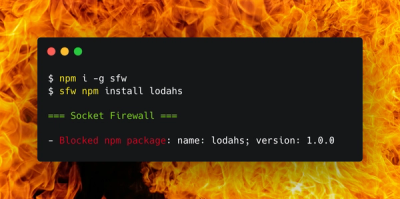
Socket Firewall is a free tool that blocks malicious packages at install time, giving developers proactive protection against rising supply chain attacks.
goldnet-fe-tools
Advanced tools
Usage: 前端开发工具箱 [options] [command]
jQuery 技术栈 前端开发工具箱
Options:
-V, --version output the version number
-h, --help display help for command
Commands:
init 初始化配置文件
minwatch 监听压缩文件
minbuild 一次性压缩文件
clean 清理 sourcemap 文件
del 删除未被 Git 跟踪的新文件
package 打包 package-source 目录里的文件
fixpath [options] 批量修复项目引入的js路径地址
create [options] 创建新项目
help [command] display help for command
push 提交并推送代码到目标分支
tags 创建和推送 git tag
1: npm install goldnet-fe-tools concurrently -D
2: 在 package.js 的 scripts 节点下添加如下执行入口
  "tools:init": "goldnet-fe-tools init",
  "tools:minwatch": "goldnet-fe-tools minwatch",
  "tools:clean": "goldnet-fe-tools clean",
  "tools:del": "goldnet-fe-tools del",
  "tools:minbuild": "goldnet-fe-tools minbuild",
  "tools:fixpath": "goldnet-fe-tools fixpath"
3: 执行 npm run tools:init 初始化配置文件
4: 执行 npm run tools:fixpath 批量修复引入路径地址
5: 调整 脚本入口
1: 通过 concurrently 把 tools:minwatch 命令集成到 dev
"dev": "concurrently \"egg-bin dev\" \"npm run tools:minwatch\"",
2: 把 npm run tools:minbuild 和 serve 入口接合,保构建期,合并代码 100% 被压缩
"serve": "npm run tools:minbuild && cross-var egg-scripts start --env=$npm_config_region-$npm_config_env --port 8080",
6: npm run dev 开始开发
1: npm install goldnet-fe-tools -D
2: 在 package.js 的 scripts 节点下添加如下执行入口
  "push": "goldnet-fe-tools push"
  "tags": "goldnet-fe-tools tags"
3: 执行 npm run push [target-branch] (备注必填、目标分支选填默认为test_merge)
例1: npm run push 'feat: 开发xxx功能'(提交并推送代码到test_merge分支)
例2: npm run push 'feat: 开发xxx功能' dev(提交并推送代码到dev分支)
4: 执行 npm run tags [target-branch] [commit-message] (传入一个参数默认为备注、传入两个参数时, 第一个为分支名、第二个为备注) 例1: npm run tags 'xxx功能'、(基于当前分支打一个备注为 xxx功能 的tag) 例2: npm run push feature-xxxx xxx功能(基于feature-xxxx分支打一个备注为 xxx功能的tag)
1: 运营端使用方式
// main.js
import { routerHandler } from 'goldnet-fe-tools'
function render(props = {}) {
  // render路由挂载前将项目的router对象、和sysCode项目标识传入
  const path =  routerHandler(router, 'cydd_yy')
  console.error(path);

  instance = new Vue({
    router,
    store,
    render: (h) => h(App)
  }).$mount('#app')
}
2: 企业端使用方式: 两种,任选其一,选择标准(路由是否自动匹配目录结构 | 静态路由表)
// router.js
const { routerHandler } = require('goldnet-fe-tools');
module.exports = app => {
  const { router, controller } = app;
  router.get('/cyorder/login/hxoldlogin', controller.login.index);

  app.ready(() => {
    // 方式1:路由全部在路由表内 系统:【航信,保函,保理,。。。】
    // 传入路由对象
    const data = router.stack.map(item => item.path);
    const path = routerHandler(data, 'CyOrderClient');
    console.log(path);

    // 方式2:路由动态匹配,系统:【新供票,国内信用证,科创E融】
    var { routesGetter, routerHandler } = require('goldnet-fe-tools')
    const data = routesGetter('./app/view') // 动态路由匹配的根目录
    const path = routerHandler(data, 'CyOrderClient');
    console.log(path);
  });
};

系统码如下:

运营端
航信 : hx_yy
订单贷管理 : orderLoan_yy
票据管理 : pj_yy
平台管理 : user_center
风控中心 : fkzx_yy
中标贷 : zbd_yy
电子账户 : dzzh_yy
保理融资 : blrz_yy
保函 : bh_yy
产业E融 : cydd_yy
国内信用证 : CREDITPACTUI
科创E融 : STIF_YY
供票系统 : 111

企业端
首页 : SouYe
航信 : hx_qy
票据融资 : pj_qy
保理融资 : FactoringClient
订单融资 : orderLoan_qy
订单E融 : CyOrderClient
国内信用证 : CREDITPACT
科创E融 : STIF
保函 : GuaranteeClient
ABS : ABSClient
供应链票据 : SCF
中标贷 : zbd
电子账户企业端 : dzzh_qy
绿色金融 : lsjr_qy
租户贷 : tl_qy

金融机构端
jrjg
FAQs
goldnet-fe-tools
We found that goldnet-fe-tools demonstrated a healthy version release cadence and project activity because the last version was released less than a year ago. It has 0 open source maintainers collaborating on the project.
Did you know?

Socket for GitHub automatically highlights issues in each pull request and monitors the health of all your open source dependencies. Discover the contents of your packages and block harmful activity before you install or update your dependencies.

Product
Socket Firewall is a free tool that blocks malicious packages at install time, giving developers proactive protection against rising supply chain attacks.

Research
Socket uncovers malicious Rust crates impersonating fast_log to steal Solana and Ethereum wallet keys from source code.

Research
A malicious package uses a QR code as steganography in an innovative technique.