Research
/Security News
Critical Vulnerability in NestJS Devtools: Localhost RCE via Sandbox Escape
A flawed sandbox in @nestjs/devtools-integration lets attackers run code on your machine via CSRF, leading to full Remote Code Execution (RCE).
The httpntlm npm package is used to perform HTTP NTLM (NT LAN Manager) authentication. This is particularly useful for interacting with services that require NTLM authentication, such as certain Microsoft services and APIs.
NTLM Authentication
This feature allows you to perform a GET request with NTLM authentication. You need to provide the URL, username, password, workstation, and domain.
const httpntlm = require('httpntlm');
httpntlm.get({
url: 'https://example.com/api',
username: 'yourUsername',
password: 'yourPassword',
workstation: 'yourWorkstation',
domain: 'yourDomain'
}, function (err, res) {
if (err) return console.log(err);
console.log(res.headers);
console.log(res.body);
});POST Request with NTLM Authentication
This feature allows you to perform a POST request with NTLM authentication. You need to provide the URL, username, password, workstation, domain, request body, and headers.
const httpntlm = require('httpntlm');

httpntlm.post({
    url: 'https://example.com/api',
    username: 'yourUsername',
    password: 'yourPassword',
    workstation: 'yourWorkstation',
    domain: 'yourDomain',
    body: '<xml>yourData</xml>',
    headers: {
        'Content-Type': 'application/xml'
    }
}, function (err, res) {
    if (err) return console.log(err);
    console.log(res.headers);
    console.log(res.body);
});The axios-ntlm package is an NTLM authentication interceptor for the popular axios HTTP client. It provides similar functionality to httpntlm but integrates with axios, allowing you to use axios' features and syntax while adding NTLM support.
The node-http-ntlm package is another library for NTLM authentication in Node.js. It offers similar capabilities to httpntlm but with a different API design. It is also actively maintained and provides comprehensive documentation.
The request-ntlm package is an NTLM authentication extension for the request library. It allows you to perform NTLM authenticated requests using the request library's API. This package is useful if you are already using request and need to add NTLM support.
httpntlm is a Node.js library to do HTTP NTLM authentication
It's a port from the Python libary python-ntml with added NTLMv2 support.
If you've benefited from this module in any way, please consider donating!
Donations:
| Name | amount | when |
|---|---|---|
| Tina Lacey | $ 20 | June 2018 |
Last update: March 2023
Thank you for your support!
You can install httpntlm using the Node Package Manager (npm):
npm install httpntlm
var httpntlm = require('httpntlm');

httpntlm.get({
  url: "https://someurl.com",
  username: 'm$',
  password: 'stinks',
  workstation: 'choose.something',
  domain: ''
}, function (err, res){
  if(err) return console.log(err);

  console.log(res.headers);
  console.log(res.body);
});
url: {String} URL to connect. (Required)username: {String} Username (optional, default: '')password: {String} Password (optional, default: '')workstation: {String} Name of workstation (optional, default: '')domain: {String} Name of domain (optional, default: '')agent: {Agent} In case you want to reuse the keepaliveAgent over different calls (optional)headers: {Object} Add in custom headers. The following headers are used by NTLM and cannot be passed: Connection, Authorization (optional)if you already got the encrypted password,you should use this two param to replace the 'password' param.
lm_password {Buffer} encrypted lm password.(Required)nt_password {Buffer} encrypted nt password. (Required)You can also pass along all other options of httpreq, including custom headers, cookies, body data, ... and use POST, PUT or DELETE instead of GET.
When NTLMv2 extended security and target information can be negotiated with the server, this library assumes the server supports NTLMv2 and creates responses according to the NTLMv2 specification (the actually supported NTLM version cannot be negotiated). Otherwise, NTLMv1 or NTLMv1 with NTLMv2 extended security will be used.
var httpntlm = require('httpntlm');
var ntlm = httpntlm.ntlm;
var lm = ntlm.create_LM_hashed_password('Azx123456');
var nt = ntlm.create_NT_hashed_password('Azx123456');


httpntlm.get({
  url: "https://someurl.com",
  username: 'm$',
  lm_password: lm,
  nt_password: nt,
  workstation: 'choose.something',
  domain: ''
}, function (err, res){
  if(err) return console.log(err);

  console.log(res.headers);
  console.log(res.body);
});
If you want to use the NTLM-functions yourself, you can access the ntlm-library like this (https example):
var ntlm = require('httpntlm').ntlm;
var async = require('async');
var httpreq = require('httpreq');
var HttpsAgent = require('agentkeepalive').HttpsAgent;
var keepaliveAgent = new HttpsAgent();

var options = {
  url: "https://someurl.com",
  username: 'm$',
  password: 'stinks',
  workstation: 'choose.something',
  domain: ''
};

async.waterfall([
  function (callback){
    var type1msg = ntlm.createType1Message(options);

    httpreq.get(options.url, {
      headers:{
        'Connection' : 'keep-alive',
        'Authorization': type1msg
      },
      agent: keepaliveAgent
    }, callback);
  },

  function (res, callback){
    if(!res.headers['www-authenticate'])
      return callback(new Error('www-authenticate not found on response of second request'));

    var type2msg = ntlm.parseType2Message(res.headers['www-authenticate']);
    var type3msg = ntlm.createType3Message(type2msg, options);

    setImmediate(function() {
      httpreq.get(options.url, {
        headers:{
          'Connection' : 'Close',
          'Authorization': type3msg
        },
        allowRedirects: false,
        agent: keepaliveAgent
      }, callback);
    });
  }
], function (err, res) {
  if(err) return console.log(err);

  console.log(res.headers);
  console.log(res.body);
});
httpntlm.get({
  url: "https://someurl.com/file.xls",
  username: 'm$',
  password: 'stinks',
  workstation: 'choose.something',
  domain: '',
  binary: true
}, function (err, response) {
  if(err) return console.log(err);
  fs.writeFile("file.xls", response.body, function (err) {
    if(err) return console.log("error writing file");
    console.log("file.xls saved!");
  });
});
httpntlm.get({
  url: "http://localhost:3000",
  username: 'm$',
  password: 'stinks',
  workstation: 'choose.something',
  domain: 'somedomain',
  headers: {
    'User-Agent': 'my-useragent'
  }
}, function (err, res){
  if(err) return console.log(err);

  console.log(res.headers);
  console.log(res.body);
});
You can find more examples on Snyk.
Running tests in an open source package is crucial for ensuring the quality and reliability of the codebase. When you submit code changes, it's essential to ensure that these changes don't break existing functionality or introduce new bugs.
Tests are written with Mocha.
To run tests, simply run:
npm test
Note that the integration tests start up a simple express.js server with NTLM support. You might see some extra debugging info from that server when running integration tests.
Copyright (c) Sam Decrock https://github.com/SamDecrock/
Permission is hereby granted, free of charge, to any person obtaining a copy of this software and associated documentation files (the "Software"), to deal in the Software without restriction, including without limitation the rights to use, copy, modify, merge, publish, distribute, sublicense, and/or sell copies of the Software, and to permit persons to whom the Software is furnished to do so, subject to the following conditions:
The above copyright notice and this permission notice shall be included in all copies or substantial portions of the Software.
THE SOFTWARE IS PROVIDED "AS IS", WITHOUT WARRANTY OF ANY KIND, EXPRESS OR IMPLIED, INCLUDING BUT NOT LIMITED TO THE WARRANTIES OF MERCHANTABILITY, FITNESS FOR A PARTICULAR PURPOSE AND NONINFRINGEMENT. IN NO EVENT SHALL THE AUTHORS OR COPYRIGHT HOLDERS BE LIABLE FOR ANY CLAIM, DAMAGES OR OTHER LIABILITY, WHETHER IN AN ACTION OF CONTRACT, TORT OR OTHERWISE, ARISING FROM, OUT OF OR IN CONNECTION WITH THE SOFTWARE OR THE USE OR OTHER DEALINGS IN THE SOFTWARE.
FAQs
httpntlm is a Node.js library to do HTTP NTLM authentication
The npm package httpntlm receives a total of 893,678 weekly downloads. As such, httpntlm popularity was classified as popular.
We found that httpntlm demonstrated a not healthy version release cadence and project activity because the last version was released a year ago. It has 1 open source maintainer collaborating on the project.
Did you know?

Socket for GitHub automatically highlights issues in each pull request and monitors the health of all your open source dependencies. Discover the contents of your packages and block harmful activity before you install or update your dependencies.

Research
/Security News
A flawed sandbox in @nestjs/devtools-integration lets attackers run code on your machine via CSRF, leading to full Remote Code Execution (RCE).

Product
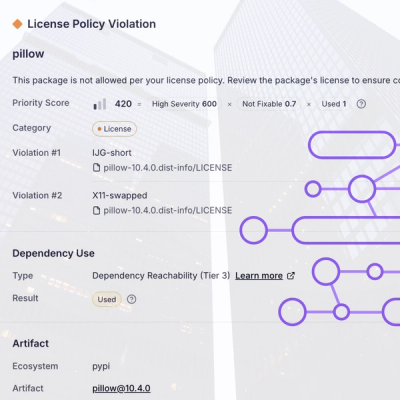
Customize license detection with Socket’s new license overlays: gain control, reduce noise, and handle edge cases with precision.

Product
Socket now supports Rust and Cargo, offering package search for all users and experimental SBOM generation for enterprise projects.