image-augment
Augment images (geometric, noise, ...) for visual machine learning data augmentation.
This library has been freely inspired from imgaug
This library is intend to work
- with hasard for randomness
- with 2 different backends :
Installation
npm install image-augment
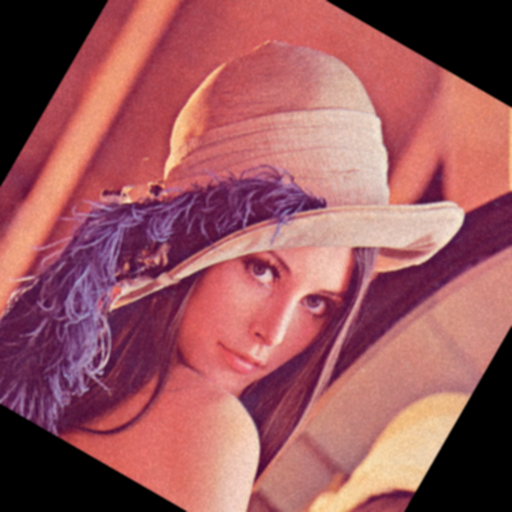
Simple example
const tf = require('@tensorflow/tfjs-node');
const ia = require('image-augment')(tf);
const basicAugmentation = ia.sequential([
ia.additiveNoise(15),
ia.affine({rotate: 30}),
ia.blur(3)
]);
fileToTensor('test/data/tfjs/lenna.png')
.then(({images}) => {
return basicAugmentation.read({images});
})
.then(({images}) => {
return tensorToFile('test/data/tfjs/lenna-example.png', {images});
})
.then(() => {
console.log('done');
});
Output is :
Grid example with opencv4nodejs
const h = require('hasard');
const cv = require('opencv4nodejs');
const ia = require('image-augment')(cv);
const sometimes = (aug => h.value([aug, ia.identity()]));
const seq = ia.sequential({
steps: [
ia.fliplr(0.5),
ia.flipud(0.5),
ia.pad({
percent: h.array({size: 2, value: h.number(0, 0.1)}),
borderType: ia.RD_BORDER_TYPE,
borderValue: h.integer(0, 255)
}),
sometimes(ia.crop({
percent: h.array({size: 2, value: h.number(0, 0.1)})
})),
sometimes(ia.affine({
scale: h.array([h.number(0.6, 1.2), h.number(0.6, 1.2)]),
translatePercent: h.array([h.number(-0.2, 0.2), h.number(-0.2, 0.2)]),
rotate: h.number(-45, 45),
shear: h.number(-16, 16),
borderValue: h.array({value: h.integer(0, 255), size: 4}),
borderType: ia.RD_BORDER_TYPE
}))
],
randomOrder: true
});
const image = cv.imread('test/data/opencv4nodejs/lenna.png');
seq.toGrid({images: [image, image, image, image, image, image, image, image]}, {
filename: 'test/data/opencv4nodejs/lenna-grid.png',
imageShape: [300, 300],
gridShape: [4, 2]
});
Output :

Grid Example with tensorflowjs
const h = require('hasard');
const tf = require('@tensorflow/tfjs-node');
const ia = require('image-augment')(tf);
const sometimes = (aug => h.value([aug, ia.identity()]));
const seq = ia.sequential({
steps: [
ia.fliplr(0.5),
ia.flipud(0.5),
ia.pad({
percent: h.array({size: 2, value: h.number(0, 0.1)}),
borderType: ia.RD_BORDER_TYPE,
borderValue: h.integer(0, 255)
}),
sometimes(ia.crop({
percent: h.array({size: 2, value: h.number(0, 0.1)})
})),
sometimes(ia.affine({
scale: h.array([h.number(0.6, 1.2), h.number(0.6, 1.2)]),
translatePercent: h.array([h.number(-0.2, 0.2), h.number(-0.2, 0.2)]),
rotate: h.number(-45, 45),
shear: h.number(-16, 16),
borderValue: h.array({value: h.integer(0, 255), size: 4}),
borderType: ia.RD_BORDER_TYPE
}))
],
randomOrder: true
});
const filenames = new Array(8).fill('test/data/opencv4nodejs/lenna.png');
filesToImages(filenames, seq.backend).then(images => {
seq.toGrid({images}, {
filename: 'test/data/tfjs/lenna-grid.png',
imageShape: [300, 300],
gridShape: [4, 2]
});
})
Output :

API documentation
See documentation
Discussion
Opencv4nodejs vs Tensorflowjs
Both librairies have advantages, this is what you need to know
Why opencv4nodejs :
- easier to manipulate files in node.js (cv.imread ...)
- Using different image sizes with no impact on performance
Why tensorflowjs :
- Browser support
- integrate with DL training
- Fast Noise image generation (truncatedNormal)
See benchmark for more info about performance
Todo list
Help appreciated, please open an issue if you have any question.