Research
Malicious fezbox npm Package Steals Browser Passwords from Cookies via Innovative QR Code Steganographic Technique
A malicious package uses a QR code as steganography in an innovative technique.
jspsych-vue
Advanced tools
A Vue component for JsPsych, compatible with most official plugins and extensions.
Easily integrate third-party components into JsPsych experiments.
Demo: https://hggshiwo.github.io/jspsych-vue/
Install via Yarn:
yarn add jspsych-vue
Or via npm:
npm install jspsych-vue
Note: Ensure jspsych (v7) is also installed in your project. You can use npm or a CDN. See the official tutorial for details.
Using a CDN is recommended. Add the required CSS files to your project:
import './assets/main.css'
import 'jspsych-vue/dist/style.css'
import 'jspsych/css/jspsych.css' // Skip this line if using a CDN.

import { createApp } from 'vue'
import App from './App.vue'

createApp(App).mount('#app')
Pass options to initialize the jsPsych instance. For npm users, pass the module prop as well:
<script lang="ts" setup>
  import * as jsPsychModule from 'jspsych'; // For npm users
  const options = { ... }; // Experiment options
</script>

<template>
  <JsPsych :options="options"></JsPsych>
  <!-- For npm users -->
  <JsPsych :options="options" :module="jsPsychModule"></JsPsych>
</template>
That's it!
JsPsych plugins define experiment logic, interfaces, and data handling. However, they limit UI flexibility as everything is rendered in JavaScript. With JsPsych-Vue, you can replace plugins with Vue components and freely use third-party UI libraries.
To use a Vue component in JsPsych, ensure:
info object (similar to JsPsych plugins).jsPsych.finishTrial at the appropriate time.Example:
<template>
  <div>Custom UI goes here...</div>
</template>

<script>
  export default {
    info: {
      parameters: { ... } // Same structure as a JsPsych plugin
    },
    setup(props) {
      // Perform experiment logic
      jsPsych.finishTrial(); // Ensure to call this to proceed
    }
  };
</script>
For components using the setup syntax:
<script setup>
  const info = defineOptions({
    parameters: { ... }
  });
</script>
Do not use local variables within info.
Props provided to components include:
trial: Parameters passed when defining the timeline.on_load: Callback for the load event.Refer to the JsPsych documentation for details.
Create a timeline file (e.g., timeline/xxx.js) and replace the type field with component:
Example:
// timeline/HelloWorld.ts
import HelloWorld from '@/component/HelloWorld.vue'

const timeline = [{ component: HelloWorld }]
export default timeline
If a JsPsych instance is required:
// timeline/HelloWorld.ts
import HelloWorld from '@/component/HelloWorld.vue'

const getTimeline = (jsPsych) => [
  {
    component: HelloWorld,
    on_finish: () => {
      // Use the jsPsych instance as needed
    }
  }
]
export default getTimeline
Define the render location and call run to start the experiment.
Example:
<template>
  <JsPsych @init="e => jsPsych = e"></JsPsych>
</template>

<script>
  import timeline1 from '@/timeline/HelloWorld.ts'

  let jsPsych = null

  onMounted(() => {
    jsPsych.run(timeline1)
  })
</script>
While plugins cannot render Vue components directly, you can still use them within the timeline. Nested timelines can mix plugins and components. See nested timelines for details.
Key differences:
Define Trials:
const trial = { type: MyPlugin, parameter1: value1 }
const trial = { component: MyComponent, prop1: value1 }
Logic:
class Plugin {
  trial(display_element, trial, on_load) {
    // Render and handle logic
  }
}
<script>
  export default {
    setup(props) {
      const trial = props.trial
      const on_load = props.on_load
      // Handle logic
    }
  }
</script>
Two methods are available:
Use the init event:
<template>
  <JsPsych @init="init"></JsPsych>
</template>

<script setup>
  let jsPsych
  const init = (instance) => (jsPsych = instance)
</script>
Use Vue's provide:
<script setup>
  import { provide } from 'vue'
  const jsPsych = provide('jsPsych')
</script>
Use slots to display content before or after an experiment.
Example:
<JsPsych>
  <div>Loading...</div>
</JsPsych>
Pass components in the timeline and use them as slots.
Example:
const timeline = [{ component: MyComponent, compSlot: () => MySlot }]
In MyComponent:
<script setup>
  const props = defineProps(['trial'])
  const MySlot = props.trial.compSlot
</script>

<template>
  <div>
    ...
    <MySlot></MySlot>
  </div>
</template>
FAQs
Vue3 component for JsPsych
The npm package jspsych-vue receives a total of 3 weekly downloads. As such, jspsych-vue popularity was classified as not popular.
We found that jspsych-vue demonstrated a healthy version release cadence and project activity because the last version was released less than a year ago. It has 1 open source maintainer collaborating on the project.
Did you know?

Socket for GitHub automatically highlights issues in each pull request and monitors the health of all your open source dependencies. Discover the contents of your packages and block harmful activity before you install or update your dependencies.

Research
A malicious package uses a QR code as steganography in an innovative technique.

Research
/Security News
Socket identified 80 fake candidates targeting engineering roles, including suspected North Korean operators, exposing the new reality of hiring as a security function.

Application Security
/Research
/Security News
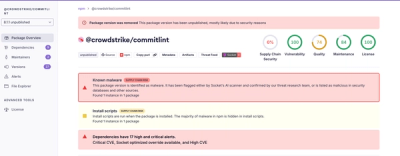
Socket detected multiple compromised CrowdStrike npm packages, continuing the "Shai-Hulud" supply chain attack that has now impacted nearly 500 packages.