Product
Introducing Socket Firewall: Free, Proactive Protection for Your Software Supply Chain
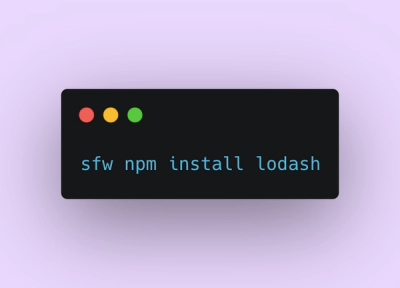
Socket Firewall is a free tool that blocks malicious packages at install time, giving developers proactive protection against rising supply chain attacks.
🤖 Zero-configuration Telegram bot runner
micro-bot was built on top of Telegraf library.
Install from NPM:
$ npm install micro-bot
If you have installed latest yarn or npm you can use create-bot scaffolding tool:
$ npm init bot smart-bot
$ cd smart-bot
Or using yarn:
$ yarn create bot smart-bot
$ cd smart-bot
The following example will answer with important information about everything.
$ mkdir smart-bot
$ cd smart-bot
$ npm init
$ npm install micro-bot --save
Then write your index.js.
module.exports = ({ reply }) => reply('42')
Then in your package.json:
"main": "index.js",
"scripts": {
  "start": "micro-bot"
}
To run the bot, use the micro-bot command:
$ BOT_TOKEN='TOKEN' npm start
or
$ micro-bot -t TOKEN index.js
To run the bot with webhook support, provide webhook domain name:
$ micro-bot -t TOKEN -d yourdomain.tld echo.js
Supported environment variables:
process.env.BOT_TOKEN - Bot tokenprocess.env.BOT_DOMAIN - Webhook domainnowLet's deploy your micro-bot with Realtime global deployments by Zeit.
First, install now
$ npm install now -g
$ now login
Finally use now to deploy:
$ now -e BOT_TOKEN='YOUR BOT TOKEN'
Congratulations, your bot is alive! 🎉
Okay, now we will deploy our micro-bot to Heroku. Why not?!
First, install heroku binaries and login via console.
Then, init new git repo:
$ git init
$ heroku create
Afterwards, update Heroku config:
$ heroku config:set --app YourAppId BOT_TOKEN='YOUR BOT TOKEN'
$ heroku config:set --app YourAppId BOT_DOMAIN='https://YourAppId.herokuapp.com'
Then add Procfile into the root of your project, with one line:
web: micro-bot -p $PORT
Finally use git to deploy:
$ git add index.js package.json
$ git commit -m 'initial commit'
$ git push heroku master
@uncover_bot - Source code@epub2mobi_bot - Source code@gorchichkabot - Source code@aloudbot - Source codeconst { mount, reply } = require('micro-bot')
module.exports = mount('sticker', reply('👍'))
const { readFileSync } = require('fs')
const { Composer } = require('micro-bot')
const bot = new Composer()

bot.start((ctx) => ctx.reply('Welcome'))
bot.help((ctx) => ctx.reply('Help message'))
bot.hears('hi', ({ reply }) => reply('Hello'))
bot.on('sticker', ({ reply }) => reply('👍'))

// Export bot handler
module.exports = bot

// Or you can export hash with handlers and options
module.exports = {
  bot: bot,
  init: (bot) => {
    console.log('Bot initialization hook')
  },
  server: (req, res, next) => {
    console.log('Http request hook')
  },
  options: {
    telegram: {
      agent: new HttpsProxyAgent('proxy url')
    }
  },
  tlsOptions: {
    key:  readFileSync('server-key.pem'),
    cert: readFileSync('server-cert.pem'),
    ca: [
      // This is necessary only if the client uses the self-signed certificate.
      readFileSync('client-cert.pem')
    ]
  }
}
const { Composer, Stage, Scene, session } = require('micro-bot')

// Greeter scene
const greeter = new Scene('greeter')
greeter.enter((ctx) => ctx.reply('Hi'))
greeter.leave((ctx) => ctx.reply('Buy'))
greeter.hears(/hi/gi, (ctx) => ctx.scene.leave())
greeter.on('message', (ctx) => ctx.reply('Send `hi`'))

const stage = new Stage()
stage.register(greeter)

const bot = new Composer()
bot.use(session())
bot.use(stage)
bot.command('greeter', (ctx) => ctx.scene.enter('greeter'))
bot.command('cancel', (ctx) => ctx.scene.leave())
module.exports = bot
micro-bot is highly inspired by Micro
FAQs
Zero-configuration Telegram bot runner
The npm package micro-bot receives a total of 32 weekly downloads. As such, micro-bot popularity was classified as not popular.
We found that micro-bot demonstrated a not healthy version release cadence and project activity because the last version was released a year ago. It has 1 open source maintainer collaborating on the project.
Did you know?

Socket for GitHub automatically highlights issues in each pull request and monitors the health of all your open source dependencies. Discover the contents of your packages and block harmful activity before you install or update your dependencies.

Product
Socket Firewall is a free tool that blocks malicious packages at install time, giving developers proactive protection against rising supply chain attacks.

Research
Socket uncovers malicious Rust crates impersonating fast_log to steal Solana and Ethereum wallet keys from source code.

Research
A malicious package uses a QR code as steganography in an innovative technique.