Research
/Security News
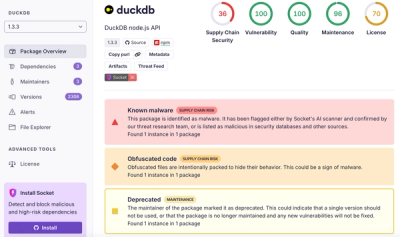
DuckDB npm Account Compromised in Continuing Supply Chain Attack
Ongoing npm supply chain attack spreads to DuckDB: multiple packages compromised with the same wallet-drainer malware.
next-tinacms-azure
Advanced tools
Manage **Microsoft Azure Blob Storage media assets** in TinaCMS.
Manage Microsoft Azure Blob Storage media assets in TinaCMS.
yarn add next-tinacms-azure
npm install next-tinacms-azure
You will need a Microsoft Azure subscription for this plugin. You can get one here. In this subscription you should create at least one resource group within which you should create an Azure Blob Storage account. You can use this storage account's blob storage service to manage your TinaCMS media.
next-tinacms-azure uses environment variables within the context of a Next.js site to properly access your Microsoft Azure blob storage account.
Add the following variables to an .env file.
AZURE_STORAGE_CONNECTION_STRING=<Your Blob Storage Account connection string, obtained from the Azure Portal>
AZURE_STORAGE_CONTAINER_NAME=<The name of the Blob Storage container to host your media>
Now, you can register the Azure Media store with the instance of Tina in your app by passing the TinaCloudAzureMediaStore to the TinaCMS instance via its mediaStore prop.
This is also where we can update our mediaOptions on the cms object.
// Typically in the tina/config.ts file of a Next.js project

import { defineConfig } from "tinacms";

export default defineConfig({
  media: {
    loadCustomStore: async () => {
      const pack = await import("next-tinacms-azure");
      return pack.TinaCloudAzureMediaStore;
    },
  },
  // other configuration options
});

...
This package is built for the new App Router. Set up a catch all API route for media as an API route, e.g. as app/api/azure/[...media]/route.ts.
Call createMediaHandler to set up routes and connect your instance of the Media Store to your Azure Storage account.
Import isAuthorized from next-tinacms-azure.
The authorized key will make it so only authorized users within TinaCloud can upload and make media edits.
// route.ts

import { createMediaHandlers } from 'next-tinacms-azure/dist/handlers'
import { isAuthorized } from 'next-tinacms-azure/dist/auth'

const handlers = createMediaHandlers({
  connectionString: process.env.AZURE_STORAGE_CONNECTION_STRING!,
  containerName: process.env.AZURE_STORAGE_CONTAINER_NAME!,
  authorized: async (req) => {
    try {
      if (process.env.NODE_ENV == 'development') {
        return true
      }

      const user = await isAuthorized(req)

      return user?.verified || false
    } catch (e) {
      console.error(e)
      return false
    }
  },
})

const { GET, POST, DELETE } = handlers

export { GET, POST, DELETE }
Media links are stored as relative URLs under /media/. For example, if a blob's actual URL is:
https://accountname.blob.core.windows.net/containername/folder1/folder2/filename.jpg
The URL registered with TinaCMS will be:
/media/folder1/folder2/filename.jpg
To fetch the actual blob from Azure Storage, an API route responding to this URL will be required.
To simplify this process, you can use the createMediaDeliveryHandlers function from the next-tinacms-azure/dist/delivery-handlers package. Set up a catch-all API route (e.g., app/api/media/[...path]/route.ts) and use the following code:
// route.ts

import { createMediaDeliveryHandlers } from 'next-tinacms-azure/dist/delivery-handlers'

const handlers = createMediaDeliveryHandlers({
  connectionString: process.env.AZURE_STORAGE_CONNECTION_STRING!,
  containerName: process.env.AZURE_STORAGE_CONTAINER_NAME!,
  authorized: async () => {
    return true
  },
})

const { GET } = handlers

export { GET }
The above route will handle all requests to /api/media/xxxx/yyyy.zzz. To map it to /media/xxxx/yyyy.zzz we need to add a rewrite to the project's next.config.mjs file like so:
const nextConfig = {
  // other config here
  async rewrites() {
    return [
      {
        source: '/media/:path*',
        destination: '/api/media/:path*',
      },
      // more rewrites here
    ]
  },
}
Note that the provided handler has built in support for image resizing and optimization according to the Next.js next/image loader directives, using the Sharp package.
Now that the media store is registered and the API route for media set up, let's add an image to your schema.
In your tina/config.ts add a new field for the image, e.g:
 {
  name: 'hero',
  type: 'image',
  label: 'Hero Image',
 }
Now, when editing your site, the image field will allow you to connect to your Azure Blob Storage account via the Media Store to manage your media assets.
FAQs
Manage **Microsoft Azure Blob Storage media assets** in TinaCMS.
The npm package next-tinacms-azure receives a total of 568 weekly downloads. As such, next-tinacms-azure popularity was classified as not popular.
We found that next-tinacms-azure demonstrated a healthy version release cadence and project activity because the last version was released less than a year ago. It has 1 open source maintainer collaborating on the project.
Did you know?

Socket for GitHub automatically highlights issues in each pull request and monitors the health of all your open source dependencies. Discover the contents of your packages and block harmful activity before you install or update your dependencies.

Research
/Security News
Ongoing npm supply chain attack spreads to DuckDB: multiple packages compromised with the same wallet-drainer malware.

Security News
The MCP Steering Committee has launched the official MCP Registry in preview, a central hub for discovering and publishing MCP servers.

Product
Socket’s new Pull Request Stories give security teams clear visibility into dependency risks and outcomes across scanned pull requests.