
Research
Malicious fezbox npm Package Steals Browser Passwords from Cookies via Innovative QR Code Steganographic Technique
A malicious package uses a QR code as steganography in an innovative technique.
node-red-contrib-blockly
Advanced tools
A Node Red node for visual programming a function using Blockly
A Node Red node that offers a visual programming interface, to make programming a function node easier. Just drag and drop blocks to build your program logic, without having to write the Javascript code yourself. By building your code in a visual way, you don't have to learn the Javascript syntax, which makes programming very difficult for beginners.
Moreover the generated Javascript code can be displayed, so you can learn Javascript coding step by step...
Thanks to lots of people, for their assistance during the development of this node:
Run the following npm command in your Node-RED user directory (typically ~/.node-red):
npm install node-red-contrib-blockly
Please buy my wife a coffee to keep her happy, while I am busy developing Node-RED stuff for you ...
The performance of this node is identical to the standard Function-node!
Indeed the Javascript code will be generated once, when the content of the Blockly workspace has been edited. From then on that generated code will run on the Node-RED server side, using exactly the "same" sandbox mechanism as used by the Function-node.
When implementing your custom logic into a Node-Red flow, sometimes the available nodes won't be sufficient. In those cases the standard function node can be used, to implement your logic by entering custom Javascript coding. However to avoid having to write Javascript code yourself, you can draw your logic by dragging and dropping blocks into the Blockly editor.
As soon as the the Node-Red flow is deployed, the generated Javascript code will run on the Node-Red flow (similar to a standard function node):
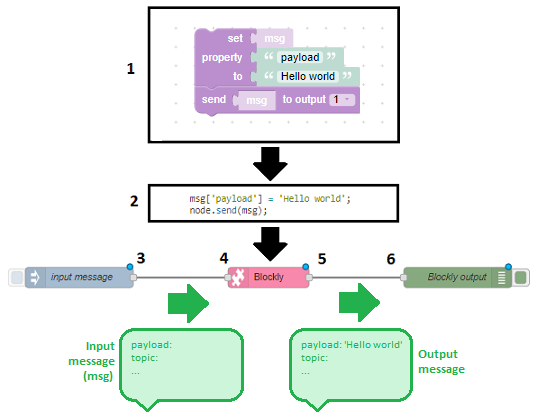
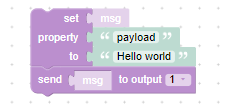
As soon as an input message arrives, we will set the 'payload' property of that input message to 'Hello world'. And afterwards that updated input message will be send to the output port:
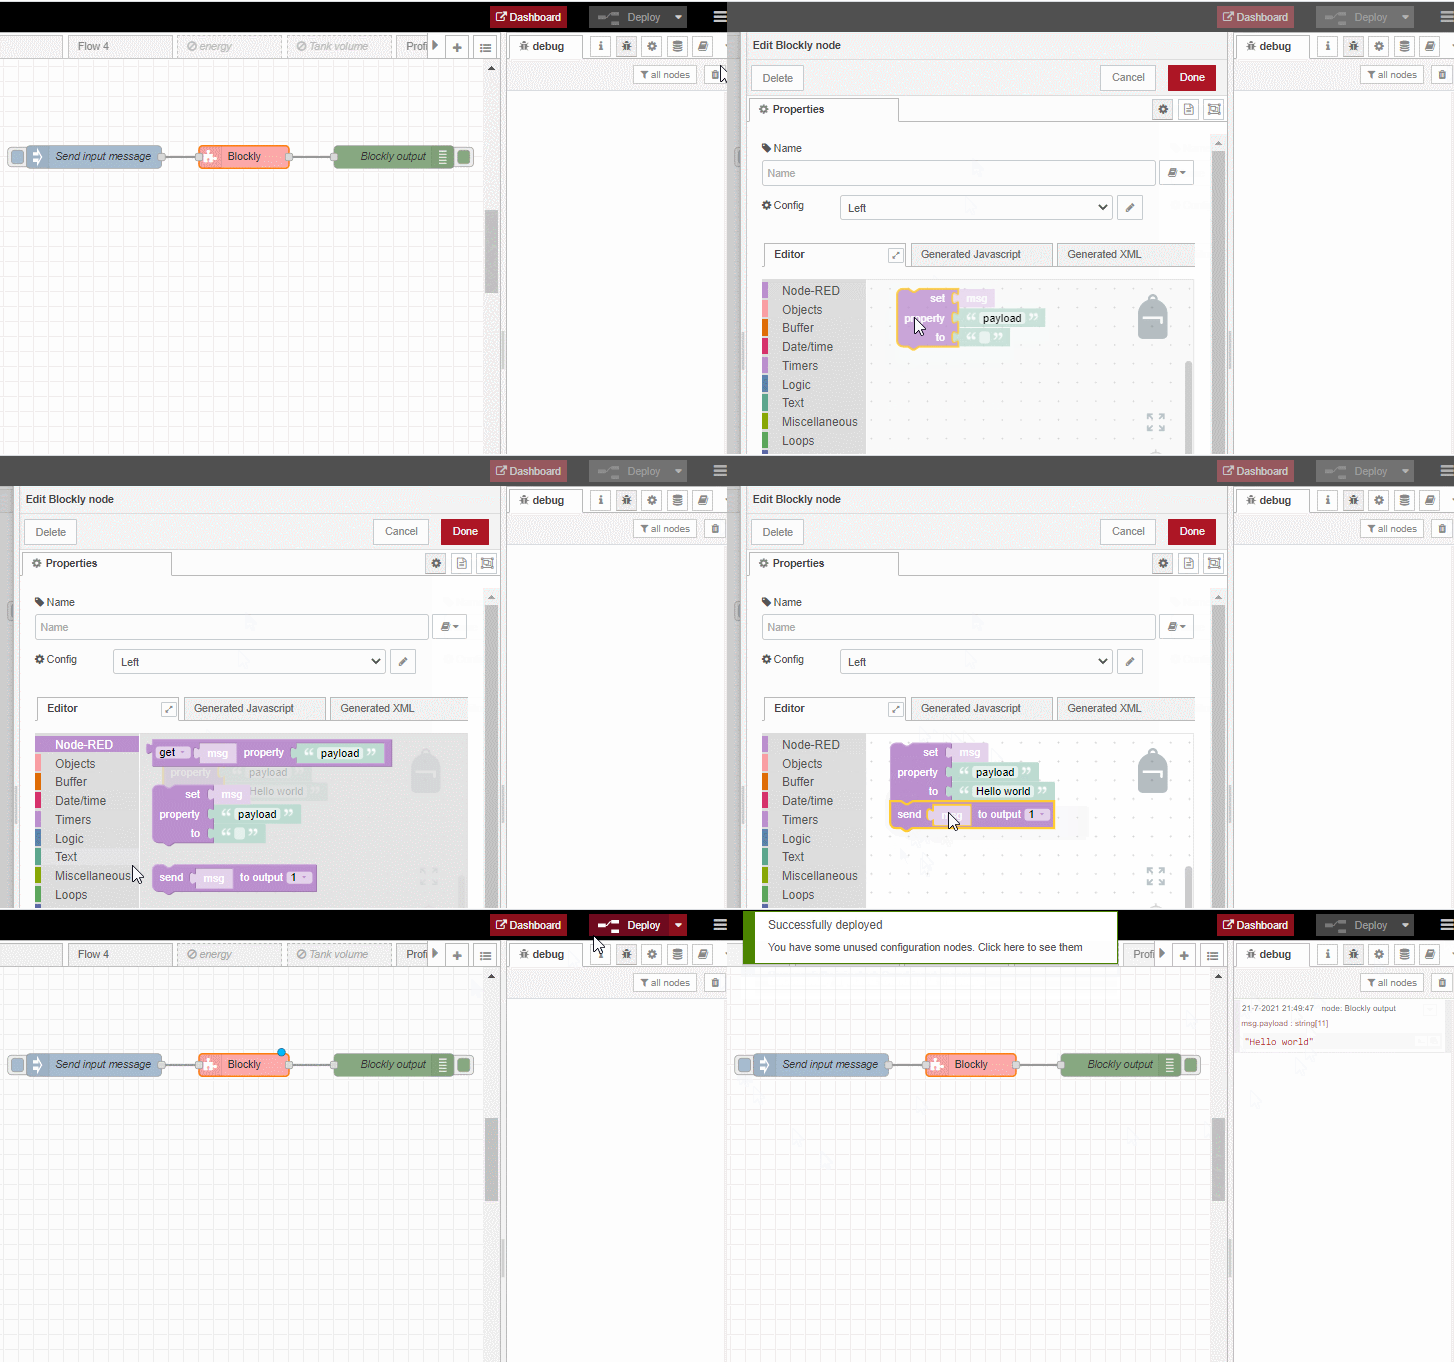
The following animation shows how this example flow can be constructed using the Blockly node:
Lots of other examples can be found in the wiki pages ...
Blockly is a visual block programming language (and editor), maintained by Google. A lot of documentation (tutorials, videos, ...) can be found on the internet, but here are some bascis to get you started:
A block can have a value input at the right side. Or a value output at the left side. Or both:

A statement is created by connecting value inputs and value outputs together horizontally, to pass data from the outputs to the inputs:

In this example the Node-Red input message is cloned, and then the cloned message is send to output 1 of your Blockly node. This means you have to read the chain of blocks from the right to the left ...
Caution: the data type requested by a value input should be equal to the data type offered by the value output. Otherwise you cannot connect the value output to the value input!
A value input can be inline or external:

For an inline value input, the next block will be inside the previous block. For an external value input, the next block will be after the previous block:

When right-clicking on top of a block, a context menu appears where you can switch between inline and external inputs.
A block input can be connected automatically to a shadow block:
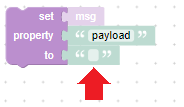
A shadow block is like a default value for that input, which is automatically attached to it (already in the toolbox). You cannot delete the shadow block, but you can drop another block on top of it. In that case the shadow block will be ignored an the new block will be used as input value.
A block can have properties to change the behaviour of the block:
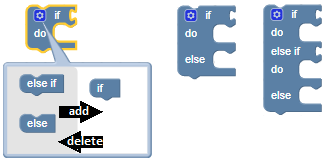
A block can have a statement input at the top side. Or a statement output at the bottom side. Or both:

Remark: a block can have multiple inputs.
A program (or statement stack) is created by connecting statement inputs and statement outputs together vertically, to specify the order in which the statements needs to be executed:
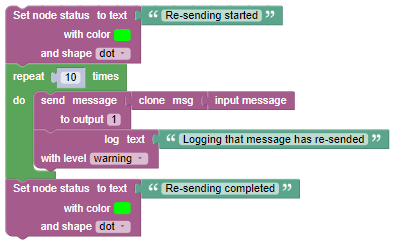
In this example we start by showing a green node status "Re-sending started". Afterwards the input message is cloned 10 times and sended to the output port, and every time a log is written to the console "Logging that the message has been resended". And we end by showing a green node status "Re-sending completed". This means you have to read the blocks from the top to the bottom ...
!!! CAUTION !!! Blockly always starts counting from 1, while Javascript starts counting from 0! This might be confusing for users that are already familiar with programming in Javascript...
The node's config screen consists out of a series of elements:
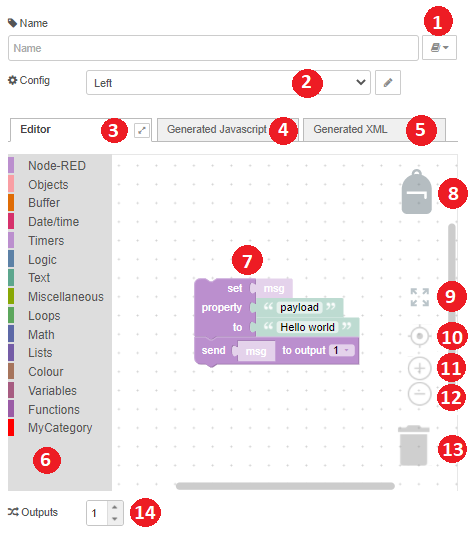
When writing Javascript code in a standard function node, some Node-Red functionality can be called from within that code (see function node API). To offer the same functionality in the Blockly editor, a series of extra blocks have been added. These blocks are availble in the 'Node-Red' category in the toolbox:

The Blocky workspace can be configured via the settings in the selected config node:
These settings will be applied to every Blockly node where this config node has been selected:
Specify whether a trash can icon needs to be displayed in the workspace.
Specify whether comments can be added to blocks in the workspace.
Specify whether the 4 zoom icons needs to to be displayed in the workspace.
Specify whether a mini map needs to be displayed in the expanded (i.e. full screen) workspace:
Specify whether a backpack icon needs to be be displayed in the workspace.
Customize the toolbox categories to fit your needs. CAUTION: this is only for advanced users and need to be done with care!! When this checkbox is activated, the "Categories" tabsheet will become enabled. See wiki.
Specify the language that needs to be used in the blocks in the workspace.
Specify the location of the toolbox, relative to the workspace.
Specify the renderer, which determines how the blocks need to be drawn.
Specify the theme, which determines the look and feel of Blockly (block colours, category colours, ...)
When you need a change in this node, you can create a new Github issue. A couple of remarks about this:
Google has already provided translations for all their basic blocks. However for our own blocks, there are currently only translations available in a few languages. If you want to translate the blocks in your own language, please follow these steps:
Thanks in advance !
FAQs
A Node Red node for visual programming a function using Blockly
We found that node-red-contrib-blockly demonstrated a not healthy version release cadence and project activity because the last version was released a year ago. It has 1 open source maintainer collaborating on the project.
Did you know?

Socket for GitHub automatically highlights issues in each pull request and monitors the health of all your open source dependencies. Discover the contents of your packages and block harmful activity before you install or update your dependencies.

Research
A malicious package uses a QR code as steganography in an innovative technique.

Research
/Security News
Socket identified 80 fake candidates targeting engineering roles, including suspected North Korean operators, exposing the new reality of hiring as a security function.
Application Security
/Research
/Security News
Socket detected multiple compromised CrowdStrike npm packages, continuing the "Shai-Hulud" supply chain attack that has now impacted nearly 500 packages.