Product
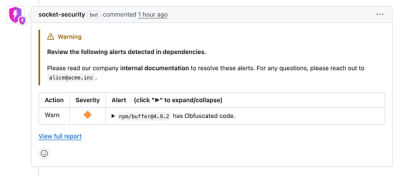
Introducing Custom Pull Request Alert Comment Headers
Socket now lets you customize pull request alert headers, helping security teams share clear guidance right in PRs to speed reviews and reduce back-and-forth.
quick-chart-mcp
Advanced tools
A Model Context Protocol (MCP) server that provides chart tools, allowing it to interact with the quick chart through a standardized interface. This implementation is based on the chart definition and enables users can open quick chart pages seamlessly.
This MCP server tools:
The server implements the Model Context Protocol specification to standardize chart interactions for AI agents.
# Install globally
npm install -g quick-chart-mcp
# Or install locally in your project
npm install quick-chart-mcp
git clone https://github.com/datafe/quick-chart-mcp
cd quick-chart-mcp
pnpm install
pnpm run build
pnpm run dev
{
  "mcpServers": {
    "quick-chart-mcp": {
      "autoApprove": [],
      "disabled": false,
      "timeout": 300,
      "command": "npx",
      "args": [
        "quick-chart-mcp@1.0.13"
      ],
      "transportType": "stdio"
    }
  }
}
Create a .env file with your credentials:
# Quick Chart Configuration
NODE_ENV=optional_development_or_product
QUICK_CHART_DRAW_URL=optional_quick_chart_draw_url
NEED_INSTALL_QUICK_CHART=optional_true_or_false
quick-chart-mcp/
├── src/
│   ├── index.ts          # Main entry point
├── package.json
└── tsconfig.json
The MCP server provides the following Quick Chart tools:
GetChartImgLink - Retrieve chart image link by parameters.InstallQuickChart - Install quick chart service locally.If you encounter issues:
image APIs.
Contributions are welcome! Please feel free to submit a Pull Request.
git checkout -b feature/amazing-feature)git commit -m 'Add some amazing feature')git push origin feature/amazing-feature)This project is licensed under the MIT License.
FAQs
A Model Context Protocol server for interacting with the QuickChart
We found that quick-chart-mcp demonstrated a healthy version release cadence and project activity because the last version was released less than a year ago. It has 1 open source maintainer collaborating on the project.
Did you know?

Socket for GitHub automatically highlights issues in each pull request and monitors the health of all your open source dependencies. Discover the contents of your packages and block harmful activity before you install or update your dependencies.

Product
Socket now lets you customize pull request alert headers, helping security teams share clear guidance right in PRs to speed reviews and reduce back-and-forth.

Product
Socket's Rust support is moving to Beta: all users can scan Cargo projects and generate SBOMs, including Cargo.toml-only crates, with Rust-aware supply chain checks.

Product
Socket Fix 2.0 brings targeted CVE remediation, smarter upgrade planning, and broader ecosystem support to help developers get to zero alerts.