Research
/Security News
9 Malicious NuGet Packages Deliver Time-Delayed Destructive Payloads
Socket researchers discovered nine malicious NuGet packages that use time-delayed payloads to crash applications and corrupt industrial control systems.
react-native-notification-displayer
Advanced tools
a notification displayer template to browse and view notification data from server

npm i react-native-notification-displayer
Before generate library files to your react-native-project, make sure that lussatech-cli is installed globally in your machine, otherwise use this command to install it:
npm i lussatech-cli -g
If lussatech-cli have been installed, change directory to your react-native-project and run this command:
lussatech generate react-native-notification-displayer
then the library files will be added automatically inside your react-native-project, e.g.
react-native-project
|_ ...
|_ lib
  |_ react-native-notification-displayer
    |_ ...
    |_ index.js
    |_ ...
...
import Notifications, {  // sample app
/* available components */
  Browse,               // sample browse notification view
  Display,              // sample display one notification view
  Home,                 // sample home view
  Notification,         // sample notification scenario view
/* available constants  */
  Host,                 // sample host for api end-point
  Server,               // sample api end-point
  Style                 // sample style
} from './lib/react-native-notification-displayer';

class Name extends Component {
  render() {
    return (
      <Notifications />  // sample calling component
    );
  }
}
...
To manage api end-point, update Server.js based on your api end-point, e.g.
# lib/react-native-notification-displayer/Server.js

...
export const host = 'http://example.com'; // host for api url
export default {
  notification: {
    find: function () {
      let url = `${host}/notification`,   // api url for browse notification
          opt = {                         // optional second argument
            method: 'get'                 //  to customize the HTTP request
          };

      return fetch(url, opt);
    },
    ...
  },
  ...
};
...
then call api end-point inside your react-native-project, e.g.
# lib/react-native-notification-displayer/Notification.js

  ...
  componentDidMount() {
    api.notification.find()             // call api url for browse notification
      .then((response) => {
        ...
      })
      .catch((error) => {
        ...
      })
      .done(() => {
        ...
      });
  }
  ...
To customize navigation bar, update Notification.js based on your need, e.g.
# lib/react-native-notification-displayer/Notification.js

...
  render() {
    return (
      <Navigator
        initialRoute={{
          component: Home,
              title: `Home`
        }}
        navigationBar={
          <Navigator.NavigationBar
            style={{backgroundColor:'teal'}}
            routeMapper={{
              /* left side of navigation bar */
              LeftButton: (route, navigator, index, navState) => {
                return (
                  <TouchableOpacity
                    activeOpacity={0.7}
                    style={{...}}
                    onPress={() => {
                      navigator.replace({
                        component: Home,
                            title: `Home`
                      });
                    }}>
                    <View style={{...}}>
                      <Image source={require('./icons/ic_menu_white.png')} />
                    </View>
                  </TouchableOpacity>
                )
              },
              /* title of currently view on navigation bar */
              Title: (route, navigator, index, navState) => {
                return (
                  <View style={{...}}>
                    <Text style={{...}}>{route.title}</Text>
                  </View>
                )
              },
              /* right side of navigation bar */
              RightButton: (route, navigator, index, navState) => {
                return (
                  <TouchableOpacity
                    activeOpacity={0.7}
                    style={{...}}
                    /* display notifications when clicked */
                    onPress={() => {
                      this.setState({data: 0});
                      navigator.replace({
                        component: Browse,
                            title: `Notification`
                      });
                    }}>
                    <View style={{...}}>
                      <Image source={require('./icons/ic_notifications_white.png')} />
                      {
                        this.state.data > 0 ? (
                          /* add badge on notification icon */
                          <View style={{...}}>
                            <Text style={{...}}>{this.state.data}</Text>
                          </View>
                        ) : undefined
                      }
                    </View>
                  </TouchableOpacity>
                )
              }
            }}
          />
        }
        sceneStyle={{paddingTop:57}}
        renderScene={(route, navigator) => {
          /* render view based on component parameter of route */
          return <route.component navigator={navigator} passProps={route.passProps} />;
        }}
        configureScene={(route) => {
          return route.sceneConfig ? route.sceneConfig : Navigator.SceneConfigs.HorizontalSwipeJump;
        }}
      />
    );
  }
...
To customize views, update Browse.js, Display.js, Home.js and Notification.js based on your need, e.g.
# lib/react-native-notification-displayer/Browse.js

  ...
  render() {
    if (!this.state.load) return this.renderLoading();
    if (this.state.nope) return this.renderEmpty();

    return this.renderScene();
  }

  renderScene() {
    return (
      <ListView
        style={styles.listView}
        dataSource={this.state.data}
        renderRow={this.renderRow.bind(this)}
        automaticallyAdjustContentInsets={false}
      />
    );
  }

  renderRow(data) {
    return (
      <TouchableHighlight
        underlayColor={'#D9D9D9'}
        /* display selected notification when clicked */
        onPress={() => {
          this.props.navigator.replace({
            component: Display,
                title: `Notification`,
            passProps: data
          })
        }}>
        <View style={styles.container}>
          <Image
            style={styles.thumbnail}
            source={{uri: `${host}/images/doctors/${data.picture}`}}
          />
          <View style={styles.rightContainer}>
            <Text style={styles.date}>{(new Date(data.createdAt)).toISOString().slice(0, 10)}</Text>
            <Text style={styles.name}>{data.name} {data.title}</Text>
          </View>
        </View>
      </TouchableHighlight>
    );
  }
  ...
FAQs
a notification displayer template to browse and view notification data from server
We found that react-native-notification-displayer demonstrated a not healthy version release cadence and project activity because the last version was released a year ago. It has 1 open source maintainer collaborating on the project.
Did you know?

Socket for GitHub automatically highlights issues in each pull request and monitors the health of all your open source dependencies. Discover the contents of your packages and block harmful activity before you install or update your dependencies.

Research
/Security News
Socket researchers discovered nine malicious NuGet packages that use time-delayed payloads to crash applications and corrupt industrial control systems.

Security News
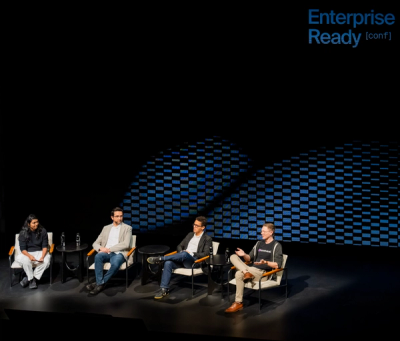
Socket CTO Ahmad Nassri discusses why supply chain attacks now target developer machines and what AI means for the future of enterprise security.

Security News
Learn the essential steps every developer should take to stay secure on npm and reduce exposure to supply chain attacks.