Security News
Crates.io Users Targeted by Phishing Emails
The Rust Security Response WG is warning of phishing emails from rustfoundation.dev targeting crates.io users.
react-svg-timeline
Advanced tools


A React event timeline component based on SVG.
Out of the box – plain & simple:

Explore our interactive demo for more details on customizations. The demo code can be found in the react-svg-timeline-demo repository.
Alternatively, you are free to use just the zooming & panning interaction logic, e.g. as a layer of the awesome Nivo line chart:

yarn add react-svg-timeline
or
npm install react-svg-timeline
Note that react and react-dom (version >=16.3) must already be installed.
This is the simplest possible way to get started:
import * as React from 'react'
import { Timeline } from 'react-svg-timeline'

export const App = () => {
  const laneId = 'demo-lane'
  const lanes = [
    {
      laneId,
      label: 'Demo Lane',
    },
  ]
  const events = [
    {
      eventId: 'event-1',
      tooltip: 'Event 1',
      laneId,
      startTimeMillis: 1167606000000,
      endTimeMillis: 1230698892000,
    },
    {
      eventId: 'event-2',
      tooltip: 'Event 2',
      laneId: laneId,
      startTimeMillis: 1399845600000,
    },
  ]
  const dateFormat = (ms: number) => new Date(ms).toLocaleString()
  return <Timeline width={600} height={300} events={events} lanes={lanes} dateFormat={dateFormat} />
}
Please check the react-svg-timeline-demo repository for a full-fledged feature demonstration.
To override the default theme, you can use the theme property.
If your project is using Material UI, the deriveTimelineTheme convenience function makes it particularly easy to use the MUI theme as a basis:
import * as React from 'react'

// MUI v4
import { useTheme } from '@material-ui/core'

// MUI v5
import { useTheme } from '@mui/material'

import { Timeline } from 'react-svg-timeline'

const App = () => {
  const materialTheme = useTheme()

  // MUI v4
  const type = materialTheme.palette.type

  // MUI v5
  const type = materialTheme.palette.mode

  const theme = deriveTimelineTheme(materialTheme.palette.mode, materialTheme)
  return <Timeline theme={theme} /** all other props here **/ />
}
If you would just like to override certain aspects of the default timeline theme, use the createTimelineTheme helper function:
const theme = createTimelineTheme({ event: { markFillColor: 'pink' } })
To run the timeline locally with HMR, execute the following command:
yarn start
To run the storybook locally, execute the following command:
yarn storybook
To run the tests, execute the following command:
yarn test
To build the library, execute the following command:
yarn build
The easiest way to test a release candidate locally is to create a symlink to the local library from your consuming project:
cd /path/to/consuming/project/node_modules
ln -s /path/to/local/react-svg-timeline react-svg-timeline
You can later remove the symlink via rm -d react-svg-timeline.
Before publishing a release, make sure to update the version number in package.json.
git tag vX.Y.Z
(yarn npm login)
yarn npm publish
git push --tags
After publishing and pushing the tag, you can add a release on GitHub with autogenerated release notes.
Thank you:
Licensed under MIT License.
© Rahel Lüthy & Jan Azzati 2022
FAQs
React Timeline Component
We found that react-svg-timeline demonstrated a not healthy version release cadence and project activity because the last version was released a year ago. It has 2 open source maintainers collaborating on the project.
Did you know?

Socket for GitHub automatically highlights issues in each pull request and monitors the health of all your open source dependencies. Discover the contents of your packages and block harmful activity before you install or update your dependencies.

Security News
The Rust Security Response WG is warning of phishing emails from rustfoundation.dev targeting crates.io users.

Product
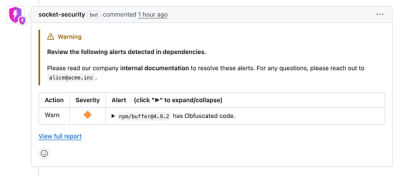
Socket now lets you customize pull request alert headers, helping security teams share clear guidance right in PRs to speed reviews and reduce back-and-forth.

Product
Socket's Rust support is moving to Beta: all users can scan Cargo projects and generate SBOMs, including Cargo.toml-only crates, with Rust-aware supply chain checks.