Research
/Security News
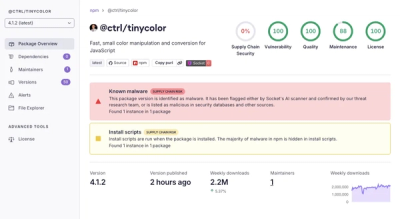
Popular Tinycolor npm Package Compromised in Supply Chain Attack Affecting 40+ Packages
Malicious update to @ctrl/tinycolor on npm is part of a supply-chain attack hitting 40+ packages across maintainers
remix-auth-form
Advanced tools
A Remix Auth strategy to work with any form.
| Runtime | Has Support |
|---|---|
| Node.js | ✅ |
| Cloudflare | ✅ |
This Strategy gives you back on the verify function the FormData instance of the request and the request from the action.
This let you use any field from that form with the names you want, so you are not limited to only a username+password or email+password, if you need a third field you can use it too.
First, install the strategy and Remix Auth.
$ npm install remix-auth remix-auth-form
Then, create an Authenticator instance.
import { Authenticator } from "remix-auth";
import { sessionStorage } from "~/services/session.server";
import { User, findOrCreateUser } from "~/models/user";

export let authenticator = new Authenticator<User>();
And you can tell the authenticator to use the FormStrategy.
import { FormStrategy } from "remix-auth-form";

// The rest of the code above here...

authenticator.use(
  new FormStrategy(async ({ form, request }) => {
    // Here you can use `form` to access and input values from the form.
    // and also use `request` to access more data
    let username = form.get("username"); // or email... etc
    let password = form.get("password");

    // You can validate the inputs however you want
    invariant(typeof username === "string", "username must be a string");
    invariant(username.length > 0, "username must not be empty");

    invariant(typeof password === "string", "password must be a string");
    invariant(password.length > 0, "password must not be empty");

    // And if you have a password you should hash it
    let hashedPassword = await hash(password);

    // And finally, you can find, or create, the user
    let user = await findOrCreateUser(username, hashedPassword);

    // And return the user as the Authenticator expects it
    return user;
  })
);
In order to authenticate a user, you can use the following inside of an action function:
export async function action({ request }: Route.ActionArgs) {
  let user = await authenticator.authenticate("form", request);
  // Now you have the user object with the data you returned in the verify function
}
Once you have the user object returned by your strategy verify function, you can do whatever you want with that information. This can be storing the user in a session, creating a new user in your database, link the account to an existing user in your database, etc.
FAQs
A Remix Auth strategy to work with any form
We found that remix-auth-form demonstrated a healthy version release cadence and project activity because the last version was released less than a year ago. It has 1 open source maintainer collaborating on the project.
Did you know?

Socket for GitHub automatically highlights issues in each pull request and monitors the health of all your open source dependencies. Discover the contents of your packages and block harmful activity before you install or update your dependencies.

Research
/Security News
Malicious update to @ctrl/tinycolor on npm is part of a supply-chain attack hitting 40+ packages across maintainers

Security News
pnpm's new minimumReleaseAge setting delays package updates to prevent supply chain attacks, with other tools like Taze and NCU following suit.

Security News
The Rust Security Response WG is warning of phishing emails from rustfoundation.dev targeting crates.io users.