Security News
Crates.io Users Targeted by Phishing Emails
The Rust Security Response WG is warning of phishing emails from rustfoundation.dev targeting crates.io users.
slm-env-backup-unitywalker-v0
Advanced tools
Build Unity environment binaries for SLM-Lab and release on npm for easy distribution.
To use a prebuilt environment, just add its npm package, e.g. yarn add slm-lab-3dball.
Building a binary requires 4 things:
npmUnity Hub > Installs > Editor > Add Modules > Linux Build Support to enable Linux builds.git clone https://github.com/Unity-Technologies/ml-agents.git
git clone https://github.com/kengz/SLM-Env.git
The goal is to build MacOSX and Ubuntu binaries that can be used in ml-agents's gym API. Currently this also means restriction to using only non-vector environments.
In this example, we will use the Walker environment. We also recommend first going through the Unity Hub tutorial to get a basic knowledge about the editor. Reference from here.
Open the ml-agents/UnitySDK folder in the Unity editor.
In the Assets tab, find Walker under ML-Agents > Examples > Walker > Scenes > Walker. Hit the play button to preview it.
Make any necessary asset changes:
to enable programmatic control, go to WalkerAcademy and check control in the Inspector tab.
since we're not supporting vector environments, remove the extra walker clones but selecting all but the first WalkerPair game objects unchecking them in the Inspector tab.
next, open the asset Walker > Brains > WalkerLearning and in the Inspector tab, change Vector Observation > Stacked Vectors to 1. Also, click on Model and delete it so we don't include the pretrained TF weights.
Go to Edit > Project Settings > Player > Resolution and Presentation. Ensure Run in Background (checked) and Display Resolution Dialog (Disabled).
Now we're ready to build the binaries. Go to File > Build Settings:
click Add Open Scenes and add your scene
click Player Settings to show the Inspector tab. Check Run in Background, set Display Resolution Dialog to 'Disabled'. Optionally, set Fullscreen Mode to 'Windowed'.
build one for Mac OS X. Hit Build and Run to render immediately after building. Choose the directory SLM-Env/bin/ and use the name unitywalker-v0.
build one for Linux. Hit Build, and use the same directory and name.
Test the binary. First ensure you have the mlagents_envs (version 0.9.2) and gym_unity pip packages installed from ml-agents. Use the following script to run an example control loop:
from gym_unity.envs import UnityEnv

env = UnityEnv('/Users/YOURNAME/SLM-Env/bin/unitywalker-v0', 0)

state = env.reset()
for i in range(500):
    action = env.action_space.sample()
    state, reward, done, info = env.step(action)
The binary is now ready. Next, release it to npm.
Note: use kebab-case naming convention with prefix
slm-envand OpenAI gym convention, soslm-env-unitywalker-v0
package.json and update:envname as appropriate: "name": "slm-env-unitywalker-v0",Copy both the MacOSX and Linux binary files from bin/ to build/
Release to npm (make sure you are logged in first, by npm login):
npm publish
Since the binaries are huge, npm will throw an error near the end of it. Just ignore that.
npm ERR! registry error parsing json
npm ERR! publish Failed PUT 403
npm ERR! code E403
npm ERR! You cannot publish over the previously published version 1.0.0. : slm-env-unitywalker-v0
It should be available on npmjs.com, just search for your package slm-env-unitywalker-v0.
SLM-Lab for usage: yarn add slm-env-3dballFAQs
SLM Env
We found that slm-env-backup-unitywalker-v0 demonstrated a not healthy version release cadence and project activity because the last version was released a year ago. It has 1 open source maintainer collaborating on the project.
Did you know?

Socket for GitHub automatically highlights issues in each pull request and monitors the health of all your open source dependencies. Discover the contents of your packages and block harmful activity before you install or update your dependencies.

Security News
The Rust Security Response WG is warning of phishing emails from rustfoundation.dev targeting crates.io users.

Product
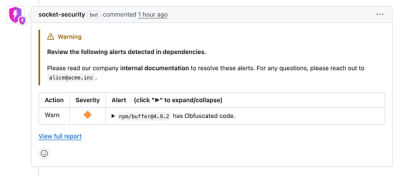
Socket now lets you customize pull request alert headers, helping security teams share clear guidance right in PRs to speed reviews and reduce back-and-forth.

Product
Socket's Rust support is moving to Beta: all users can scan Cargo projects and generate SBOMs, including Cargo.toml-only crates, with Rust-aware supply chain checks.