You're Invited: Meet the Socket team at BSidesSF and RSAC - April 27 - May 1.RSVP →
trtc-electron-sdk
Advanced tools
trtc-electron-sdk - npm Package Compare versions
Comparing version 7.1.55-beta to 7.1.58-beta
| { | ||
| "name": "trtc-electron-sdk", | ||
| "version": "7.1.55-beta", | ||
| "version": "7.1.58-beta", | ||
| "description": "", | ||
@@ -14,4 +14,2 @@ "main": "./liteav/trtc.js", | ||
| "repository": { | ||
| "type": "git", | ||
| "url": "http://git.code.oa.com/TICSDK/TRTC_Electron.git" | ||
| }, | ||
@@ -18,0 +16,0 @@ "author": "", |
232
README.md
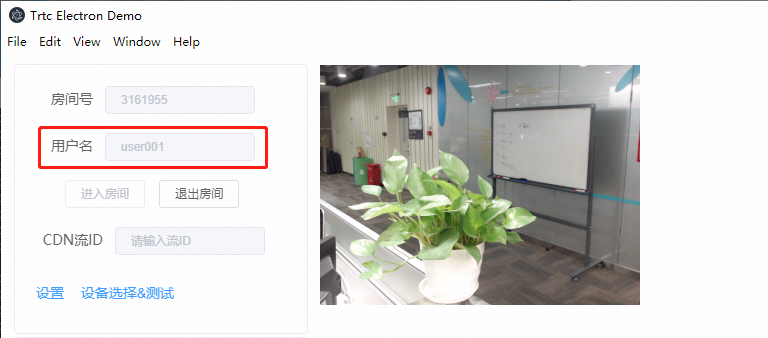
| # TRTC on Electron | ||
|  | ||
| ## Windows | ||
| ## 跑通 DEMO | ||
| <span id="step1"></span> | ||
| ### 步骤1:创建新的应用 | ||
| 1. 登录实时音视频控制台,选择【开发辅助】>【[快速跑通Demo](https://console.cloud.tencent.com/trtc/quickstart)】。 | ||
| 2. 单击【立即开始】,输入应用名称,例如`TestTRTC`,单击【创建应用】。 | ||
| ### 工程编译 | ||
| <span id="step2"></span> | ||
| ### 步骤2:下载 SDK 和 Demo 源码 | ||
| 1. 鼠标移动至对应卡片,单击【[Github](https://github.com/tencentyun/TRTCSDK/tree/master/Electron)】跳转至 Github(或单击【[ZIP](http://liteavsdk-1252463788.cosgz.myqcloud.com/TXLiteAVSDK_TRTC_Electron_latest.zip)】),下载相关 SDK 及配套的 Demo 源码。 | ||
| 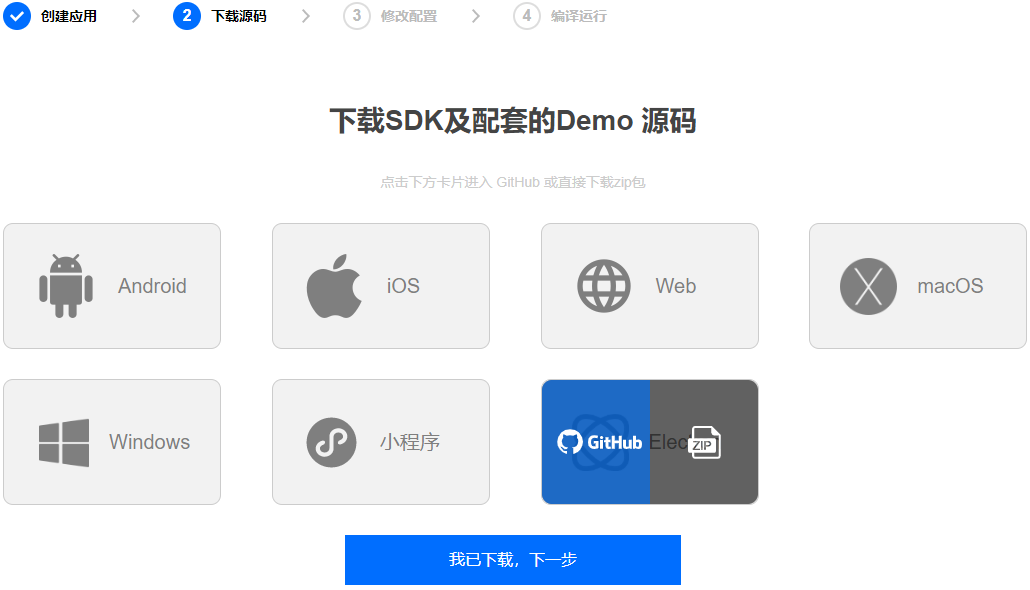 | ||
| 2. 下载完成后,返回实时音视频控制台,单击【我已下载,下一步】,可以查看 SDKAppID 和密钥信息。 | ||
| 1. 安装win32 node环境 | ||
| 2. 安装visual Studio 2015 | ||
| 3. 确认安装node-gyp,如果node没有自带node-gyp,需要[手动安装](https://github.com/nodejs/node-gyp) | ||
| 4. npm install | ||
| 5. npm start | ||
| 注意: trtc electron sdk暂只支持win32版本,安装node 请选用win32版本 | ||
| <span id="step3"></span> | ||
| ### 步骤3:配置 Demo 工程文件 | ||
| 1. 解压 [步骤2](#step2) 中下载的源码包。 | ||
| 2. 找到并打开 `TRTCSDK/Electron/js/GenerateTestUserSig.js` 文件。 | ||
| 3. 设置 `GenerateTestUserSig.js` 文件中的相关参数: | ||
| <ul><li>SDKAPPID:默认为0,请设置为实际的 SDKAppID。</li> | ||
| <li>SECRETKEY:默认为空字符串,请设置为实际的密钥信息。</li></ul> | ||
| <img src="https://main.qcloudimg.com/raw/a82e1c7c3b4edde3b9ac1326b2556147.png"/> | ||
| 4. 返回实时音视频控制台,单击【粘贴完成,下一步】。 | ||
| 5. 单击【关闭指引,进入控制台管理应用】。 | ||
| ## mac 环境搭建 | ||
| - 安装npm:brew install node | ||
| - 安装cnpm:npm install -g cnpm --registry=https://registry.npm.taobao.org | ||
| - 安装Electron:npm install electron -g | ||
| - npm install | ||
| - npm start | ||
| <span id="step4"></span> | ||
| ### 步骤4:编译运行 | ||
| #### Windows 平台 | ||
| 1. 下载最新版本的 [Node.js](https://nodejs.org/en/download/) 安装包,如果您的电脑是64位操作系统,请选择 Windows Installer (.msi) 64-bit,32位操作系统请选择 Windows Installer (.msi) 32-bit。 | ||
| 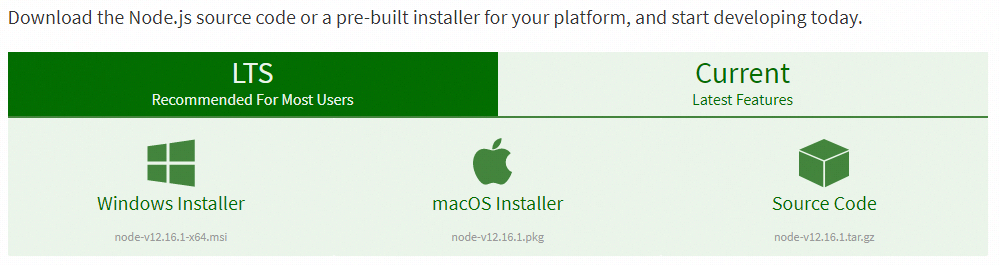 | ||
| 2. 打开应用程序列表中的 `Node.js command prompt`,启动命令行窗口,并将目录定位到 [步骤3](#step3) 中解压到的目标路径,并运行如下命令: | ||
| ``` | ||
| npm install | ||
| ``` | ||
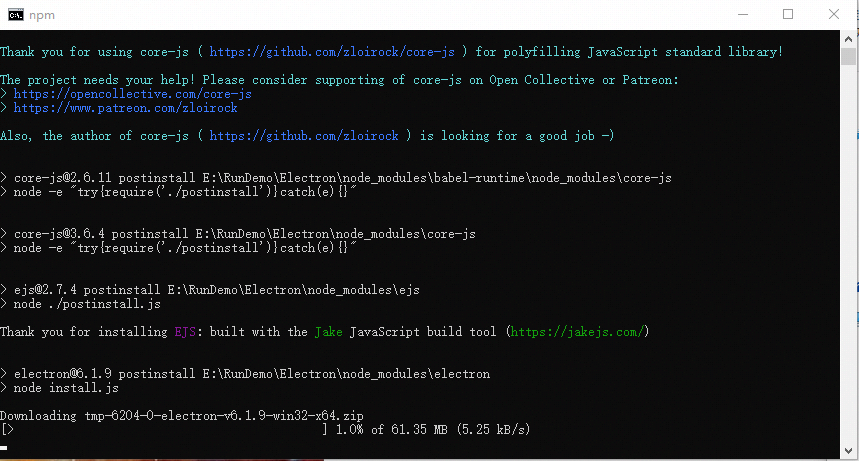
| 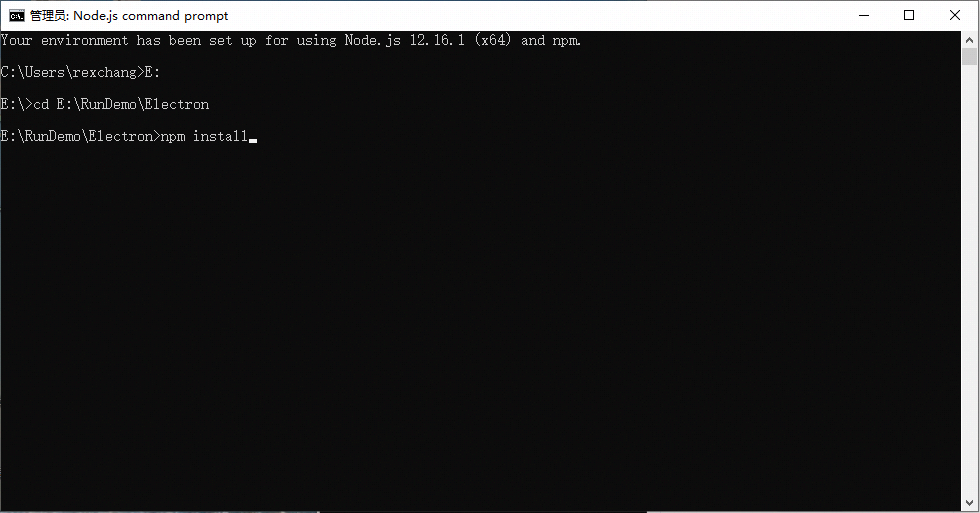 | ||
| 3. 如果您在中国大陆,可能会遭遇下载 electron 压缩包很慢的问题: | ||
|  | ||
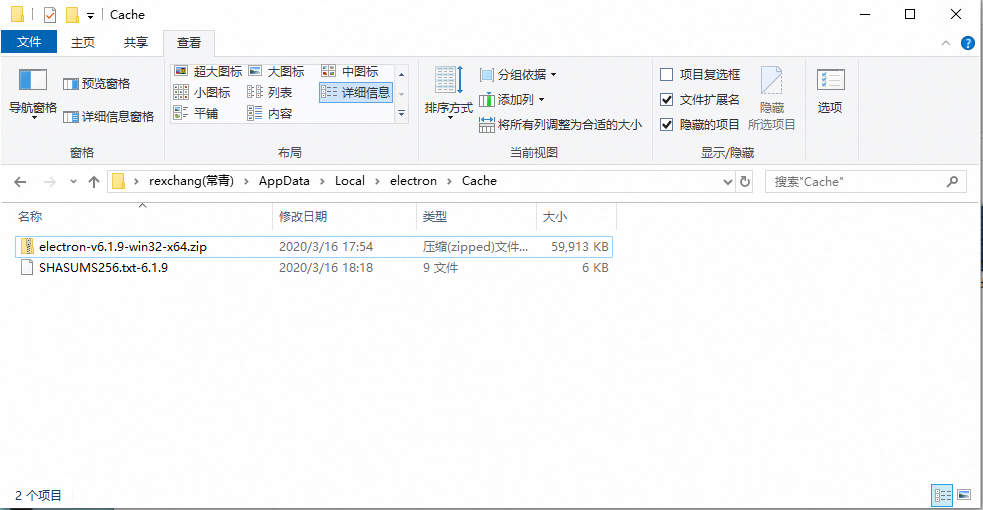
| 此时可以通过配置国内的镜像地址,或者从 [Github](https://github.com/electron/electron/releases) 下载对应的版本和 `SHASUMS256.txt` 文件到 `C:\Users\[您的用户名]\AppData\Local\electron\Cache` 目录下,如下图: | ||
|  | ||
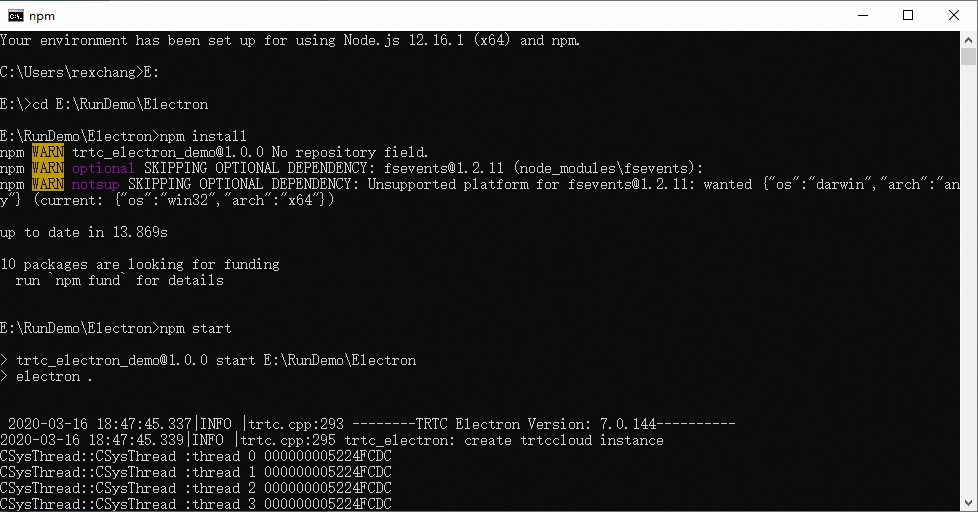
| 4. 待 npm 的依赖包都安装完成后,继续在命令行窗口运行如下命令,即可运行起 Electron Demo。 | ||
| ``` | ||
| npm start | ||
| ``` | ||
|  | ||
| #### Mac OS 平台 | ||
| 1. 打开终端(Terminal)窗口,输入如下命令安装 Homebrew,如果已经安装请跳过此步骤。 | ||
| ``` | ||
| $ ruby -e "$(curl -fsSL https://raw.githubusercontent.com/Homebrew/install/master/install)" | ||
| ``` | ||
| 2. 继续键入如下命令,安装 Node.js: | ||
| ``` | ||
| $ brew install node | ||
| ``` | ||
| 3. 如果您在中国大陆,可能会发现使用 Homebrew 的默认地址安装 Node.js 会比较慢,此时可以考虑替换为国内镜像地址。 | ||
| ```cmd | ||
| $ cd `brew --repo` | ||
| $ git remote set-url origin https://mirrors.tuna.tsinghua.edu.cn/git/homebrew/brew.git | ||
| $ brew update | ||
| ``` | ||
| 4. 通过 cd 命令定位到 [步骤3](#step3) 中解压到的目标路径,并运行如下命令: | ||
| ``` | ||
| npm install | ||
| ``` | ||
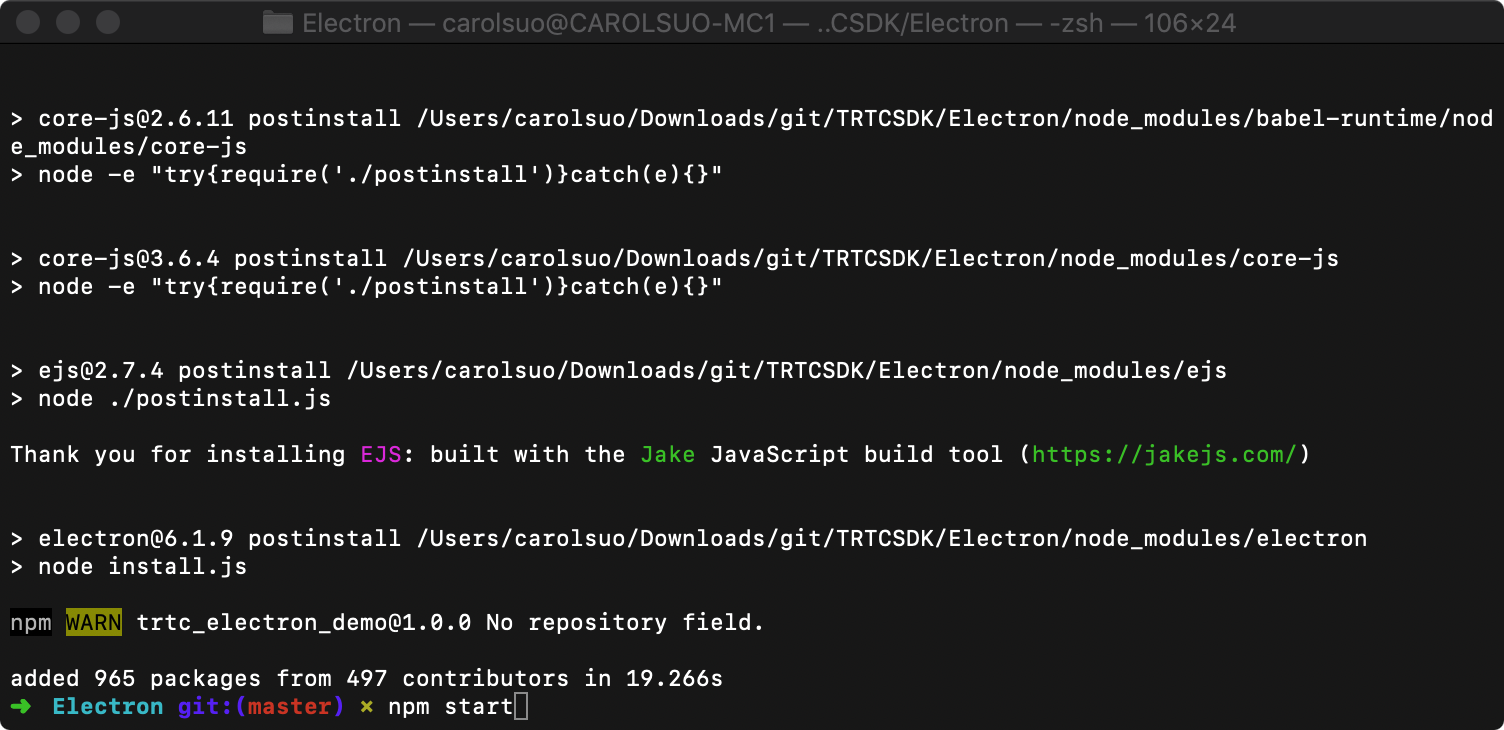
|  | ||
| 5. 待 npm 的依赖包都安装完成后,继续在命令行窗口运行如下命令,即可运行起 Electron Demo。 | ||
| ``` | ||
| npm start | ||
| ``` | ||
|  | ||
| ## 参考文档 | ||
| https://trtc-1252463788.file.myqcloud.com/electron_sdk/docs/index.html | ||
| ## 快速集成 | ||
| #### step1. 通过npm下载trtc库(确认联网状态) | ||
| ``` | ||
| npm install trtc-electron-sdk@latest --save-dev | ||
| ``` | ||
| #### step2. 对接基本功能函数 | ||
| ```js | ||
| //1、引入库 | ||
| const TRTCCloud = require('trtc-electron-sdk'); | ||
| const { | ||
| TRTCVideoStreamType, | ||
| TRTCAppScene, | ||
| TRTCVideoResolution, | ||
| TRTCVideoResolutionMode, | ||
| TRTCParams | ||
| } = require('trtc-electron-sdk/liteav/trtc_define'); | ||
| //2、构建 TRTCCloud | ||
| this.rtcCloud = new TRTCCloud(); | ||
| //3、注册回调 | ||
| subscribeEvents = (rtcCloud) => { | ||
| rtcCloud.on('onError', (errcode, errmsg) => { | ||
| console.info('trtc_demo: onError :' + errcode + " msg" + errmsg); | ||
| }); | ||
| rtcCloud.on('onEnterRoom', (elapsed) => { | ||
| console.info('trtc_demo: onEnterRoom elapsed:' + elapsed); | ||
| }); | ||
| rtcCloud.on('onExitRoom', (reason) => { | ||
| console.info('trtc_demo: onExitRoom reason:' + reason); | ||
| }); | ||
| // 注册远程视频的可用状态 | ||
| rtcCloud.on('onUserVideoAvailable', (uid, available) => { | ||
| console.info('trtc_demo: onUserVideoAvailable uid:' + uid + " available:" + available); | ||
| if (available) { | ||
| let view = this.findVideoView(uid, TRTCVideoStreamType.TRTCVideoStreamTypeBig); | ||
| this.rtcCloud.startRemoteView(uid, view); | ||
| } | ||
| else { | ||
| this.rtcCloud.stopRemoteView(uid); | ||
| this.destroyVideoView(uid, TRTCVideoStreamType.TRTCVideoStreamTypeBig); | ||
| } | ||
| }); | ||
| //..... | ||
| //..... | ||
| }; | ||
| subscribeEvents(this.rtcCloud); | ||
| //4、进入房间 | ||
| enterroom () { | ||
| //1. 进房参数 | ||
| let param = new TRTCParams(); | ||
| param.sdkAppId = sdkInfo.sdkappid; | ||
| param.roomId = parseInt(this.roomId); | ||
| param.userSig = userSig; | ||
| param.userId = this.userId; | ||
| param.privateMapKey = ''; | ||
| param.businessInfo = ''; | ||
| this.rtcCloud.enterRoom(param, TRTCAppScene.TRTCAppSceneVideoCall); | ||
| //2. 编码参数 | ||
| let encparam = new TRTCVideoEncParam(); | ||
| encparam.videoResolution = TRTCVideoResolution.TRTCVideoResolution_640_360; | ||
| encparam.resMode = TRTCVideoResolutionMode.TRTCVideoResolutionModeLandscape; | ||
| encparam.videoFps = 15; | ||
| encparam.videoBitrate = 550; | ||
| this.rtcCloud.setVideoEncoderParam(encparam); | ||
| //3. 打开采集和预览本地视频、采集音频 | ||
| enableVideoCapture(true); | ||
| enableAudioCapture(true); | ||
| }, | ||
| //5、退出房间 | ||
| exitroom() { | ||
| this.rtcCloud.exitRoom(); | ||
| }, | ||
| //6、开启视频 | ||
| enableVideoCapture(bEnable) { | ||
| if (bEnable) { | ||
| let view = this.findView("local", TRTCVideoStreamType.TRTCVideoStreamTypeBig); | ||
| this.rtcCloud.startLocalPreview(view); | ||
| } | ||
| else { | ||
| this.rtcCloud.stopLocalPreview(); | ||
| } | ||
| }, | ||
| //7、开启音频 | ||
| enableAudioCapture(bEnable) { | ||
| if (bEnable) { | ||
| this.rtcCloud.startLocalAudio(); | ||
| } | ||
| else { | ||
| this.rtcCloud.stopLocalAudio(); | ||
| } | ||
| }, | ||
| //8、找个DOM结点,作为视频显示的view | ||
| findVideoView(uid, streamtype) { | ||
| let key = uid + String(streamtype); | ||
| var userVideoEl = document.getElementById(key); | ||
| if (!userVideoEl) { | ||
| userVideoEl = document.createElement('div'); | ||
| userVideoEl.id = key; | ||
| userVideoEl.classList.add('video_view'); | ||
| document.querySelector("#video_wrap").appendChild(userVideoEl); | ||
| } | ||
| return userVideoEl; | ||
| }, | ||
| //9、在视频退出时,清掉一个DOM结点 | ||
| destroyVideoView(uid, streamtype) { | ||
| let key = uid + String(streamtype); | ||
| var userVideoEl = document.getElementById(key); | ||
| if (userVideoEl) { | ||
| document.querySelector("#video_wrap").removeChild(userVideoEl); | ||
| } | ||
| }, | ||
| ``` | ||
| ## 常见问题 | ||
| ### 1. 查看密钥时只能获取公钥和私钥信息,要如何获取密钥? | ||
| TRTC SDK 6.6 版本(2019年08月)开始启用新的签名算法 HMAC-SHA256。在此之前已创建的应用,需要先升级签名算法才能获取新的加密密钥。如不升级,您也可以继续使用 [老版本算法 ECDSA-SHA256](https://cloud.tencent.com/document/product/647/17275#.E8.80.81.E7.89.88.E6.9C.AC.E7.AE.97.E6.B3.95)。 | ||
| 升级操作: | ||
| 1. 登录 [实时音视频控制台](https://console.cloud.tencent.com/trtc)。 | ||
| 2. 在左侧导航栏选择【应用管理】,单击目标应用所在行的【应用信息】。 | ||
| 3. 选择【快速上手】页签,单击【第二步 获取签发UserSig的密钥】区域的【点此升级】。 | ||
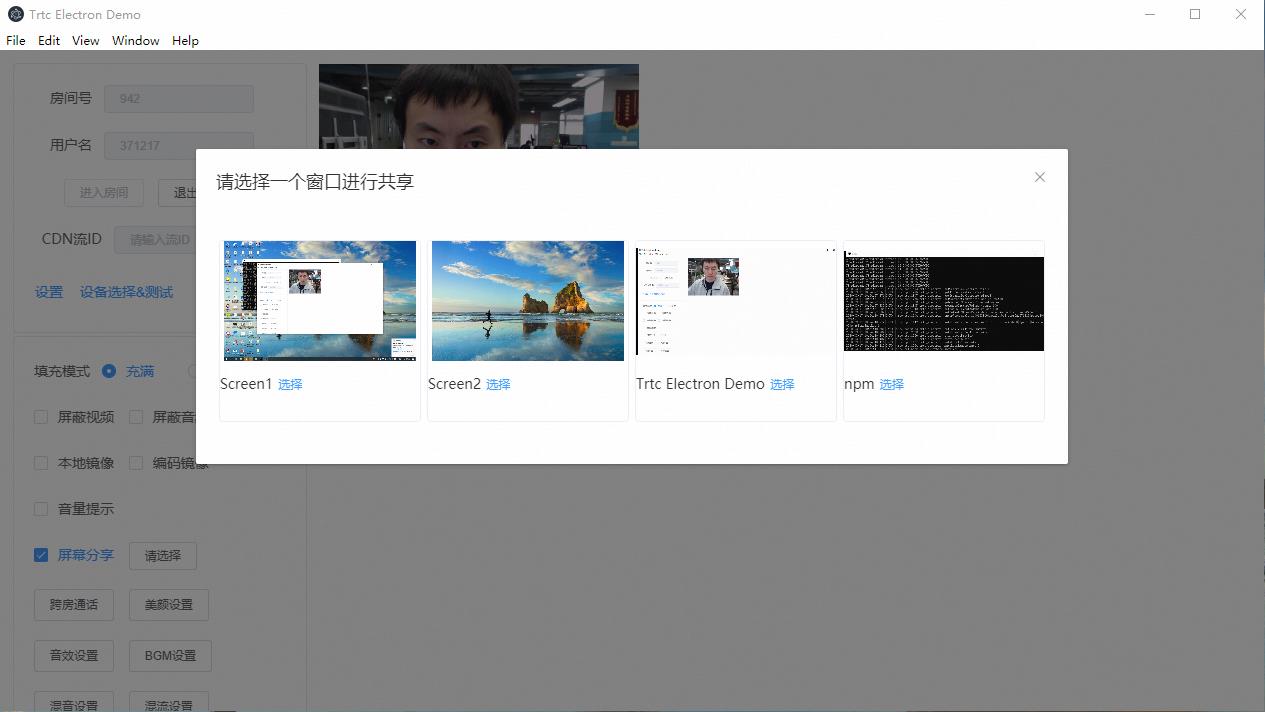
| ### 2. 两台设备同时运行 Demo,为什么看不到彼此的画面? | ||
| 请确保两台设备在运行 Demo 时使用的是不同的 UserID,TRTC 不支持同一个 UserID (除非 SDKAppID 不同)在两个设备同时使用。 | ||
|  | ||
| ### 3. 防火墙有什么限制? | ||
| 由于 SDK 使用 UDP 协议进行音视频传输,所以对 UDP 有拦截的办公网络下无法使用,如遇到类似问题,请参考文档:[应对公司防火墙限制](https://cloud.tencent.com/document/product/647/34399)。 |
New alerts
No repository
Supply chain riskPackage does not have a linked source code repository. Without this field, a package will have no reference to the location of the source code use to generate the package.
Found 1 instance in 1 package
Improved metrics
- Total package byte prevSize
12851
196.11%- Number of lines in readme file
222
957.14%Worsened metrics
- Number of low supply chain risk alerts
1
Infinity%No dependency changes