
Research
wget to Wipeout: Malicious Go Modules Fetch Destructive Payload
Socket's research uncovers three dangerous Go modules that contain obfuscated disk-wiping malware, threatening complete data loss.
By Kush Pandya - May 01, 2025
vlabs-buildexp
Advanced tools
#+title: Phase 3 Lab and Experiment Operations #+setupfile: ./org-html-themes/setup/theme-readtheorg-local.setup #+export_file_name: ./docs/index.html
Introduction
A Virtual Labs /Experiment/ is a systematic collection of learning resources for Engineering students to learn about a single topic in a subject. Each experiment consists of some theory and reading material, interactive simulations and quizes or tests. The authoring process may be different for each institute but the end result is a collection of web-pages that are published together as an /Experiment/.
Each experiment is a part of of /Lab/. A /Lab/ is a conceptually a collection of /Experiments/ related to a subject. A /Lab/ is published as a collection of web-pages that provide an entry point for a user to learn about that subject. The list of experiments included in a lab provides links to all the available experiments.
Creating a publishable lab along with all it's experiments, is a process that involves a lot of manual effort that does not add any value to the lab itself. Labgen is a command-line tool that helps in avoiding all the repeatative effort involved in creating a lab from individual experiments and other lab content.
The following processes are supported by labgen:
The automated build and deployment of experiments is supported only for experiments generated using the /Phase 3 experiment authoring process/ (link?) defined by IIT-B.
Requirements
Setup
** Install Dependencies
#+BEGIN_SRC bash
npm install
#+END_SRC
** Create Lab Repository
Create a new lab repository on [[https://github.com/virtual-labs][Github]] or clone and existing one. The repository should be empty.
** Initialize Lab Descriptor
To start with the process of lab generation, you need a /Lab Descriptor/.
/Lab Descriptor/ is a json file the contains data for lab pages and other information for lab and experiment deployment. [[file:lab-descriptor.org][This]] document describes the structure of a lab descriptor file.
** Complete and Verify Lab Descriptor
Fill all the values in the =<path/to/lab/repo>/lab-descriptor.json= file generated above and create a pull-request to get the lab-descriptor approved.
*** LD Verification Example
Continuing the [[Init Example][init]] example, lets see how to submit the completed
lab-descriptor for verification.
In the lab repository, switch to a new branch and edit the json.
#+BEGIN_SRC bash
cd ~/virtual-labs/myNewLab
git checkout -b lab-descriptor
editor lab-descriptor.json
#+END_SRC
After filling the json push the file to remote and create a pull
request.
#+BEGIN_SRC bash
git add lab-descriptor.json
git commit -m "lab-descriptor for verification"
git push origin lab-descriptor
#+END_SRC
Once this pull request is merged to master, do not make any new
changes to the lab-descriptor.
** Run All
From the /Phase-3-Lab-Template/ repository, run the following.
#+NAME: labgen-generate #+BEGIN_SRC bash npm run labgen -- --release minor <path/to/lab/repo> #+END_SRC
To build an individual experiment first clone the experiment and run the following:
#+BEGIN_SRC sh cd <path/to/experiment/repo> git clone https://github.com/virtual-labs/ph3-lab-mgmt/ cd ph3-lab-mgmt npm install npm run build-exp ../ #+END_SRC
Or, from with this repository:
#+BEGIN_SRC sh npm run build-exp <path/to/exp/repo> #+END_SRC
The first method is useful when running the script from the github actions pipeline.
The experiment can be found in the =build= directory with the experiment repository location.
|--------------------------+---------------------------------------------------------------------------| | DOCUMENT | DESCRIPTION | |--------------------------+---------------------------------------------------------------------------| | [[file:docs/lab-build-process.org][Lab Build Process]] | This document describes the lab build process. | | [[file:docs/lab-descriptor.org][Lab Descriptor]] | This document describes the structure and functions of the lab-descriptor | | [[file:docs/exp-build-process.org][Experiment Build Process]] | Document describing the experiment build process. | | [[file:docs/analytics.org][Analytics]] | Lab and Experiment Analytics details. | | [[docs/units.org][Units]] | Defines all types of units in an experiment | | [[docs/plugins.org][Proposed Plugins]] | Proposal for moving towards a plugin based architecture. | |--------------------------+---------------------------------------------------------------------------|
DOCS:
Lab Build Process
Experiment build process
Analytics - DONE
script usage - DONE
quiz - TODO
exp process integration and testing - DONE
identify modules - WIP
FAQ - WIP
label -> backend => build-process - DONE
FAQs
* Introduction
The npm package vlabs-buildexp receives a total of 146 weekly downloads. As such, vlabs-buildexp popularity was classified as not popular.
We found that vlabs-buildexp demonstrated a not healthy version release cadence and project activity because the last version was released a year ago. It has 2 open source maintainers collaborating on the project.
Did you know?

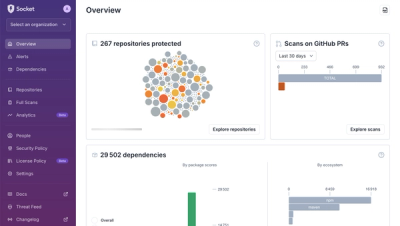
Socket for GitHub automatically highlights issues in each pull request and monitors the health of all your open source dependencies. Discover the contents of your packages and block harmful activity before you install or update your dependencies.
Research
Socket's research uncovers three dangerous Go modules that contain obfuscated disk-wiping malware, threatening complete data loss.

Research
Socket uncovers malicious packages on PyPI using Gmail's SMTP protocol for command and control (C2) to exfiltrate data and execute commands.
Product
We redesigned Socket's first logged-in page to display rich and insightful visualizations about your repositories protected against supply chain threats.