Security News
Crates.io Users Targeted by Phishing Emails
The Rust Security Response WG is warning of phishing emails from rustfoundation.dev targeting crates.io users.
This repo contains library, samples and examples for developers who wish to work with the atPlatform from Python code.
This SDK was created to support Python 3.8 (specifically 3.8.1 due to some dependency requirements). As of 7 Oct 2024 Python 3.8 is end-of-life, and will no longer receive security patches. Occordingly we have decided to continue support for 3.8 for another 6 months (on a best efforts basis). As 7 Apr 2025 has now passed, Python 3.8 has been removeded from the test matrix, and pyproject.toml bumped to require Python 3.9(.2).
Older versions of this package will of course remain available on PyPI, though they may lack features, fixes and security updates; so it is recommended that you try to update to a more recent Python.
To deal with a security vulnerability in the underlying OpenSSL library the cryptography package was bumped to 44.0.1, and this forced the removal of Python 3.9.0 and 3.9.1. Later versions of Python 3.9 are supported.
This package can be installed from PyPI with:
pip install atsdk
Alternatively clone this repo and from the repo root:
pip install -r requirements.txt
pip install .
.atKeysTo run the examples save .atKeys file in the '~/.atsign/keys/' directory.
There are 3 ways in which data can be sent and received from at server.
Using PublicKey
from at_client import AtClient
from at_client.common import AtSign
from at_client.common.keys import PublicKey

atsign = AtSign("@bob")
atclient = AtClient(atsign)
pk = PublicKey("key", atsign)

# Sending data
response = atclient.put(pk, "value")
print(response)

# Receiving Data
response = atclient.get(pk)
print(response)

# Deleting data
response = atclient.delete(pk)
print(response)
Using SelfKey
from at_client import AtClient
from at_client.common import AtSign
from at_client.common.keys import SelfKey

atsign = AtSign("@bob")
atclient = AtClient(atsign)
sk = SelfKey("key", atsign)

# Sending data
response = atclient.put(sk, "value")
print(response)

# Receiving Data
response = atclient.get(sk)
print(response)

# Deleting data
response = atclient.delete(sk)
print(response)
Using SharedKey
from at_client import AtClient
from at_client.common import AtSign
from at_client.common.keys import SharedKey

bob = AtSign("@bob")
alice = AtSign("@alice")
bob_atclient = AtClient(bob)
sk = SharedKey("key", bob, alice)

# Sending data
response = bob_atclient.put(sk, "value")
print(response)

# Receiving Data
alice_atclient = AtClient(alice)
response = alice_atclient.get(sk)
print(response)

# Deleting data
response = bob_atclient.delete(sk)
print(response)
REPL - you can use this to type atPlatform commands and see responses; but the best thing about the REPL currently is that it shows the data notifications as they are received. The REPL code has the essentials of what a 'receiving' client needs to do - i.e.
12. REPL will start and activate monitor mode
automatically in a different thread. You can still send commands/verbs.
You will start seeing your own notifications (from yourself to yourself)
and heartbeat working (noop verb is sent from time to time as a keepalive)at_talk or any other tool to send notifications to your atSign
from a different atSign. You should be able to see the complete
notification, and the encrypted and decrypted value of it.REGISTER - use this cli to register new free atsign. Uses onboarding cli to create atkey files.
Use following command to run the REGISTER cli using email:
python register.py -e <email>
Use following command to run the REGISTER cli using api-key:
python register.py -k <api-key>
ONBOARDING - use this cli to onboard a new atSign. Once onboarding is complete it creates the all-important keys file. Onboard is a subset of Register.
Use following command to run the ONBOARDING cli:
python onboarding.py -a <atsign> -c <cram-secret>
SHARE - use this cli to share data between 2 atsigns.
Use following command to run the SHARE cli:
python share.py -a <atsign> -o <other-atsign> -k <key-name> -s <value>
GET - use this cli to get shared data between 2 atsigns.
Use following command to run the GET cli:
python get.py -a <atsign> -o <other-atsign> -k <key-name>
DELETE - use this cli to delete any key shared between 2 atsigns.
Use following command to run the DELETE cli:
python delete.py -a <atsign> -o <other-atsign> -k <key-name>
This is open source code, so feel free to use it as is, suggest changes or enhancements or create your own version. See CONTRIBUTING.md for detailed guidance on how to setup tools, tests and make a pull request.
This project was created by Umang Shah and is maintained by Chris Swan and Xavier Lin
FAQs
Python SDK for atPlatform
We found that atsdk demonstrated a healthy version release cadence and project activity because the last version was released less than a year ago. It has 2 open source maintainers collaborating on the project.
Did you know?

Socket for GitHub automatically highlights issues in each pull request and monitors the health of all your open source dependencies. Discover the contents of your packages and block harmful activity before you install or update your dependencies.

Security News
The Rust Security Response WG is warning of phishing emails from rustfoundation.dev targeting crates.io users.

Product
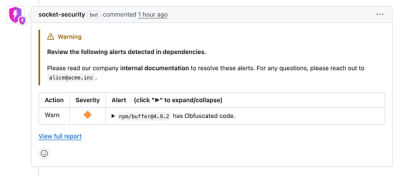
Socket now lets you customize pull request alert headers, helping security teams share clear guidance right in PRs to speed reviews and reduce back-and-forth.

Product
Socket's Rust support is moving to Beta: all users can scan Cargo projects and generate SBOMs, including Cargo.toml-only crates, with Rust-aware supply chain checks.