Research
/Security News
Critical Vulnerability in NestJS Devtools: Localhost RCE via Sandbox Escape
A flawed sandbox in @nestjs/devtools-integration lets attackers run code on your machine via CSRF, leading to full Remote Code Execution (RCE).
Client to connect VSCode with Cloud9/CloudX instance over ssh using Session Manager plugin
A cross-platform Python client for connecting VSCode to CloudX/Cloud9 EC2 instances via SSH over AWS Systems Manager Session Manager.
cloudX-client enables seamless SSH connections from VSCode to EC2 instances using AWS Systems Manager Session Manager, eliminating the need for direct SSH access or public IP addresses. It handles:
pip install uv
The client expects to find AWS credentials in a profile named 'vscode' by default. These credentials should be the Access Key and Secret Key that were created by deploying the cloudX-user stack in your AWS account. The cloudX-user stack creates an IAM user with the minimal permissions required for:
Once the SSH session is established, the user has to further configure the instance using generate-sso-config tool. This is a one-time setup unless the user's access to AWS accounts changes, in which case the user should re-run the generate-sso-config tool.
It is recommended to use --generate-directories and --use-ou-structure to create working directories for each account the user has access to.
Everytime the user connects to the instance, ssostart will authenticate the user with AWS SSO and generate temporary credentials.
This ensures you have the appropriate AWS access both for connecting to the instance and for working within it.
The client also supports easytocloud's AWS profile organizer. If you use multiple AWS environments, you can store your AWS configuration and credentials in ~/.aws/aws-envs/<environment> directories and use the --aws-env option to specify which environment to use.
pip install uv
The uvx command, part of the uv package manager, makes running cloudx-client seamless. When you run uvx cloudx-client, it automatically:
All of this happens in a single, fast operation without any manual setup required.
If you don't already have an SSH key pair for VSCode:
# Create .ssh/vscode directory
mkdir -p ~/.ssh/vscode

# Generate key pair
ssh-keygen -t rsa -b 4096 -f ~/.ssh/vscode/vscode
Create or edit ~/.ssh/config:
# Include VSCode-specific config
Include vscode/config
Create ~/.ssh/vscode/config:
Host cloudx-*
    ProxyCommand uvx cloudx-client %h %p
    User ec2-user
    IdentityFile ~/.ssh/vscode/vscode
    StrictHostKeyChecking no
    UserKnownHostsFile /dev/null

# Example host configuration
Host cloudx-dev
    HostName i-0123456789abcdef0  # Your EC2 instance ID
Create or edit %USERPROFILE%\.ssh\config:
Include vscode/config
Create %USERPROFILE%\.ssh\vscode\config:
Host cloudx-*
    ProxyCommand uvx cloudx-client %h %p
    User ec2-user
    IdentityFile %USERPROFILE%\.ssh\vscode\vscode
    StrictHostKeyChecking no
    UserKnownHostsFile /dev/null

# Example host configuration
Host cloudx-dev
    HostName i-0123456789abcdef0  # Your EC2 instance ID
{
    "remote.SSH.configFile": "~/.ssh/vscode/config",
    "remote.SSH.connectTimeout": 90
}
# Basic usage (uses default vscode profile, port 22, and eu-west-1 region)
uvx cloudx-client i-0123456789abcdef0

# With custom port
uvx cloudx-client i-0123456789abcdef0 2222

# With custom profile
uvx cloudx-client i-0123456789abcdef0 --profile myprofile

# With different region (overrides eu-west-1 default)
uvx cloudx-client i-0123456789abcdef0 --region us-east-1

# With AWS profile organizer environment
uvx cloudx-client i-0123456789abcdef0 --aws-env prod

# With custom SSH key
uvx cloudx-client i-0123456789abcdef0 --key-path ~/.ssh/custom_key.pub
The AWS user/role needs these permissions:
{
    "Version": "2012-10-17",
    "Statement": [
        {
            "Effect": "Allow",
            "Action": [
                "ec2:StartInstances",
                "ec2:DescribeInstances",
                "ssm:StartSession",
                "ssm:DescribeInstanceInformation",
                "ec2-instance-connect:SendSSHPublicKey"
            ],
            "Resource": "*"
        }
    ]
}
Connection Timeout
SSH Key Issues
AWS Configuration
~/.aws/aws-envs/<environment>/MIT License - see LICENSE file for details
FAQs
Client to connect VSCode with Cloud9/CloudX instance over ssh using Session Manager plugin
We found that cloudx-client demonstrated a healthy version release cadence and project activity because the last version was released less than a year ago. It has 0 open source maintainers collaborating on the project.
Did you know?

Socket for GitHub automatically highlights issues in each pull request and monitors the health of all your open source dependencies. Discover the contents of your packages and block harmful activity before you install or update your dependencies.

Research
/Security News
A flawed sandbox in @nestjs/devtools-integration lets attackers run code on your machine via CSRF, leading to full Remote Code Execution (RCE).

Product
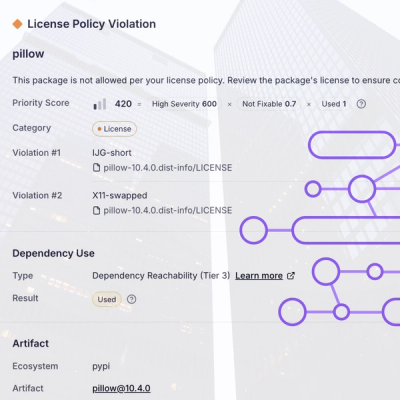
Customize license detection with Socket’s new license overlays: gain control, reduce noise, and handle edge cases with precision.

Product
Socket now supports Rust and Cargo, offering package search for all users and experimental SBOM generation for enterprise projects.