Research
Malicious npm Packages Impersonate Flashbots SDKs, Targeting Ethereum Wallet Credentials
Four npm packages disguised as cryptographic tools steal developer credentials and send them to attacker-controlled Telegram infrastructure.
An XSS vulnerability fuzz tester for Django views.
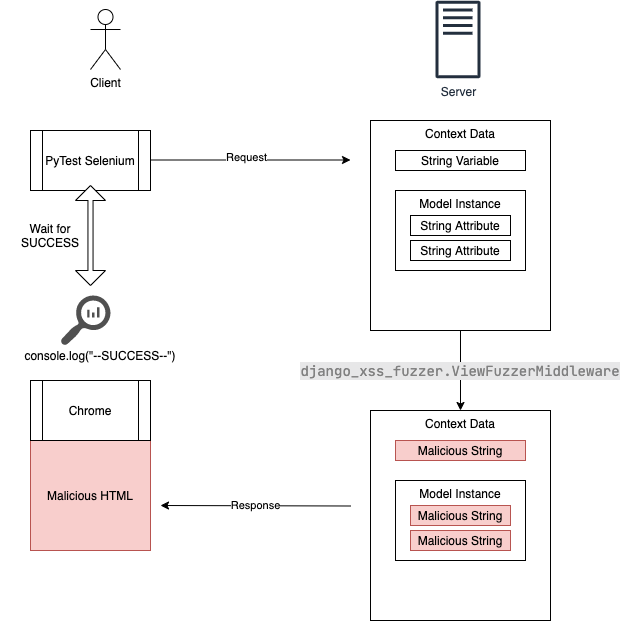
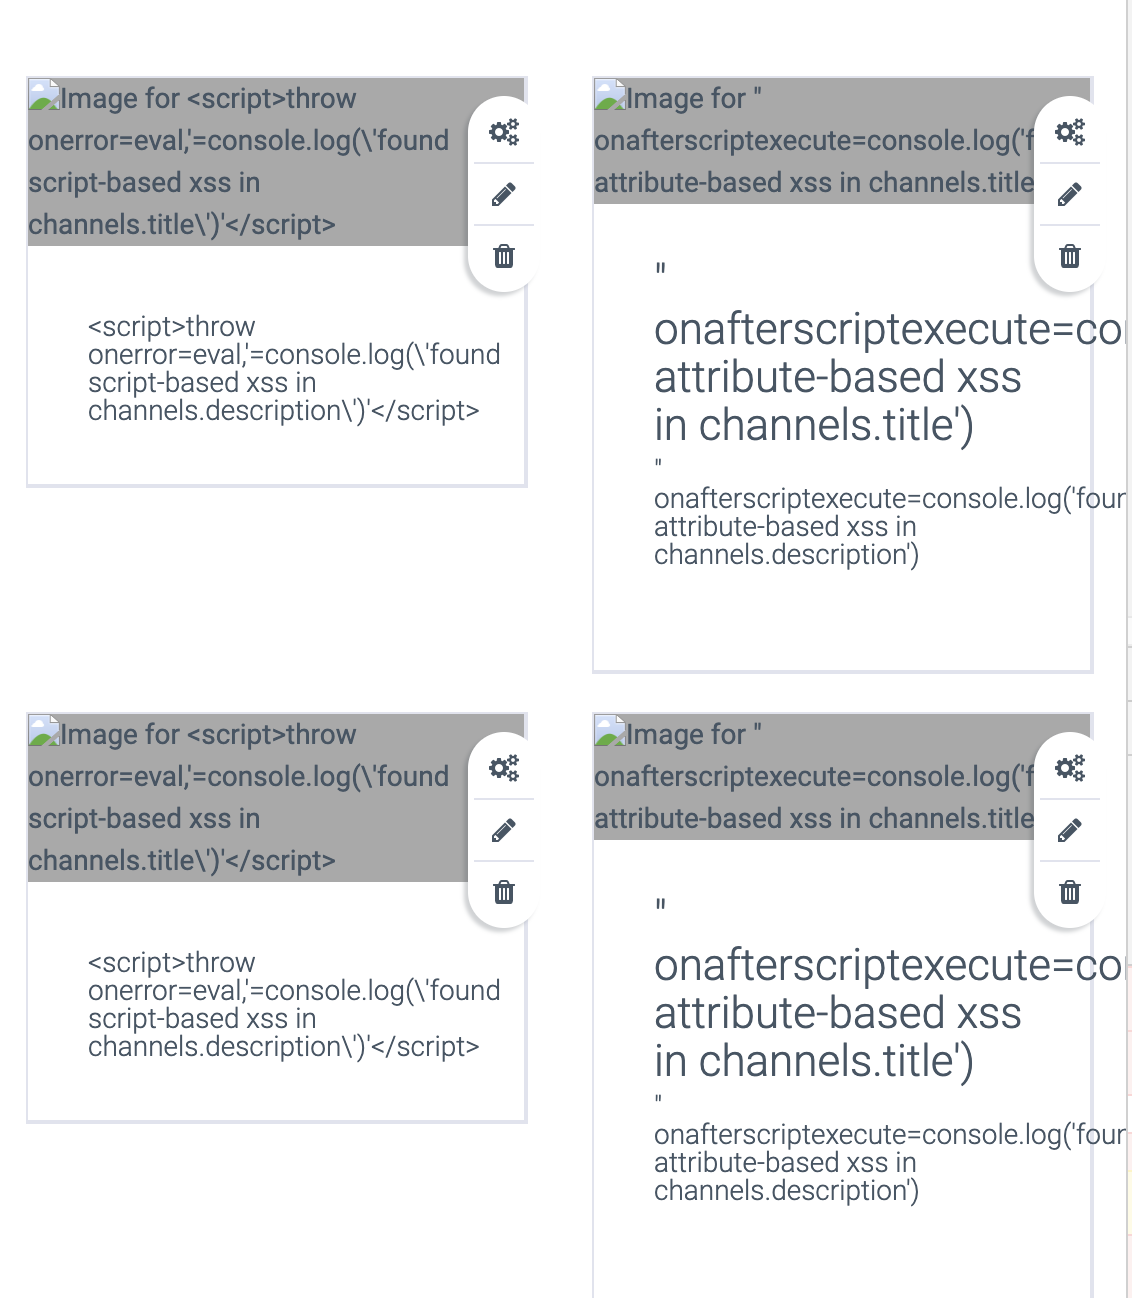
This tester will inject XSS patterns into the context data for a template before it is rendered, including:
The goal of this tool is to quickly find any XSS vulnerabilities in Django templates.
Any successful injections will write a message to the browser JavaScript console.
Install via pip
$ pip install django-xss-fuzzer
Add ViewFuzzerMiddleware to your middleware list for a test environment.
MIDDLEWARE = [
    ...
    'django_xss_fuzzer.ViewFuzzerMiddleware'
]
Do not deploy this to a production server!
Configure the middleware via the Django global settings.
XSS_PATTERN : An XSS patterns to try. See XSS Cheatsheet for inspiration.XSS_INJECT_KWARGS (Default False) : A switch to disable injecting XSS view function keyword argumentsXSS_INJECT_CONTEXT_DATA (Default True) : A switch to disable injecting XSS into class dataThis package comes with a Pytest extension to add a parametrized fixture, xss_pattern.
Once you've restarted Django, it will replace anything "string-like" in the context data with a malicious string.
By default it will try <script>throw onerror=eval,\'=console.log\x28\\\'{0}\\\'\x29\'</script>.
The values that will be replaced :

When you browse any of the pages on your site, you should see Django successfully protecting and escaping the strings.

When you open the JavaScript console, if you see any --SUCCESS[]-- messages this means your page is vulnerable, the name of the field that it replaced will be inside square brackets.
To change the malicious string, set the XSS_PATTERN variable in your Django settings.
It's designed to be paired with PyTest, PyTest-Django, and Selenium so that it will try a range of malicious strings until it finds a successful attack vector.
The selenium integration is required so that each view will be rendered and then processed by Chrome. Once Chrome has loaded the page, the tool will inspect the JavaScript log for any occurences of --SUCCESS[field]--
and then fail the test if one is found.
Here is an example test for the URLs / and /home:
import pytest


paths = (
    '/',
    '/home'
)


@pytest.mark.django_db()
@pytest.mark.parametrize('path', paths)
def test_xss_patterns(selenium, live_server, settings, xss_pattern, path):
    setattr(settings, 'XSS_PATTERN', xss_pattern.string)
    selenium.get('%s%s' % (live_server.url, path), )
    assert not xss_pattern.succeeded(selenium), xss_pattern.message
The test function test_xss_patterns is a parametrized test that will run a live server using pytest-django and open a browser for each test using pytest-selenium.
To test more views, just add the URIs to paths.
To setup selenium, add the following to your conftest.py:
import pytest


@pytest.fixture(scope='session')
def session_capabilities(session_capabilities):
    session_capabilities['goog:loggingPrefs'] = {'browser': 'ALL'}
    return session_capabilities


@pytest.fixture
def chrome_options(chrome_options):
    chrome_options.headless = True
    return chrome_options
This will configure Chrome as headless and enable logging to capture the XSS flaws.
To run PyTest with this plugin, use the --driver flag as Chrome and --driver-path to point to a downloaded version of the Chrome Driver for the version of Chrome you have installed.
$ python -m pytest tests/ --driver Chrome --driver-path /path/to/chromedriver -rs -vv
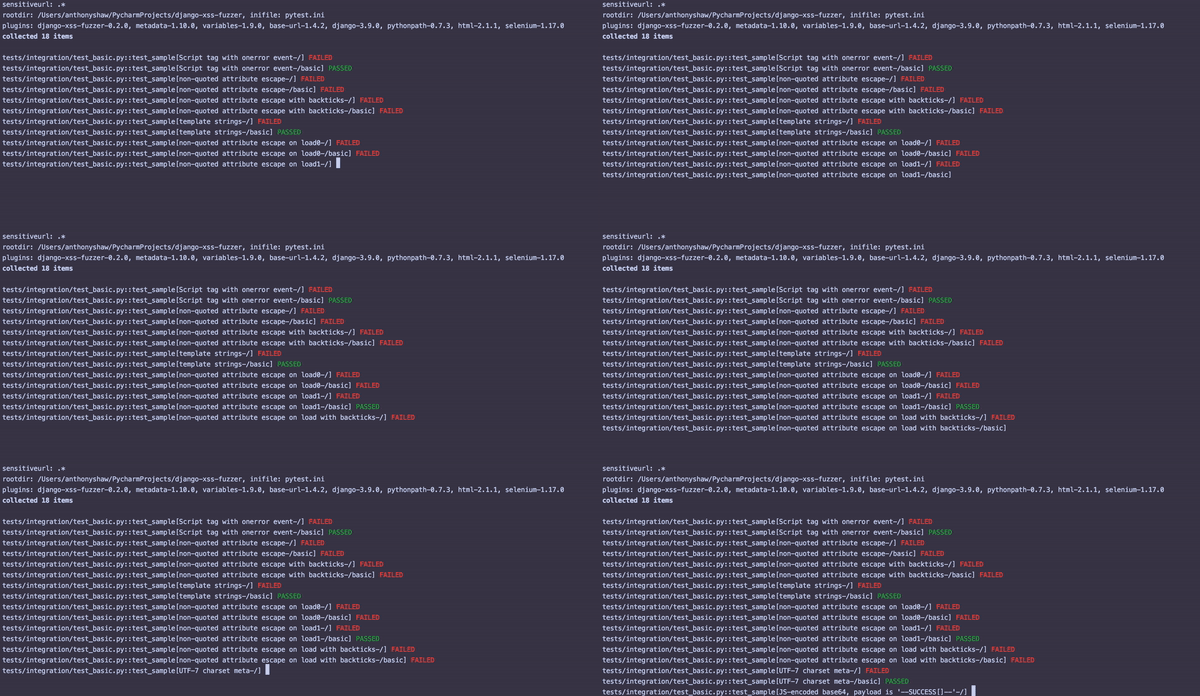
Once this is running, you'll see something similar to the following output:

For each failed test, inspect that particular view with the attack string and see where the potential vulnerability is.
In 99% of cases, Django will sanitize the injection strings and they will be unsuccessful.
However, there are some limitations, such as unquoted expressions of HTML tag attributes
<style class={{ var }}>...</style>
This extension would automatically replace var with x onafterscriptexecute=console.log('found attribute-based xss in {0}').
Django would render the following HTML:
<style class=x onafterscriptexecute=console.log('found attribute-based xss in {0}')>...</style>
The JavaScript code within the onafterscriptexecute would be run by the browser, demonstrating the vulnerability.
Other examples, would be the use of the |safe filter inside the Django template. This filter can be put into Django views without a full-understanding of the ramifications.
For example, in a permanent XSS attack, the database, or memory state could contain a dangerous string.
GitHub Actions has Chrome and Chromedriver preinstalled on the ubuntu-latest image.
You can run the tests with the same flag with the environment variable:
    - name: Run Security Tests
      run: |
        python -m pytest tests/your_security_tests --driver Chrome --driver-path $CHROMEWEBDRIVER/chromedriver
Azure Pipelines uses the same image, but has a different syntax. You can run using a script task like this:
- script: |
    pytest tests/your_security_tests --driver Chrome --driver-path $(CHROMEWEBDRIVER)/chromedriver
  displayName: 'Run Security tests'
Also use my pytest-azurepipelines extension to automate the publishing of test results to the pipelines UI.
FAQs
django-xss-fuzzer: An XSS vulnerability fuzz tester for Django views.
We found that django-xss-fuzzer demonstrated a healthy version release cadence and project activity because the last version was released less than a year ago. It has 1 open source maintainer collaborating on the project.
Did you know?

Socket for GitHub automatically highlights issues in each pull request and monitors the health of all your open source dependencies. Discover the contents of your packages and block harmful activity before you install or update your dependencies.

Research
Four npm packages disguised as cryptographic tools steal developer credentials and send them to attacker-controlled Telegram infrastructure.

Security News
Ruby maintainers from Bundler and rbenv teams are building rv to bring Python uv's speed and unified tooling approach to Ruby development.

Security News
Following last week’s supply chain attack, Nx published findings on the GitHub Actions exploit and moved npm publishing to Trusted Publishers.