
Research
PyPI Package Disguised as Instagram Growth Tool Harvests User Credentials
A deceptive PyPI package posing as an Instagram growth tool collects user credentials and sends them to third-party bot services.
By Kush Pandya - Jun 06, 2025
![]()
![]()
![]()
![]()
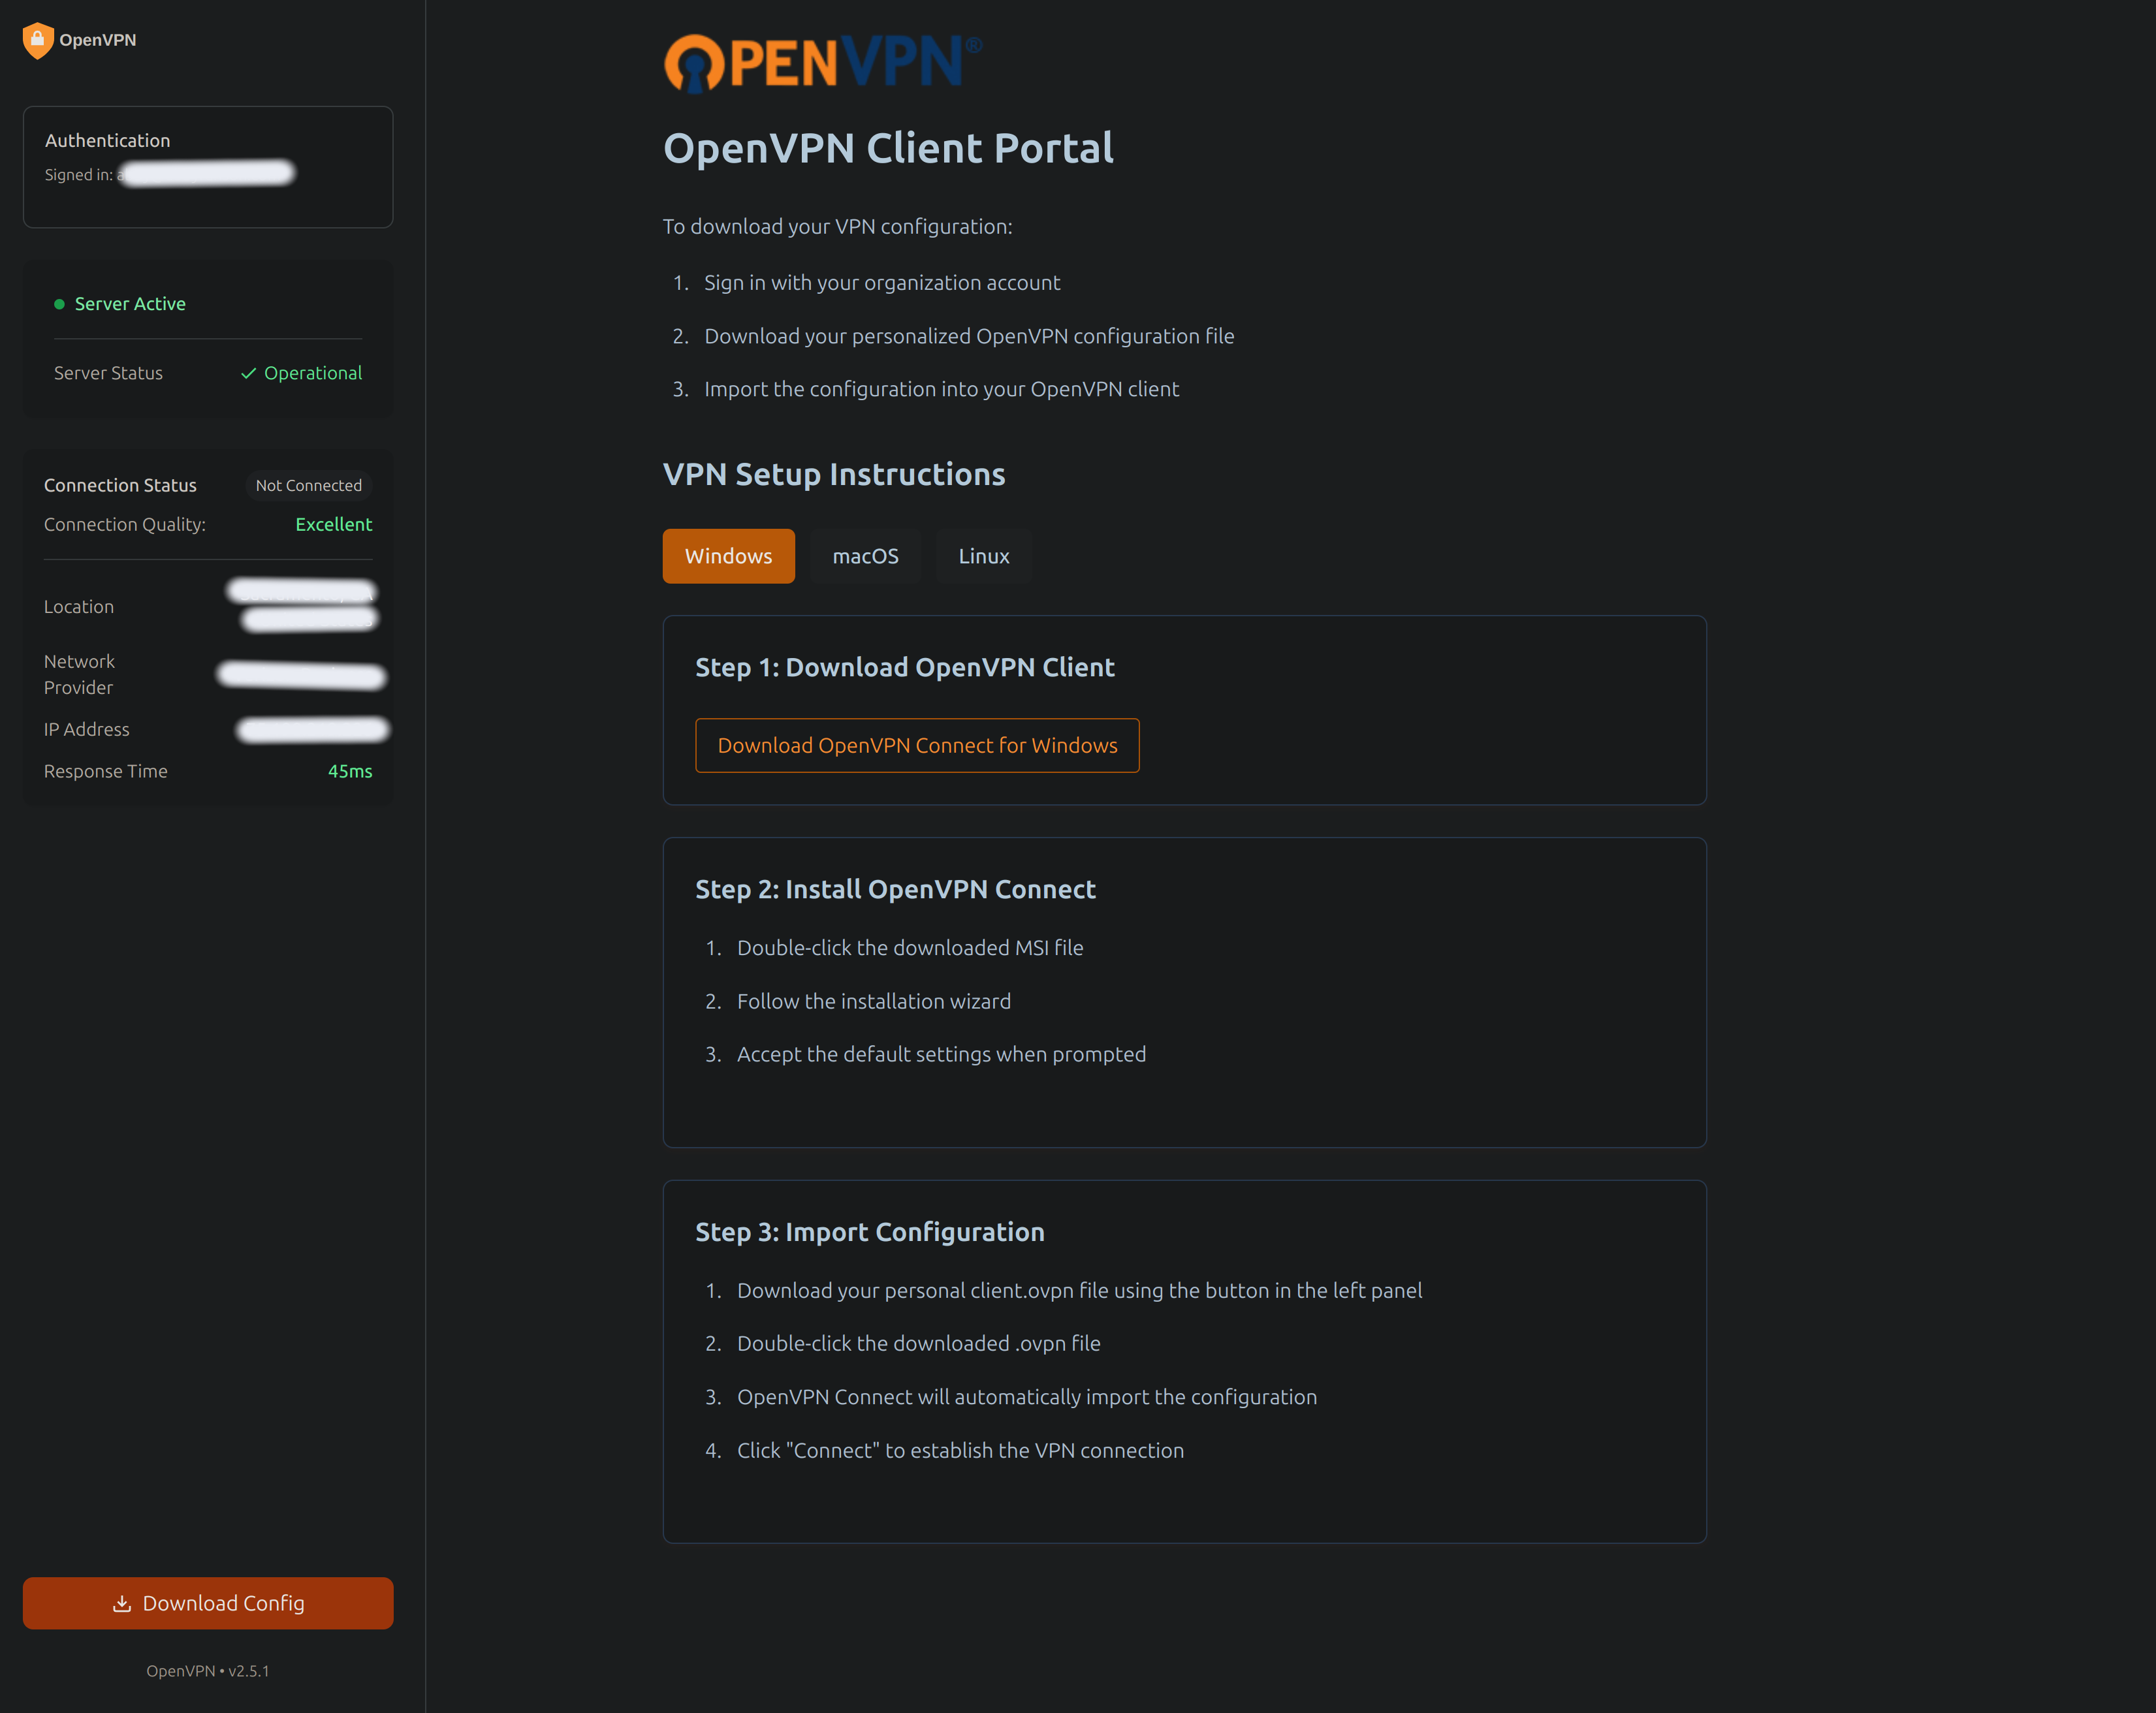
A secure, user-friendly authentication portal for OpenVPN configuration distribution. This application provides Google OAuth2 authentication and domain-restricted access to OpenVPN configuration files.
pip install gcp-ovpn-portal
git clone https://github.com/ranson21/gcp-ovpn-portal
cd gcp-ovpn-portal
poetry install
http://localhost:8081https://your-domain.comThe following environment variables are required:
CLIENT_ID: Google OAuth2 client ID (obtained from steps above)ALLOWED_DOMAIN: Authorized email domain (e.g., "company.com")EXTERNAL_IP: VPN server's external IP addressOPENVPN_DIR: Directory containing OpenVPN configuration files (default: /etc/openvpn)Create a .env file:
cp .env.example .env
# Edit .env with your configuration
Example .env file:
CLIENT_ID=your-google-client-id.apps.googleusercontent.com
ALLOWED_DOMAIN=yourcompany.com
EXTERNAL_IP=203.0.113.1
OPENVPN_DIR=/etc/openvpn
# Run the VPN portal
ovpn-portal
# Using Poetry
poetry run ovpn-portal

# Or using make
make run
openvpn-auth-portal/
├── ovpn_portal/
│   ├── app/
│   │   ├── main/
|   │   │   ├── __init__.py
|   │   │   └── routes.py
│   │   ├── __init__.py
│   │   ├── config.py
│   │   ├── middleware.py
│   │   └── vpn.py
│   └── run.py
├── static/
│   ├── css/
│   ├── images/
│   ├── js/
│   └── favicon.ico
├── templates/
│   └── index.html
├── tests/
├── pyproject.toml
├── .env.example
├── .gitignore
└── README.md
The project includes a Makefile to help with common development tasks:
make dev-setup # Install Poetry, initialize git, and install dependencies
make install      # Install project dependencies
make run         # Run development server
make test        # Run test suite
make coverage    # Run tests with coverage report
make format      # Format code with black and isort
make lint        # Run linting checks
make clean       # Clean temporary files and builds
To run tests with coverage reporting:
make coverage
This will:
coverage_html/View the HTML coverage report:
make coverage-open  # On macOS
# Or open coverage_html/index.html in your browser
make build       # Build package distribution
make develop     # Install package locally in editable mode
make publish-test  # Publish to Test PyPI
make publish      # Publish to PyPI
You can also use Poetry directly for development tasks:
poetry install    # Install dependencies
poetry run pytest # Run tests
poetry run black . # Format code
poetry run flake8 # Lint code
This project is licensed under the MIT License - see the LICENSE file for details.
Contributions are welcome! Please feel free to submit a Pull Request.
Abigail Ranson
FAQs
A secure OpenVPN authentication portal with Google OAuth2
We found that gcp-ovpn-portal demonstrated a healthy version release cadence and project activity because the last version was released less than a year ago. It has 1 open source maintainer collaborating on the project.
Did you know?

Socket for GitHub automatically highlights issues in each pull request and monitors the health of all your open source dependencies. Discover the contents of your packages and block harmful activity before you install or update your dependencies.
Research
A deceptive PyPI package posing as an Instagram growth tool collects user credentials and sends them to third-party bot services.

Product
Socket now supports pylock.toml, enabling secure, reproducible Python builds with advanced scanning and full alignment with PEP 751's new standard.

Security News
Research
Socket uncovered two npm packages that register hidden HTTP endpoints to delete all files on command.