Research
/Security News
Critical Vulnerability in NestJS Devtools: Localhost RCE via Sandbox Escape
A flawed sandbox in @nestjs/devtools-integration lets attackers run code on your machine via CSRF, leading to full Remote Code Execution (RCE).

Ingradient is an open-source labeling and dataset management tool designed to provide an intuitive interface for dataset creation, annotation, and organization.
It is highly recommended to create a Python virtual environment before installing Ingradient.
# Create a virtual environment named "env"
python3 -m venv env
# Activate the virtual environment
source env/bin/activate
Using Command Prompt:
python -m venv env
env\Scripts\activate
Using PowerShell:
python -m venv env
.\env\Scripts\Activate.ps1
Note: If you encounter an execution policy error in PowerShell, run:
Set-ExecutionPolicy -ExecutionPolicy RemoteSigned -Scope CurrentUserand then try activating again.
Once the virtual environment is activated, install Ingradient via pip:
pip install ingradient
Alternatively, for local development:
# 1. Navigate to the frontend directory
cd web

# 2. Install dependencies (first time only)
npm install

# 3. Build the frontend
npm run build

# 4. Go back to the root and install the Python package in editable mode
cd ..
pip install -e .
⚠️ Why?
Ingradient's frontend is built using Next.js and exported as a static site. Thenpm run buildcommand generates these static files and places them insideingradient_sdk/static, which the Python backend serves.
Without this step, the UI will not be accessible from the browser.
Once installed, simply run:
ingradient
This single command will start:
http://127.0.0.1:8000Below is an example of how to interact with Ingradient programmatically using the Python SDK:
from ingradient_sdk.client import Ingradient

# 1. Initialize Ingradient client: Set server URL
ing = Ingradient(url="http://localhost:8000")
print("Client connection established!")

# 2. Dataset management
# 2-1) Retrieve the list of existing datasets
dataset_list = ing.dataset.get_list()
print("Current dataset list:", dataset_list)

# 2-2) Create new datasets
new_dataset = ing.dataset.create(name="MyNewDataset")
print("Created dataset:", new_dataset)

# 3. Image management
# 3-1) Upload a single image
single_image_upload = ing.image.upload(
    dataset_id=new_dataset.id,
    file_path="path/to/image1.jpg"
)
print("Single image upload completed:", single_image_upload)

# 3-2) Retrieve image list (now includes class information)
image_list = ing.image.get_list(dataset_id=new_dataset.id)
print(f"Image list in dataset (ID: {new_dataset.id}):", image_list)

# 3-3) Assign class to an image and update on server
if len(image_list) > 0:
    some_image = image_list[0]  # 이미지 리스트에서 첫 번째 이미지 선택
    class_list = ing.classes.get_list(dataset_id=new_dataset.id)  # 해당 데이터셋의 클래스 목록 가져오기

    if len(class_list) > 0:
        some_class_id = class_list[0]['id']  # 첫 번째 클래스를 선택
        some_image.classes = some_class_id   # 이미지에 클래스 ID 할당
        some_image.save()  # 서버에 업데이트 요청
        print(f"Image (ID: {some_image['id']}) assigned to class (ID: {some_class_id}) and updated on server.")

# 3-4) Assign multiple classes to an image and update on server
if len(image_list) > 0 and len(class_list) > 1:
    some_image = image_list[0]  # 같은 이미지 대상으로
    multiple_class_ids = [class_list[0]['id'], class_list[1]['id']]  # 첫 번째, 두 번째 클래스 추가
    some_image.classes = multiple_class_ids  # 여러 개의 클래스 ID 할당
    some_image.save()  # 서버에 업데이트 요청
    print(f"Image (ID: {some_image['id']}) assigned to classes: {multiple_class_ids} and updated on server.")

# 3-5) Delete an image
if len(image_list) > 0:
    ing.image.delete(dataset_id=new_dataset.id, image_id=some_image['id'])
    print(f"Image (ID: {some_image['id']}) deleted successfully")

# 4. Class (Label) management
# 4-1) Retrieve the list of existing classes (all datasets)
all_classes = ing.classes.get_list()
print("All classes:", all_classes)

# 4-2) Retrieve classes only for a specific dataset
dataset_classes = ing.classes.get_list(dataset_id=new_dataset.id)
print(f"Classes in dataset (ID: {new_dataset.id}):", dataset_classes)

# 4-3) Create a new class (now requires a dataset_id)
new_class = ing.classes.create(name="NewLabel", dataset_id=new_dataset.id)
print(f"Created class in dataset (ID: {new_dataset.id}):", new_class)

# 4-4) Update class name
if len(dataset_classes) > 0:
    target_class_id = dataset_classes[0]['id']
    updated_class = ing.classes.update(class_id=target_class_id, new_name="UpdatedClassName")
    print(f"Class (ID: {target_class_id}) name updated:", updated_class)

# 4-5) Delete a class
if len(dataset_classes) > 1:
    another_class_id = dataset_classes[1]['id']
    ing.classes.delete(class_id=another_class_id)
    print(f"Class (ID: {another_class_id}) deleted successfully")

# 5. Delete the created dataset
ing.dataset.delete(dataset_id=new_dataset.id)
print(f"Dataset (ID: {new_dataset.id}) deleted successfully")
GET /api/datasets - List all datasetsPOST /api/datasets - Create a new datasetPUT /api/datasets/{id} - Update a dataset nameDELETE /api/datasets/{id} - Delete a datasetPOST /api/images/{dataset_id} - Upload an imageGET /api/images/{image_id} - Get image detailsDELETE /api/images/{image_id} - Delete an imagePOST /api/labels/{image_id} - Add annotation (classification, keypoints, bounding box)GET /api/labels/{image_id} - Get annotationsFor more details, visit http://127.0.0.1:8000/docs for interactive API documentation (Swagger UI).
You can also run Ingradient using Docker:
docker build -t ingradient .
docker run -p 8000:8000 ingradient
This will start both the backend and frontend in a containerized environment.
Contributions are welcome! For guidelines on contributing, please see our CONTRIBUTING.md file.
This project is licensed under the MIT License - see the LICENSE file for details.
For any inquiries, feel free to open an issue or reach out:
Happy coding! 🚀
FAQs
Ingradient - A labeling and dataset management tool
We found that ingradient demonstrated a healthy version release cadence and project activity because the last version was released less than a year ago. It has 1 open source maintainer collaborating on the project.
Did you know?

Socket for GitHub automatically highlights issues in each pull request and monitors the health of all your open source dependencies. Discover the contents of your packages and block harmful activity before you install or update your dependencies.

Research
/Security News
A flawed sandbox in @nestjs/devtools-integration lets attackers run code on your machine via CSRF, leading to full Remote Code Execution (RCE).

Product
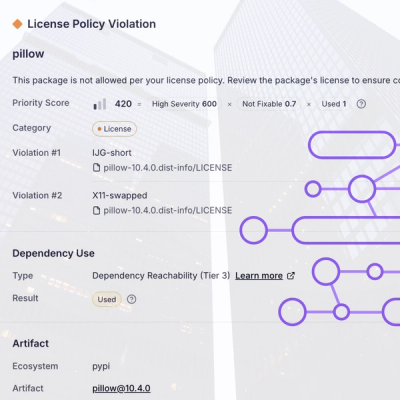
Customize license detection with Socket’s new license overlays: gain control, reduce noise, and handle edge cases with precision.

Product
Socket now supports Rust and Cargo, offering package search for all users and experimental SBOM generation for enterprise projects.