Security News
Package Maintainers Call for Improvements to GitHub’s New npm Security Plan
Maintainers back GitHub’s npm security overhaul but raise concerns about CI/CD workflows, enterprise support, and token management.
lfx is a command-line tool for running Langflow workflows. It provides two main commands: serve and run.
# Install globally
uv pip install lfx

# Or run without installing using uvx
uvx lfx serve my_flow.json
uvx lfx run my_flow.json "input"
# Clone and run in workspace
git clone https://github.com/langflow-ai/langflow
cd langflow/src/lfx
uv run lfx serve my_flow.json
lfx now supports simplified component imports for better developer experience:
Before (old import style):
from lfx.components.agents.agent import AgentComponent
from lfx.components.data.url import URLComponent
from lfx.components.input_output import ChatInput, ChatOutput
Now (new flattened style):
from lfx import components as cp

# Direct access to all components
chat_input = cp.ChatInput()
agent = cp.AgentComponent()
url_component = cp.URLComponent()
chat_output = cp.ChatOutput()
Benefits:
cp.ComponentNamelfx serve - Run flows as an APIServe a Langflow workflow as a REST API.
Important: You must set the LANGFLOW_API_KEY environment variable before running the serve command.
export LANGFLOW_API_KEY=your-secret-key
uv run lfx serve my_flow.json --port 8000
This creates a FastAPI server with your flow available at /flows/{flow_id}/run. The actual flow ID will be displayed when the server starts.
Options:
--host, -h: Host to bind server (default: 127.0.0.1)--port, -p: Port to bind server (default: 8000)--verbose, -v: Show diagnostic output--env-file: Path to .env file--log-level: Set logging level (debug, info, warning, error, critical)--check-variables/--no-check-variables: Check global variables for environment compatibility (default: check)Example:
# Set API key (required)
export LANGFLOW_API_KEY=your-secret-key

# Start server
uv run lfx serve simple_chat.json --host 0.0.0.0 --port 8000

# The server will display the flow ID, e.g.:
# Flow ID: af9edd65-6393-58e2-9ae5-d5f012e714f4

# Call API using the displayed flow ID
curl -X POST http://localhost:8000/flows/af9edd65-6393-58e2-9ae5-d5f012e714f4/run \
  -H "Content-Type: application/json" \
  -H "x-api-key: your-secret-key" \
  -d '{"input_value": "Hello, world!"}'
lfx run - Run flows directlyExecute a Langflow workflow and get results immediately.
uv run lfx run my_flow.json "What is AI?"
Options:
--format, -f: Output format (json, text, message, result) (default: json)--verbose: Show diagnostic output--input-value: Input value to pass to the graph (alternative to positional argument)--flow-json: Inline JSON flow content as a string--stdin: Read JSON flow from stdin--check-variables/--no-check-variables: Check global variables for environment compatibility (default: check)Examples:
# Basic execution
uv run lfx run simple_chat.json "Tell me a joke"

# JSON output (default)
uv run lfx run simple_chat.json "input text" --format json

# Text output only
uv run lfx run simple_chat.json "Hello" --format text

# Using --input-value flag
uv run lfx run simple_chat.json --input-value "Hello world"

# From stdin (requires --input-value for input)
echo '{"data": {"nodes": [...], "edges": [...]}}' | uv run lfx run --stdin --input-value "Your message"

# Inline JSON
uv run lfx run --flow-json '{"data": {"nodes": [...], "edges": [...]}}' --input-value "Test"
Here's a step-by-step example of creating and running an agent workflow with dependencies:
Step 1: Create the agent script
Create a file called simple_agent.py:
"""A simple agent flow example for Langflow.

This script demonstrates how to set up a conversational agent using Langflow's
Agent component with web search capabilities.

Features:
- Uses the new flattened component access (cp.AgentComponent instead of deep imports)
- Configures logging to 'langflow.log' at INFO level
- Creates an agent with OpenAI GPT model
- Provides web search tools via URLComponent
- Connects ChatInput → Agent → ChatOutput

Usage:
    uv run lfx run simple_agent.py "How are you?"
"""

import os
from pathlib import Path

# Using the new flattened component access
from lfx import components as cp
from lfx.graph import Graph
from lfx.log.logger import LogConfig

log_config = LogConfig(
    log_level="INFO",
    log_file=Path("langflow.log"),
)

# Showcase the new flattened component access - no need for deep imports!
chat_input = cp.ChatInput()
agent = cp.AgentComponent()
url_component = cp.URLComponent()
tools = url_component.to_toolkit()

agent.set(
    model_name="gpt-4.1-mini",
    agent_llm="OpenAI",
    api_key=os.getenv("OPENAI_API_KEY"),
    input_value=chat_input.message_response,
    tools=tools,
)
chat_output = cp.ChatOutput().set(input_value=agent.message_response)

graph = Graph(chat_input, chat_output, log_config=log_config)
Step 2: Install dependencies
# Install lfx (if not already installed)
uv pip install lfx

# Install additional dependencies required for the agent
uv pip install langchain-community langchain beautifulsoup4 lxml langchain-openai
Step 3: Set up environment
# Set your OpenAI API key
export OPENAI_API_KEY=your-openai-api-key-here
Step 4: Run the agent
# Run with verbose output to see detailed execution
uv run lfx run simple_agent.py "How are you?" --verbose

# Run with different questions
uv run lfx run simple_agent.py "What's the weather like today?"
uv run lfx run simple_agent.py "Search for the latest news about AI"
This creates an intelligent agent that can:
The --verbose flag shows detailed execution information including timing and component details.
Both commands support multiple input sources:
uv run lfx serve my_flow.jsonuv run lfx serve --flow-json '{"data": {"nodes": [...], "edges": [...]}}'uv run lfx serve --stdin# Install development dependencies
make dev
# Run tests
make test
# Format code
make format
MIT License. See LICENSE for details.
FAQs
Langflow Executor - A lightweight CLI tool for executing and serving Langflow AI flows
We found that lfx demonstrated a healthy version release cadence and project activity because the last version was released less than a year ago. It has 1 open source maintainer collaborating on the project.
Did you know?

Socket for GitHub automatically highlights issues in each pull request and monitors the health of all your open source dependencies. Discover the contents of your packages and block harmful activity before you install or update your dependencies.

Security News
Maintainers back GitHub’s npm security overhaul but raise concerns about CI/CD workflows, enterprise support, and token management.

Product
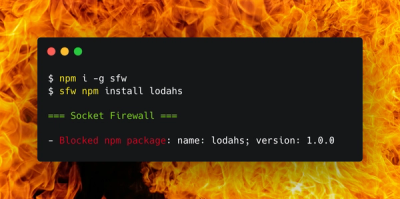
Socket Firewall is a free tool that blocks malicious packages at install time, giving developers proactive protection against rising supply chain attacks.

Research
Socket uncovers malicious Rust crates impersonating fast_log to steal Solana and Ethereum wallet keys from source code.