Research
/Security News
9 Malicious NuGet Packages Deliver Time-Delayed Destructive Payloads
Socket researchers discovered nine malicious NuGet packages that use time-delayed payloads to crash applications and corrupt industrial control systems.
mcp-tavily
Advanced tools
A Model Context Protocol server that provides AI-powered web search capabilities using Tavily's search API
A Model Context Protocol server that provides AI-powered web search capabilities using Tavily's search API. This server enables LLMs to perform sophisticated web searches, get direct answers to questions, and search recent news articles with AI-extracted relevant content.
tavily_web_search - Performs comprehensive web searches with AI-powered content extraction.
query (string, required): Search querymax_results (integer, optional): Maximum number of results to return (default: 5, max: 20)search_depth (string, optional): Either "basic" or "advanced" search depth (default: "basic")include_domains (list or string, optional): List of domains to specifically include in resultsexclude_domains (list or string, optional): List of domains to exclude from resultstavily_answer_search - Performs web searches and generates direct answers with supporting evidence.
query (string, required): Search querymax_results (integer, optional): Maximum number of results to return (default: 5, max: 20)search_depth (string, optional): Either "basic" or "advanced" search depth (default: "advanced")include_domains (list or string, optional): List of domains to specifically include in resultsexclude_domains (list or string, optional): List of domains to exclude from resultstavily_news_search - Searches recent news articles with publication dates.
query (string, required): Search querymax_results (integer, optional): Maximum number of results to return (default: 5, max: 20)days (integer, optional): Number of days back to search (default: 3)include_domains (list or string, optional): List of domains to specifically include in resultsexclude_domains (list or string, optional): List of domains to exclude from resultsThe server also provides prompt templates for each search type:
uv Python package manager (recommended)# With pip
pip install mcp-tavily
# Or with uv (recommended)
uv add mcp-tavily
You should see output similar to:
Resolved packages: mcp-tavily, mcp, pydantic, python-dotenv, tavily-python [...]
Successfully installed mcp-tavily-0.1.4 mcp-1.0.0 [...]
# Clone the repository
git clone https://github.com/RamXX/mcp-tavily.git
cd mcp-tavily

# Create a virtual environment (optional but recommended)
python -m venv .venv
source .venv/bin/activate  # On Windows: .venv\Scripts\activate

# Install dependencies and build
uv sync  # Or: pip install -r requirements.txt
uv build  # Or: pip install -e .

# To install with test dependencies:
uv sync --dev  # Or: pip install -r requirements-dev.txt
During installation, you should see the package being built and installed with its dependencies.
For quick installation, use one of the one-click install buttons below:
For manual installation, add the following JSON block to your User Settings (JSON) file in VS Code. You can do this by pressing Ctrl + Shift + P and typing Preferences: Open User Settings (JSON).
Optionally, you can add it to a file called .vscode/mcp.json in your workspace. This will allow you to share the configuration with others.
Note that the
mcpkey is not needed in the.vscode/mcp.jsonfile.
{
  "mcp": {
    "inputs": [
      {
        "type": "promptString",
        "id": "apiKey",
        "description": "Tavily API Key",
        "password": true
      }
    ],
    "servers": {
      "tavily": {
        "command": "uvx",
        "args": ["mcp-tavily"],
        "env": {
          "TAVILY_API_KEY": "${input:apiKey}"
        }
      }
    }
  }
}
The server requires a Tavily API key, which can be provided in three ways:
Through a .env file in your project directory:
TAVILY_API_KEY=your_api_key_here
As an environment variable:
export TAVILY_API_KEY=your_api_key_here
As a command-line argument:
python -m mcp_server_tavily --api-key=your_api_key_here
Add to your Claude settings:
"mcpServers": {
  "tavily": {
    "command": "python",
    "args": ["-m", "mcp_server_tavily"]
  },
  "env": {
    "TAVILY_API_KEY": "your_api_key_here"
  }
}
If you encounter issues, you may need to specify the full path to your Python interpreter. Run which python to find the exact path.
For a regular web search:
Tell me about Anthropic's newly released MCP protocol
To generate a report with domain filtering:
Tell me about redwood trees. Please use MLA format in markdown syntax and include the URLs in the citations. Exclude Wikipedia sources.
To use answer search mode for direct answers:
I want a concrete answer backed by current web sources: What is the average lifespan of redwood trees?
For news search:
Give me the top 10 AI-related news in the last 5 days
The project includes a comprehensive test suite with automated dependency compatibility testing.
Install test dependencies:
source .venv/bin/activate  # If using a virtual environment
uv sync --dev  # Or: pip install -r requirements-dev.txt
Run the standard test suite:
./tests/run_tests.sh
# Or using Make
make test
To ensure the project works with the latest dependency versions, use these commands:
# Test with latest dependencies using Make
make test-deps

# Full compatibility test with verbose output
make test-compatibility

# Or use the standalone script
./scripts/test-compatibility.sh
These commands will:
The project includes automated dependency compatibility testing through GitHub Actions:
When tests pass: Your project is compatible with the latest dependency versions. You can safely update your requirements files.
When tests fail: Review the test output to identify breaking changes, update your code to handle API changes, update tests if needed, or consider pinning problematic dependency versions.
You should see output similar to:
======================================================= test session starts ========================================================
platform darwin -- Python 3.13.3, pytest-8.3.5, pluggy-1.5.0
rootdir: /Users/ramirosalas/workspace/mcp-tavily
configfile: pyproject.toml
plugins: cov-6.0.0, asyncio-0.25.3, anyio-4.8.0, mock-3.14.0
asyncio: mode=Mode.STRICT, asyncio_default_fixture_loop_scope=function
collected 50 items

tests/test_docker.py ..                                                                                                      [  4%]
tests/test_integration.py .....                                                                                              [ 14%]
tests/test_models.py .................                                                                                       [ 48%]
tests/test_server_api.py .....................                                                                               [ 90%]
tests/test_utils.py .....                                                                                                    [100%]

---------- coverage: platform darwin, python 3.13.3-final-0 ----------
Name                                Stmts   Miss  Cover
-------------------------------------------------------
src/mcp_server_tavily/__init__.py      16      2    88%
src/mcp_server_tavily/__main__.py       2      2     0%
src/mcp_server_tavily/server.py       149     16    89%
-------------------------------------------------------
TOTAL                                 167     20    88%
The test suite includes tests for data models, utility functions, integration testing, error handling, and parameter validation. It focuses on verifying that all API capabilities work correctly, including handling of domain filters and various input formats.
The project includes tools for building and releasing with the latest dependency versions:
# Build package with latest dependency versions
make build-latest

# Complete release workflow: test, build, and check with latest deps
make release-all

# Prepare a release with version management
./scripts/prepare-release.sh [new_version]
Recommended approach for releases with latest dependencies:
make release-allmake upload-latestAlternative step-by-step approach:
make test-compatibilitymake release-buildmake upload-latestOne-command release and publish:
make release-publish
Important: Use make upload-latest instead of make upload to prevent dependency downgrades during the upload process. The upload-latest command uses existing distribution files without reinstalling dependencies.
The release commands ensure your package is built and tested with the most recent compatible dependency versions, preventing the downgrades that can occur with traditional build chains.
Build the Docker image:
make docker-build
Alternatively, build directly with Docker:
docker build -t mcp_tavily .
Run a detached Docker container (default name mcp_tavily_container, port 8000 → 8000):
make docker-run
Or manually:
docker run -d --name mcp_tavily_container \
  -e TAVILY_API_KEY=your_api_key_here \
  -p 8000:8000 mcp_tavily
Stop and remove the container:
make docker-stop
Follow container logs:
make docker-logs
You can override defaults by setting environment variables:
mcp_tavily)mcp_tavily_container)8000)8000)You can use the MCP inspector to debug the server:
# Using npx
npx @modelcontextprotocol/inspector python -m mcp_server_tavily

# For development
cd path/to/mcp-tavily
npx @modelcontextprotocol/inspector python -m mcp_server_tavily
We welcome contributions to improve mcp-tavily! Here's how you can help:
git checkout -b feature/amazing-feature)git commit -m 'Add amazing feature')git push origin feature/amazing-feature)For examples of other MCP servers and implementation patterns, see: https://github.com/modelcontextprotocol/servers
mcp-tavily is licensed under the MIT License. See the LICENSE file for details.
FAQs
A Model Context Protocol server that provides AI-powered web search capabilities using Tavily's search API
We found that mcp-tavily demonstrated a healthy version release cadence and project activity because the last version was released less than a year ago. It has 1 open source maintainer collaborating on the project.
Did you know?

Socket for GitHub automatically highlights issues in each pull request and monitors the health of all your open source dependencies. Discover the contents of your packages and block harmful activity before you install or update your dependencies.

Research
/Security News
Socket researchers discovered nine malicious NuGet packages that use time-delayed payloads to crash applications and corrupt industrial control systems.

Security News
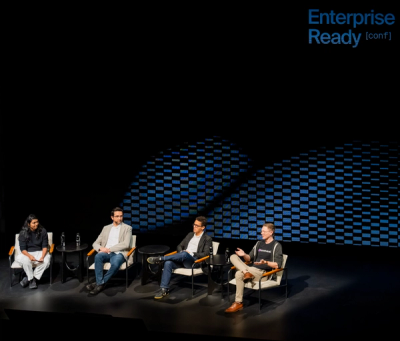
Socket CTO Ahmad Nassri discusses why supply chain attacks now target developer machines and what AI means for the future of enterprise security.

Security News
Learn the essential steps every developer should take to stay secure on npm and reduce exposure to supply chain attacks.