Security News
Crates.io Users Targeted by Phishing Emails
The Rust Security Response WG is warning of phishing emails from rustfoundation.dev targeting crates.io users.

PLua is a powerful Lua interpreter built on Python that provides native Fibaro Home Center 3 (HC3) QuickApp development and emulation. Whether you're developing QuickApps for Fibaro home automation or just need a robust Lua runtime with async capabilities, PLua has you covered.
# Install PLua via pip
pip install plua
# Verify installation
plua --version
If you want to contribute or work with the latest development version:
# Clone and set up for development
git clone https://github.com/jangabrielsson/plua.git
cd plua
python -m venv .venv
source .venv/bin/activate  # On Windows: .venv\Scripts\activate
pip install -e .
# Initialize a new QuickApp project with scaffolding
plua --init-qa

# Choose from 42 device templates:
# [1] Basic QuickApp - Simple starter template
# [2] Binary Switch - On/Off switch with actions
# [3] Multilevel Switch - Dimmer/level control
# [4] Temperature Sensor - Temperature measurement
# ... and many more!
This creates a complete project structure:
my-quickapp/
├── .vscode/
│   ├── launch.json    # F5 debugging configuration
│   └── tasks.json     # HC3 upload/sync tasks
├── .project           # HC3 deployment config
└── main.lua          # Your QuickApp code
# Run your QuickApp with full Fibaro SDK
plua --fibaro main.lua

# With desktop UI window (if your QA has --%%desktop:true)
plua --fibaro main.lua

# Run for specific duration
plua --fibaro main.lua --run-for 30  # 30 seconds minimum
# Open project in VS Code
code .

# Press F5 to run/debug your QuickApp
# Use Ctrl+Shift+P -> "Tasks: Run Task" for HC3 operations:
# - "QA, upload current file as QA to HC3"
# - "QA, update QA (defined in .project)"
# - "QA, update single file (part of .project)"
--%%name:My Temperature Sensor
--%%type:com.fibaro.temperatureSensor
--%%u:{label="temp", text="--°C"}

function QuickApp:onInit()
    self:debug("Temperature sensor started")
    self:updateView("temp", "text", "22.5°C")

    -- Simulate temperature readings
    fibaro.setInterval(5000, function()
        local temp = math.random(180, 250) / 10  -- 18.0-25.0°C
        self:updateView("temp", "text", temp .. "°C")
        self:updateProperty("value", temp)
    end)
end
PLua supports all standard Fibaro UI elements:
--%%u:{button="btn1", text="Turn On", onReleased="turnOn"}
--%%u:{slider="level", min="0", max="100", onChanged="setLevel"}
--%%u:{switch="toggle", text="Auto Mode", onToggled="setAuto"}
--%%u:{label="status", text="Ready"}
Add --%%desktop:true to automatically open desktop UI windows:
--%%name:My Smart Light
--%%desktop:true
--%%u:{button="on", text="ON", onReleased="turnOn"}
# Start interactive Lua session (recommended)
plua -i

# With Fibaro SDK loaded
plua -i --fibaro
In the REPL:
> print("Hello from PLua!")
Hello from PLua!

> fibaro.debug("Testing Fibaro API")
[DEBUG] Testing Fibaro API

> local qa = fibaro.createQuickApp(555)
> qa:debug("QuickApp created!")
PLua includes a multi-session telnet server for remote development:
# Start with telnet server (port 8023)
plua --telnet script.lua

# Or start just the telnet server
plua --telnet

# Connect from another terminal
telnet localhost 8023
PLua provides comprehensive networking capabilities:
-- HTTP requests (async)
http.request("https://api.example.com/data", {
    method = "GET",
    success = function(response)
        print("Response:", response.data)
    end
})

-- WebSocket connections
local ws = websocket.connect("ws://localhost:8080")
ws:send("Hello WebSocket!")

-- MQTT client
local mqtt = require("mqtt")
mqtt.connect("broker.hivemq.com", 1883)

-- TCP/UDP sockets
local tcp = require("tcp")
local client = tcp.connect("127.0.0.1", 8080)
plua [script.lua] [options]

Positional Arguments:
  script              Lua script file to run (optional)

Options:
  -h, --help          Show help message and exit
  -v, --version       Show version information
  --init-qa           Initialize a new QuickApp project
  -e, --eval EVAL     Execute Lua code fragments
  -i, --interactive   Start interactive Lua REPL (stdin/stdout with prompt_toolkit)
  --telnet            Start telnet server for remote REPL access
  --loglevel LEVEL    Set logging level (debug, info, warning, error)
  -o, --offline       Run in offline mode (disable HC3 connections)
  --desktop [BOOL]    Override desktop UI mode for QuickApp windows (true/false)
  -t, --tool          Run tool, [help, downloadQA, uploadQA, updateFile, updateQA]
  --nodebugger        Disable Lua debugger support
  --fibaro            Enable Fibaro HC3 emulation mode
  -l                  Ignored, for Lua CLI compatibility
  --header HEADER     Add header string (can be used multiple times)
  -a, --args ARGS     Add argument string to pass to the script
  --api-port PORT     Port for FastAPI server (default: 8080)
  --api-host HOST     Host for FastAPI server (default: localhost)
  --telnet-port PORT  Port for telnet server (default: 8023)
  --no-api            Disable FastAPI server
  --run-for N         Run script for specified seconds then terminate:
                      N > 0: Run at least N seconds or until no callbacks
                      N = 0: Run indefinitely (until killed)
                      N < 0: Run exactly |N| seconds
Check out the examples/ directory:
# Fibaro QuickApp examples
ls examples/fibaro/

# Basic Lua examples
ls examples/lua/

# Python integration examples
ls examples/python/
-- Different log levels
self:debug("Debug message")
self:trace("Trace message")
fibaro.debug("Global debug")
print("Console output")
-- Update UI elements in real-time
self:updateView("label1", "text", "New text")
self:updateView("slider1", "value", 75)

-- Updates immediately appear in desktop windows
Run several QuickApps simultaneously:
plua --fibaro qa1.lua qa2.lua qa3.lua
PLua supports all Fibaro device types and interfaces:
MIT License - see LICENSE for details.
Happy QuickApp Development! 🏠✨
FAQs
Python project using Lupa to run Lua scripts with async timer functionality
We found that plua demonstrated a healthy version release cadence and project activity because the last version was released less than a year ago. It has 1 open source maintainer collaborating on the project.
Did you know?

Socket for GitHub automatically highlights issues in each pull request and monitors the health of all your open source dependencies. Discover the contents of your packages and block harmful activity before you install or update your dependencies.

Security News
The Rust Security Response WG is warning of phishing emails from rustfoundation.dev targeting crates.io users.

Product
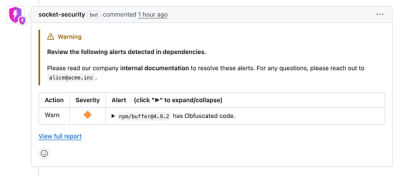
Socket now lets you customize pull request alert headers, helping security teams share clear guidance right in PRs to speed reviews and reduce back-and-forth.

Product
Socket's Rust support is moving to Beta: all users can scan Cargo projects and generate SBOMs, including Cargo.toml-only crates, with Rust-aware supply chain checks.