Research
Malicious fezbox npm Package Steals Browser Passwords from Cookies via Innovative QR Code Steganographic Technique
A malicious package uses a QR code as steganography in an innovative technique.
##################### Pyfbook Documentation #####################
A python package to easily collect data from Facebook Marketing API
Installation
Open a terminal and install pyfbook package. Your SSH key should be authorised on pyfook git repository
For github repository:
.. code-block:: bash
pip install git+ssh://git@github.com/[[repository_address]]/pyfbook.git
Configuration
You need to configure a database to use pyfbook. Pyfbook required a dbstream object to work properly.
You can use pyred, pyzure or pybigquery depending on your database provider.
To define a dbstream object, you need to add in your environment the following variables
For Redshift:
.. code-block:: bash
export RED_[YOUR_PROJECT_NAME]_DATABASE="database_name"
export RED_[YOUR_PROJECT_NAME]_USERNAME="database_username"
export RED_[YOUR_PROJECT_NAME]_PASSWORD="database_password"
export RED_[YOUR_PROJECT_NAME]_HOST="database_host"
export RED_[YOUR_PROJECT_NAME]_PORT="database_port"
For Azure:
.. code-block:: bash
export AZURE_[YOUR_PROJECT_NAME]_DATABASE="database_name"
export AZURE_[YOUR_PROJECT_NAME]_USERNAME="database_username"
export AZURE_[YOUR_PROJECT_NAME]_PASSWORD="database_password"
export AZURE_[YOUR_PROJECT_NAME]_HOST="database_host"
export AZURE_[YOUR_PROJECT_NAME]_PORT="database_port"
Then you can init a dbstream object in your python code.
For Redshift:
.. code-block:: python
# For Redshift
from pyred import RedDBStream as DBStream
# For Azure
from pyzure import AzureDBStream as DBStream


NAME = "[YOUR_PROJECT_NAME]"
CLIENT_ID = 1

datamart = DBStream(
    NAME,
    client_id=CLIENT_ID
)
Add in your environment the following variables
.. code-block:: bash
export [CHOOSE A FACEBOOK APP_ID NAME REFERENCE] = “YOUR_FACEBOOK_APP_ID”
export [CHOOSE A FACEBOOK APP_SECRET NAME REFERENCE] = “YOUR_FACEBOOK_APP_SECRET”
export [CHOOSE A FACEBOOK ACCESSTOKEN NAME REFERENCE] = “YOUR_FACEBOOK_ACCESSTOKEN”
You need a .yaml config file to use pyfbook.
You can create a default one in your working directory with the following python code :
.. code-block:: python
from pyfbook.FacebookReport import Facebook

Facebook()
Do not forget to update the schema_name. This is where everything will happen in you database!
You need to execute the following python code
.. code-block:: python
facebook = Facebook(config_path="[PATH_TO_YOUR_CONFIG_FILE]", dbstream=[YOUR DBSTREAM OBJECT])
facebook.create_app_system_user(
    app_id_name="APP_ID NAME REFERENCE",
    app_secret_name="APP_SECRET NAME REFERENCE",
    access_token_name="ACCESSTOKEN NAME REFERENCE"
 )
By default, pyfbook use Graph API v8.0. You can change that by adding a DEFAULT_GRAPH_API_VERSION environment variable.
Get Facebook Data
.. code-block:: python
facebook.get_all_ad_accounts()
It will create a table with the list of ad accounts you have access to.
You can update the "active" field in this table to choose which account you want to recover the data.
Pyfbook uses asynchronous reports to get data.
.. code-block:: python
facebook.get(
    report_name=None,
    time_increment=None,
    start=None, end=None,
    list_account_ids=None
)
When you execute this python code, it will launch and fetch asynchronous reports.
Your config field should look like the following:
.. code-block:: yaml
schema_name: pyfbook_raw_data
reports:
  - name: account
    level: account
    fields:
      - impressions
      - spend
      - clicks
      - purchase
      - unique_clicks
      - reach
      - date_start
      - date_stop
      - account_id
    time_increments:
      - day
      - lifetime
    breakdowns:
      - country
You can list as many report as you want.
Results will be saved in [schema_name].[report_name]_[time_increment].
You can specify start and end dates in your python 'get' function : 'YYYY-MM-DD'.
.. note::
If nothing is specified :

- If this reports was launched at least once before, start date will be :
    - **Time increment = day**: The max end date saved for this report minus 1 day
    - **Other Time increment**: The max end date saved for this report minus 28 days
- First time report
    - You can specify a DEFAULT_START_DATE environment variable
    - If not start date will be current date minus 1 year
- End date is current date
This process is done at account level.
FAQs
Easily collect data from Facebook APIs
We found that pyfbook demonstrated a healthy version release cadence and project activity because the last version was released less than a year ago. It has 1 open source maintainer collaborating on the project.
Did you know?

Socket for GitHub automatically highlights issues in each pull request and monitors the health of all your open source dependencies. Discover the contents of your packages and block harmful activity before you install or update your dependencies.

Research
A malicious package uses a QR code as steganography in an innovative technique.

Research
/Security News
Socket identified 80 fake candidates targeting engineering roles, including suspected North Korean operators, exposing the new reality of hiring as a security function.

Application Security
/Research
/Security News
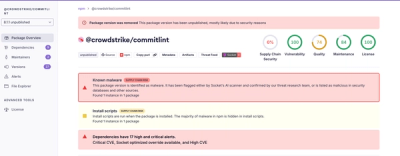
Socket detected multiple compromised CrowdStrike npm packages, continuing the "Shai-Hulud" supply chain attack that has now impacted nearly 500 packages.