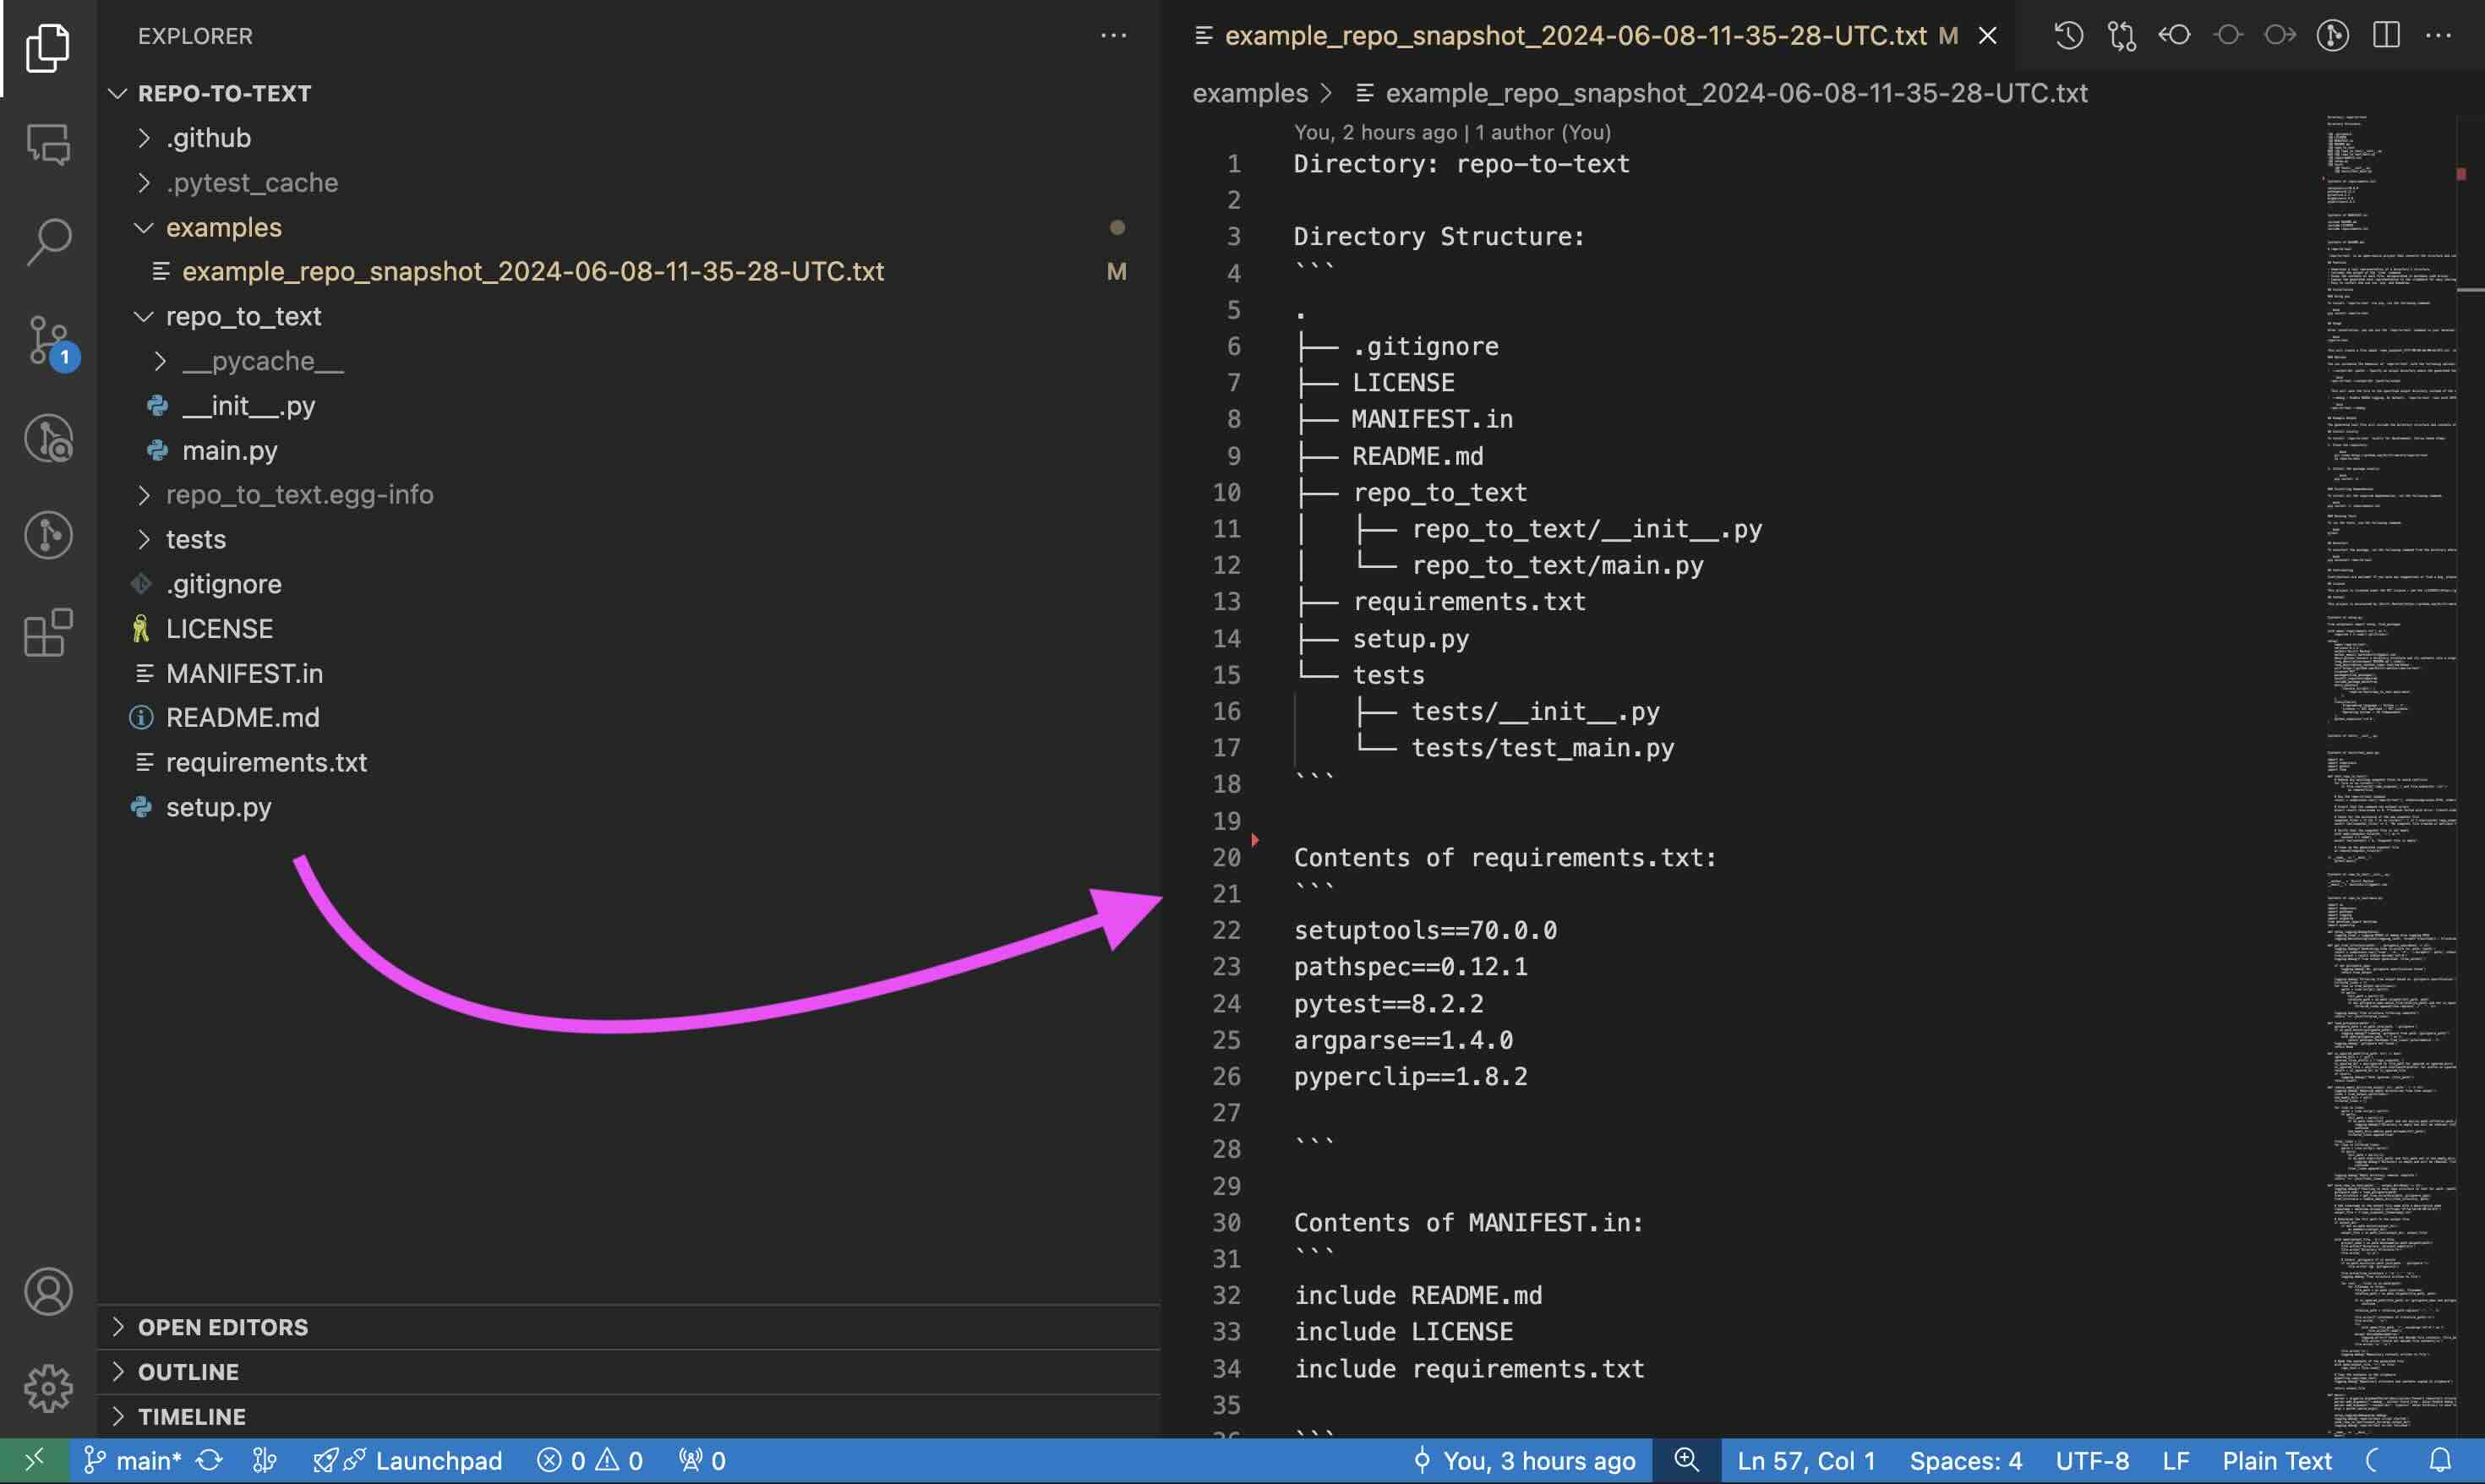
Repository to Text Conversion: repo-to-text command
repo-to-text converts a directory's structure and contents into a single text file. Run it from the terminal to generate a formatted text representation that includes the directory tree and file contents. This makes it easy to share code with LLMs for development and debugging.
Quick Start
pip install repo-to-text — install the packagecd <your-repo-dir> — navigate to the repository directoryrepo-to-text — run the command, result will be saved in the current directory
Example of Repository to Text Conversion

The generated text file will include the directory structure and contents of each file, using XML tags for better structure:
<repo-to-text>
Directory: myproject

Directory Structure:
<directory_structure>
.
├── .gitignore
├── README.md
└── src
    └── main.py
</directory_structure>

<content full_path="README.md">
# My Project
This is a simple project.
</content>

<content full_path="src/main.py">
def main():
    print("Hello, World!")

if __name__ == "__main__":
    main()
</content>

</repo-to-text>

For a full example, see the [example output for this repository](https://github.com/kirill-markin/repo-to-text/blob/main/examples/example_repo-to-text_2024-06-09-08-06-31-UTC.txt).

## Installation

### Using pip

To install `repo-to-text` via pip, run the following command:

```bash
pip install repo-to-text
To upgrade to the latest version, use the following command:
pip install --upgrade repo-to-text
Usage
After installation, you can use the repo-to-text command in your terminal. Navigate to the directory you want to convert and run:
repo-to-text
or
flatten
This will create a file named repo-to-text_YYYY-MM-DD-HH-MM-SS-UTC.txt in the current directory with the text representation of the repository. The contents of this file will also be copied to your clipboard for easy sharing.
Options
You can customize the behavior of repo-to-text with the following options:
-
--output-dir <path>: Specify an output directory where the generated text file will be saved. For example:
repo-to-text --output-dir /path/to/output
This will save the file in the specified output directory instead of the current directory.
-
--create-settings or --init: Create a default .repo-to-text-settings.yaml file with predefined settings. This is useful if you want to start with a template settings file and customize it according to your needs. To create the default settings file, run the following command in your terminal:
repo-to-text --create-settings
or
repo-to-text --init
This will create a file named .repo-to-text-settings.yaml in the current directory. If the file already exists, an error will be raised to prevent overwriting.
-
--debug: Enable DEBUG logging. By default, repo-to-text runs with INFO logging level. To enable DEBUG logging, use the --debug flag:
repo-to-text --debug
or to save the debug log to a file:
repo-to-text --debug > debug_log.txt 2>&1
-
input_dir: Specify the directory to process. If not provided, the current directory (.) will be used. For example:
repo-to-text /path/to/input_dir
-
--stdout: Output the generated text to stdout instead of a file. This is useful for piping the output to another command or saving it to a file using shell redirection. For example:
repo-to-text --stdout > myfile.txt
This will write the output directly to myfile.txt instead of creating a timestamped file.
Docker Usage
Building and Running
Once in the shell, you can run repo-to-text:
-
Process current directory:
repo-to-text
-
Process specific directory:
repo-to-text /home/user/myproject
-
Use with options:
repo-to-text --output-dir /home/user/output
The container mounts your home directory at /home/user, allowing access to all your projects.
Settings
repo-to-text also supports configuration via a .repo-to-text-settings.yaml file. By default, the tool works without this file, but you can use it to customize what gets included in the final text file.
Creating the Settings File
To create a settings file, add a file named .repo-to-text-settings.yaml at the root of your project with the following content:
gitignore-import-and-ignore: True
ignore-tree-and-content:
- ".repo-to-text-settings.yaml"
- "examples/"
- "MANIFEST.in"
- "setup.py"
ignore-content:
- "README.md"
- "LICENSE"
- "tests/"
You can copy this file from the existing example in the project and adjust it to your needs. This file allows you to specify rules for what should be ignored when creating the text representation of the repository.
Configuration Options
- gitignore-import-and-ignore: Ignore files and directories specified in
.gitignore for all sections.
- ignore-tree-and-content: Ignore files and directories for the tree and contents sections.
- ignore-content: Ignore files and directories only for the contents sections.
Using these settings, you can control which files and directories are included or excluded from the final text file.
- maximum_word_count_per_file: Optional integer. Sets a maximum word count for each output file. If the total content exceeds this limit, the output will be split into multiple files. The split files will be named using the convention
output_filename_part_N.txt, where N is the part number.
Example:
Wildcards and Inclusions
Using Wildcard Patterns
*.ext: Matches any file ending with .ext in any directory.dir/*.ext: Matches files ending with .ext in the specified directory dir/.**/*.ext: Matches files ending with .ext in any subdirectory (recursive).
If you want to include certain files that would otherwise be ignored, use the ! pattern:
ignore-tree-and-content:
  - "*.txt"
  - "!README.txt"
gitignore Rule to Ignore generated files
To ignore the generated text files, add the following lines to your .gitignore file:
repo-to-text_*.txt
Install Locally
To install repo-to-text locally for development, follow these steps:
Requirements
- Python >= 3.6
- Core dependencies:
- setuptools >= 70.0.0
- pathspec >= 0.12.1
- argparse >= 1.4.0
- PyYAML >= 6.0.1
Development Dependencies
For development, additional packages are required:
- pytest >= 8.2.2
- black
- mypy
- isort
- build
- twine
Running Tests
To run the tests, use the following command:
pytest
Uninstall
To uninstall the package, run the following command from the directory where the repository is located:
pip uninstall repo-to-text
Contributing
Contributions are welcome! If you have any suggestions or find a bug, please open an issue or submit a pull request.
License
This project is licensed under the MIT License - see the LICENSE file for details.
Contact
This project is maintained by Kirill Markin. For any inquiries or feedback, please contact markinkirill@gmail.com.


