Product
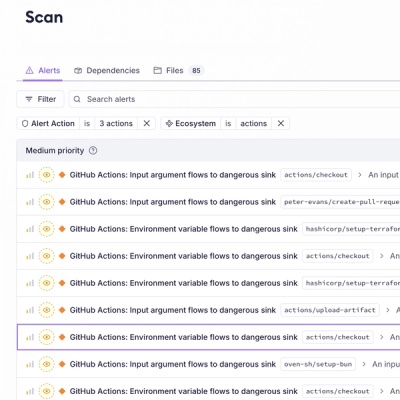
Introducing GitHub Actions Scanning Support
Detect malware, unsafe data flows, and license issues in GitHub Actions with Socket’s new workflow scanning support.
By Rakesh Chatrath, Greg Tystahl - Oct 23, 2025
TeleNotify by ppati000 enables your Rails app to send notifications/messages to your users via Telegram's Bot API. Forget email newsletters!
A working demo can be tested here. For the source, see the TeleTest repository
Note: For any news, questions, suggestions or anything else, contact and/or follow me on Twitter or send me a mail
Needless to say, you need a Telegram bot account first. To generate a new Telegram bot, message @botfather on Telegram. For more information, see the official guide. During this process, you will obtain a token which you will need in the following steps.
Just add the following to your Gemfile.
#Gemfile
gem 'tele_notify', '~> 0.1'
And follow that up with a bundle install.
TeleNotify uses a telegram_users table to store all users. To generate and run the migration just use.
rails generate tele_notify:migration
This will also generate a config file in config/initializers/tele_notify.rb. Make sure to set your Telegram token and application URLs here. It should look something like this:
#Set your home URL, so Telegram callbacks work
#For production, just use your URL (e.g. https://myapp.com)
#You MUST NOT include a trailing slash and it MUST be https!
#INVALID URLS: e.g. http://myapp.com or https://myapp.com/
TeleNotify::TelegramUser.configure_home_url("YOUR PRODUCTION URL")

#For development, download ngrok from https://ngrok.com/.
#Extract it and run "./ngrok http 3000"
#Then copy the URL you get from the console window.
#Remember to use the HTTPS URL!
TeleNotify::TelegramUser.configure_dev_url("YOUR NGROK DEVELOPMENT URL")

#Set your Telegram Bot API token here
#Don't have your token yet? Create your bot using https://telegram.me/botfather
TeleNotify::TelegramUser.configure_token("YOUR TOKEN")
Next, add two lines of code to make your ApplicationController look like this:
#app/controllers/application_controller.rb
class ApplicationController < ActionController::Base
  protect_from_forgery with: :exception

  #IMPORTANT! THESE TWO LINES MUST COME AFTER protect_from_forgery!
  skip_before_filter :verify_authenticity_token, :only => :webhook
  include TeleNotify::Controller

  #other code...
end
Last but not least, add a callback URL for Telegram in config/routes.rb, which must be the same as your token.
#config/routes.rb
Rails.application.routes.draw do
  post '/<your token>' => 'application#webhook'
end
Now that everything is done, you can finally run rake db:migrate. Congratulations! Yout successfully installed TeleNotify!
To give users the ability to sign up for your Telegram Notifications, put a link to your telegram bot somewhere in your app. This can be as simple as
<a href="https://telegram.me/YOUR_BOT_USERNAME">Send us a message to receive Push Notifications via Telegram!"</a>
Any user that sends a message to your bot will be stored in the database with their telegram_id and their first_name.
Send messages to those users like this: (e.g. from some controller in your app)
#in some controller action

#sends message to a user
TeleNotify::TelegramUser.find(1).send_message("How Obama won the internet: Read more at http://example.com")

#finds a user by his Telegram ID and sends him a message
TeleNotify::TelegramUser.find_by(telegram_id: 12345678).send_message("Some other notification")

#sends a message to everyone who signed up
TeleNotify::TelegramUser.send_message_to_all("Check out our new stuff!")
All testing is currently here: TeleTest repository
0.1
Fork it. Commit your changes. Make a pull request :)
TeleNotify was initially forked from Acts as votable by ryanto. It is released under the MIT License.
FAQs
Unknown package
We found that tele_notify demonstrated a not healthy version release cadence and project activity because the last version was released a year ago. It has 2 open source maintainers collaborating on the project.
Did you know?

Socket for GitHub automatically highlights issues in each pull request and monitors the health of all your open source dependencies. Discover the contents of your packages and block harmful activity before you install or update your dependencies.
Product
Detect malware, unsafe data flows, and license issues in GitHub Actions with Socket’s new workflow scanning support.
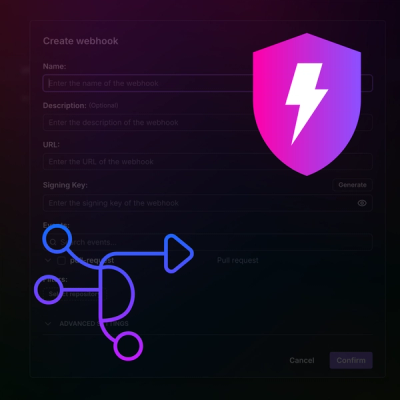
Product
Add real-time Socket webhook events to your workflows to automatically receive pull request scan results and security alerts in real time.

Research
The Socket Threat Research Team uncovered malicious NuGet packages typosquatting the popular Nethereum project to steal wallet keys.