Research
/Security News
Critical Vulnerability in NestJS Devtools: Localhost RCE via Sandbox Escape
A flawed sandbox in @nestjs/devtools-integration lets attackers run code on your machine via CSRF, leading to full Remote Code Execution (RCE).
github.com/KScaesar/go-layout
在進行開發或整合測試之前,請先設定以下環境變數:
ref1
CONF_PATH:config 的完整路徑(如 configs/example.yml)。WORK_DIR:工作目錄的路徑。CGO_ENABLED:設定為 1 以啟用 CGO 支援,僅 macOS 需要開啟。Run Application:
ref1
export CONF_PATH=$(pwd)/configs/acs3.yml

go run ./cmd/acs3/main.go
or
go run ./cmd/acs3/main.go --conf=$(pwd)/configs/acs3.yml
Run Integration Test:
ref1
ref2
export WORK_DIR=$(pwd)
export CGO_ENABLED=1

go test -tags=intg -count=1 -v ./pkg/...
Run Unit Test:
go test -count=1 ./pkg/...

首先要分成兩個視角
思路
utility/, inject/ 雖然物理位置在 pkg/ 底下, 但只是為了集中 go 程式才放在一起, 抽象意義並不會跟 pkg/ 一起思考pkg/ 是所有 go 程式的物理存放位置pkg/ 物理位置有四個目錄 adapters/, app/, utility/, inject/, 用抽象角度思考可以分為三個類型
pkg/, app/, adapters/: 和商業邏輯相關的程式碼 及 global variable 依賴 (defaultErrorRegistry, defaultLogger, defaultShutdown, defaultVersion ...)utility/: 提供技術類型的元件, 期望未來可以成為公司專用 package, 避免每個 project 的做法不同inject/: 組裝 project code, 讓不同的進入端點(main.go, xxx_test.go)使用app/, 有人也稱為 service layergolang-standards/project-layout
To make it easy for you to get started with GitLab, here's a list of recommended next steps.
Already a pro? Just edit this README.md and make it your own. Want to make it easy? Use the template at the bottom!
Use the built-in continuous integration in GitLab.
When you're ready to make this README your own, just edit this file and use the handy template below (or feel free to structure it however you want - this is just a starting point!). Thanks to makeareadme.com for this template.
Every project is different, so consider which of these sections apply to yours. The sections used in the template are suggestions for most open source projects. Also keep in mind that while a README can be too long and detailed, too long is better than too short. If you think your README is too long, consider utilizing another form of documentation rather than cutting out information.
Choose a self-explaining name for your project.
Let people know what your project can do specifically. Provide context and add a link to any reference visitors might be unfamiliar with. A list of Features or a Background subsection can also be added here. If there are alternatives to your project, this is a good place to list differentiating factors.
On some READMEs, you may see small images that convey metadata, such as whether or not all the tests are passing for the project. You can use Shields to add some to your README. Many services also have instructions for adding a badge.
Depending on what you are making, it can be a good idea to include screenshots or even a video (you'll frequently see GIFs rather than actual videos). Tools like ttygif can help, but check out Asciinema for a more sophisticated method.
Within a particular ecosystem, there may be a common way of installing things, such as using Yarn, NuGet, or Homebrew. However, consider the possibility that whoever is reading your README is a novice and would like more guidance. Listing specific steps helps remove ambiguity and gets people to using your project as quickly as possible. If it only runs in a specific context like a particular programming language version or operating system or has dependencies that have to be installed manually, also add a Requirements subsection.
Use examples liberally, and show the expected output if you can. It's helpful to have inline the smallest example of usage that you can demonstrate, while providing links to more sophisticated examples if they are too long to reasonably include in the README.
Tell people where they can go to for help. It can be any combination of an issue tracker, a chat room, an email address, etc.
If you have ideas for releases in the future, it is a good idea to list them in the README.
State if you are open to contributions and what your requirements are for accepting them.
For people who want to make changes to your project, it's helpful to have some documentation on how to get started. Perhaps there is a script that they should run or some environment variables that they need to set. Make these steps explicit. These instructions could also be useful to your future self.
You can also document commands to lint the code or run tests. These steps help to ensure high code quality and reduce the likelihood that the changes inadvertently break something. Having instructions for running tests is especially helpful if it requires external setup, such as starting a Selenium server for testing in a browser.
Show your appreciation to those who have contributed to the project.
For open source projects, say how it is licensed.
If you have run out of energy or time for your project, put a note at the top of the README saying that development has slowed down or stopped completely. Someone may choose to fork your project or volunteer to step in as a maintainer or owner, allowing your project to keep going. You can also make an explicit request for maintainers.
FAQs
Unknown package
Did you know?

Socket for GitHub automatically highlights issues in each pull request and monitors the health of all your open source dependencies. Discover the contents of your packages and block harmful activity before you install or update your dependencies.

Research
/Security News
A flawed sandbox in @nestjs/devtools-integration lets attackers run code on your machine via CSRF, leading to full Remote Code Execution (RCE).

Product
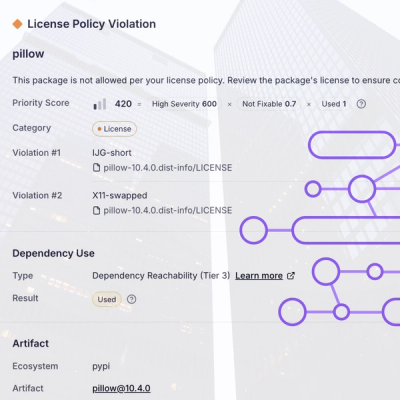
Customize license detection with Socket’s new license overlays: gain control, reduce noise, and handle edge cases with precision.

Product
Socket now supports Rust and Cargo, offering package search for all users and experimental SBOM generation for enterprise projects.