Security News
Crates.io Users Targeted by Phishing Emails
The Rust Security Response WG is warning of phishing emails from rustfoundation.dev targeting crates.io users.
@apify/n8n-nodes-apify-content-crawler
Advanced tools
This is an n8n community node that integrates Apify Website Content Crawler with your n8n workflows.
Use this node to run the Website Content Crawler, configure its input, and fetch results directly in your workflows.
Website Content Crawler is an Apify Actor that can perform a deep crawl of one or more websites and extract text content from the web pages. It is useful to download data from websites such as documentation, knowledge bases, help sites, or blogs.
Begin by installing and running n8n to create the necessary configuration directory (~/.n8n):
npm install -g n8n # Skip this step if you already have n8n installed globally
n8n start # This will generate the ~/.n8n directory
Install dependencies and build the node:
pnpm install
pnpm run build
Create the custom directory inside ~/.n8n (if it doesn't exist), then symlink your local node package:
mkdir -p ~/.n8n/custom
ln -s /full/path/to/n8n-nodes-apify-content-crawler ~/.n8n/custom/n8n-nodes-apify-content-crawler # replace full/path/to with the path to your n8n-nodes-apify-content-crawler directory
Note: Use the absolute path in the symlink for compatibility.
Now that your custom node is linked, start n8n again:
n8n start
If you make any changes to your custom node locally, remember to rebuild and restart:
pnpm run build
n8n start
This configuration is required for our service's trigger functionality to work correctly.
By default, when running n8n locally, it generates webhook URLs using localhost, which external services cannot reach. To fix this:
WEBHOOK_URL to a publicly-accessible address. For example:export WEBHOOK_URL="https://your-tunnel.local"
pnpm run build
n8n start

This node integrates the Apify Website Content Crawler Actor and supports running the Apify Actor with custom input.
Execute a Website Content Crawler with optional input parameters
The node supports two authentication methods:
API key authentication
apifyApiOAuth2 authentication (available only in n8n cloud)
apifyOAuth2Api
This node has been tested with n8n version 1.57.0.
You can use this node in various workflows. It is especially useful for extracting content from websites for LLMs and other AI applications.

This project uses a GitHub Actions workflow to automate the release process, including publishing to npm. Here's how to trigger a new release.
Prerequisites (for all methods):
vX.Y.Z).gh) installed and authenticated (gh auth login).Navigate to GitHub Releases:
Draft a New Release:
Create or Choose a Tag:
v1.2.3).Set Release Title and Notes:
vX.Y.Z or a more descriptive title).Publish the Release:
Upon publishing, GitHub creates the tag from your specified branch and then creates the release. This "published" release event triggers the automated workflow.
This method uses the GitHub CLI (gh) for all steps, including tag creation.
Ensure your local target branch is synced and changes are pushed:
git checkout master
git pull origin master
Create the Release (which also creates and pushes the tag):
Replace vX.Y.Z with your desired tag/version. The command will create this tag from the latest commit of your specified --target branch (defaults to repository's default branch, if --target is omitted and the branch is up to date).
gh release create vX.Y.Z \
    --target master \
    --title "vX.Y.Z" \
    --notes "Your detailed release notes here.
    - Feature X
    - Bugfix Y"

# Or, to use notes from a file:
gh release create vX.Y.Z \
    --target master \
    --title "vX.Y.Z" \
    --notes-file ./RELEASE_NOTES.md

# Or, to generate notes from pull requests (commits must follow conventional commit format for best results):
gh release create vX.Y.Z \
    --target master \
    --title "vX.Y.Z"
    --generate-notes
vX.Y.Z: The tag and release name.--target <branch>: Specifies which branch the tag should be created from (e.g., master). If the tag vX.Y.Z doesn't exist, gh will create it based on the HEAD of this target branch and push it.--title "<title>": The title for your release.--notes "<notes>" or --notes-file <filepath> or --generate-notes: Your release notes.This command will create the tag, push it to GitHub, and then publish the release. This "published" release event triggers the automated workflow.
Regardless of how you create and publish the GitHub Release:
Automated Workflow Execution:
X.Y.Z) from the release tag.package.json and pnpm-lock.yaml to version X.Y.Z.chore(release): set version to X.Y.Z [skip ci].@apify/n8n-nodes-apify-content-crawler@X.Y.Z to npm.Verify the Package on npm: After the workflow successfully completes (check the "Actions" tab in your GitHub repository):
pnpm view @apify/n8n-nodes-apify-content-crawler version
X.Y.Z.Track changes and updates to the node here.
Authentication errors
Resource Not Found
Operation failures
If you encounter issues:
FAQs
n8n nodes for Apify
We found that @apify/n8n-nodes-apify-content-crawler demonstrated a healthy version release cadence and project activity because the last version was released less than a year ago. It has 10 open source maintainers collaborating on the project.
Did you know?

Socket for GitHub automatically highlights issues in each pull request and monitors the health of all your open source dependencies. Discover the contents of your packages and block harmful activity before you install or update your dependencies.

Security News
The Rust Security Response WG is warning of phishing emails from rustfoundation.dev targeting crates.io users.

Product
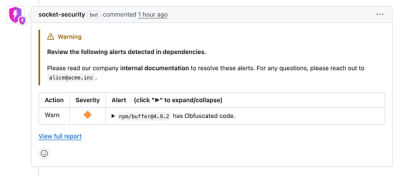
Socket now lets you customize pull request alert headers, helping security teams share clear guidance right in PRs to speed reviews and reduce back-and-forth.

Product
Socket's Rust support is moving to Beta: all users can scan Cargo projects and generate SBOMs, including Cargo.toml-only crates, with Rust-aware supply chain checks.