Research
/Security News
Shai Hulud Strikes Again (v2)
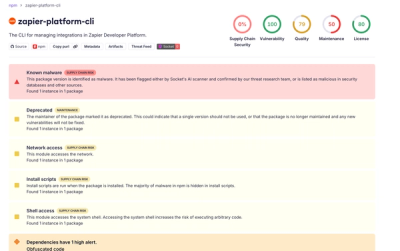
Another wave of Shai-Hulud campaign has hit npm with more than 500 packages and 700+ versions affected.
@arcblock/did-auth
Advanced tools
Helper function to setup DID authentication support on a node.js web server
This library is implemented according to ABT-DID-Protocol, aiming to make it easier for developers to handle customized DID Connect Sessions in Node.js applications, and should always be used together with DID Connect UX package, if you are composing a blocklet, you may find the wrapped implementation in Blocklet SDK more useful.
Within a typical DID Connect Session, the application may request user to sign a transaction or provide some information, such as:
The following diagram demonstrates how a typical DID Connect Session works:

Claim is the key concept in DID Connect Session, its used by the application to send specification of required info to finish the session. A claim is identified by type, and defined with a set of properties. Checkout the claim section for more information.
npm install @arcblock/did-auth
// or
pnpm install @arcblock/did-auth
const SimpleStorage = require('@arcblock/did-auth-storage-nedb');
const { fromRandom } = require('@ocap/wallet');
const { WalletAuthenticator, WalletHandlers } = require('@arcblock/did-auth');

// First setup authenticator and handler factory
const wallet = fromRandom();
const authenticator = new WalletAuthenticator({
  wallet,
  baseUrl: 'http://wangshijun.natapp1.cc',
  appInfo: {
    description: 'Starter projects to develop web application on forge',
    icon: '/images/logo@2x.png',
    name: 'Forge Web Starter',
  },
  chainInfo: {
    host: 'http://did-workshop.arcblock.co:8210/api',
    id: 'forge',
  },
});

const handlers = new WalletHandlers({
  authenticator,
  tokenStorage: new SimpleStorage({ dbPath: '/tmp/test/auth.db' }),
});

// Then attach handler to express server
const express = require('express');
const app = express();

// This is required if you want to use dynamic baseUrl inference
app.set('trust proxy', true);

handlers.attach({
  action: 'profile',
  claims: {
    // This function can be async or returns a promise
    profile: () => ({
      fields: ['fullName', 'email'],
      description: 'Please provide your name and email to continue',
    }),
  },

  onAuth: async ({ userDid, claims, extraParams }) => {
    // `userDid` is the current connected did
    // `claims` contains what the user has submitted
    // `extraParams` is set from webapp when creating the session
    try {
      const profile = claims.find((x) => x.type === 'profile');
      console.info('login.success', { userDid, profile });
    } catch (err) {
      console.error('login.error', err);
    }
  },
});
Then your application backend is ready to handle DID Connect Session that request and accept profile from user. For frontend integration please checkout DID Connect UX.
You can request multiple claims in a single DID Connect Session:
handlers.attach({
  action: 'multiple-claims',
  claims: {
    profile: () => ({
      fields: ['fullName', 'email'],
      description: 'Please provide your name and email to continue',
    }),
    asset: ({ userDid, extraParams }) => {
      // `userDid` is the current connected did
      // `extraParams` is set from webapp when creating the session
      return {
        description: 'Please provide a valid NFT',
        trustedIssuers: ['nft-issuer-did'],
      };
    },
  },
  onAuth: async ({ claims, userDid }) => {
    // `claims` contains both the profile and the asset claim
  },
});
If you want to provide multiple claims of the same type:
handlers.attach({
  action: 'multiple-claims',
  claims: {
    signText: [
      'signature',
      {
        type: 'mime:text/plain',
        data: 'xxxx',
        description: 'sign the text to continue',
      },
    ],
    signHtml: [
      'signature',
      {
        type: 'mime:text/html',
        data: `<h2>This is title</h2>`,
        description: 'sign the html to continue',
      },
    ],
  },
  onAuth: async ({ claims, userDid }) => {
    // `claims` contains both the profile and the asset claim
  },
});
By returning a claims object from onConnect callback, you can provide dynamic claims for the DID Connect Session.
handlers.attach({
  action: 'dynamic-claims',

  // Can be async or returns a promise
  onConnect: ({ userDid }) => {
    // check userDid for some business logic
    // then return the claim object
    // you can return multiple claims here
    return {
      profile: () => ({
        fields: ['fullName', 'email'],
        description: 'Please provide your name and email to continue',
      }),
    };
  },

  onAuth: async ({ claims, userDid }) => {
    // `claims` now contains the result for the dynamic claim
  },
});
Following callbacks are supported during the lifecycle of a DID-Connect session.
onStart({ req, challenge, didwallet, extraParams, updateSession }): optional, called when a new session starts, can be async, return values from this callback will be returned to and available from browser, error thrown from onStart will halt the session.onConnect({ req, challenge, userDid, userPk, extraParams, updateSession }): optional, when wallet has selected userDid and userPk, you can return dynamic claims here, or do some permission check, error thrown from onConnect will halt the session.onDecline({ req, challenge, userDid, userPk, extraParams, updateSession }): optional, when wallet has rejected dapp request.onAuth({ req, challenge, claims, userDid, userPk, extraParams, updateSession }): required, when wallet has approved dapp request, and submitted info will be available in claims, which is a list of the dapp requested info.onComplete({ req, userDid, userPk, extraParams, updateSession }): optional, when the did connect session has completed.onExpire({ extraParams }): optional, when the did connect session has expired.onError({ err, extraParams }): optional, when the did connect session encountered some error, default to console.error.Most commonly used callbacks are onConnect and onAuth.
Developer should always attach an onAuth callback for a DID Connect session handler. And put the business logic once user has approved and submitted the requested info in the callback.
Sometimes, developer may want to pass some information to the session storage, such as a transaction hash or login token, so that the browser can fetch for later use, developer can achieve this by call updateSession from onAuth. eg,
handlers.attach({
  action: 'dynamic-claims',

  onAuth: ({ userDid, updateSession }) => {
    // to persist plain non-sensible info
    await updateSession({ key: 'non-sensible' });

    // to persist sensible info: that need to be encrypted
    await updateSession({ key: 'sensible' }, true);
  },
});
A claim specifies what kind of information the application can request user to provide. specifications for each claim are defined here, complete claim request and response specification can be found in the ABT DID Protocol.
FAQs
Helper function to setup DID authentication support on a node.js web server
The npm package @arcblock/did-auth receives a total of 37 weekly downloads. As such, @arcblock/did-auth popularity was classified as not popular.
We found that @arcblock/did-auth demonstrated a healthy version release cadence and project activity because the last version was released less than a year ago. It has 4 open source maintainers collaborating on the project.
Did you know?

Socket for GitHub automatically highlights issues in each pull request and monitors the health of all your open source dependencies. Discover the contents of your packages and block harmful activity before you install or update your dependencies.

Research
/Security News
Another wave of Shai-Hulud campaign has hit npm with more than 500 packages and 700+ versions affected.

Product
Add real-time Socket webhook events to your workflows to automatically receive software supply chain alert changes in real time.

Security News
ENISA has become a CVE Program Root, giving the EU a central authority for coordinating vulnerability reporting, disclosure, and cross-border response.