Product
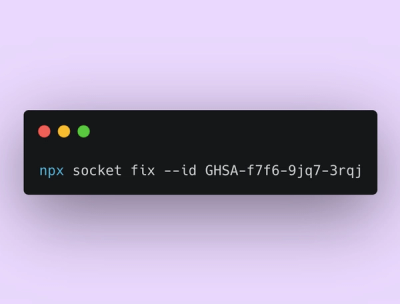
Announcing Socket Fix 2.0
Socket Fix 2.0 brings targeted CVE remediation, smarter upgrade planning, and broader ecosystem support to help developers get to zero alerts.
@aws-cdk/aws-elasticsearch
Advanced tools
This API may emit warnings. Backward compatibility is not guaranteed.
Instead of this module, we recommend using the @aws-cdk/aws-opensearchservice module. See Amazon OpenSearch Service FAQs for details. See Migrating to OpenSearch for migration instructions.
Create a development cluster by simply specifying the version:
const devDomain = new es.Domain(this, 'Domain', {
version: es.ElasticsearchVersion.V7_1,
});
To perform version upgrades without replacing the entire domain, specify the enableVersionUpgrade property.
const devDomain = new es.Domain(this, 'Domain', {
  version: es.ElasticsearchVersion.V7_10,
  enableVersionUpgrade: true, // defaults to false
});
Create a production grade cluster by also specifying things like capacity and az distribution
const prodDomain = new es.Domain(this, 'Domain', {
  version: es.ElasticsearchVersion.V7_1,
  capacity: {
    masterNodes: 5,
    dataNodes: 20,
  },
  ebs: {
    volumeSize: 20,
  },
  zoneAwareness: {
    availabilityZoneCount: 3,
  },
  logging: {
    slowSearchLogEnabled: true,
    appLogEnabled: true,
    slowIndexLogEnabled: true,
  },
});
This creates an Elasticsearch cluster and automatically sets up log groups for logging the domain logs and slow search logs.
Some cluster configurations (e.g VPC access) require the existence of the AWSServiceRoleForAmazonElasticsearchService service-linked role.
When performing such operations via the AWS Console, this SLR is created automatically when needed. However, this is not the behavior when using CloudFormation. If an SLR is needed, but doesn't exist, you will encounter a failure message simlar to:
Before you can proceed, you must enable a service-linked role to give Amazon ES...
To resolve this, you need to create the SLR. We recommend using the AWS CLI:
aws iam create-service-linked-role --aws-service-name es.amazonaws.com
You can also create it using the CDK, but note that only the first application deploying this will succeed:
const slr = new iam.CfnServiceLinkedRole(this, 'ElasticSLR', {
  awsServiceName: 'es.amazonaws.com',
});
To import an existing domain into your CDK application, use the Domain.fromDomainEndpoint factory method.
This method accepts a domain endpoint of an already existing domain:
const domainEndpoint = 'https://my-domain-jcjotrt6f7otem4sqcwbch3c4u.us-east-1.es.amazonaws.com';
const domain = es.Domain.fromDomainEndpoint(this, 'ImportedDomain', domainEndpoint);
Helper methods also exist for managing access to the domain.
declare const fn: lambda.Function;
declare const domain: es.Domain;

// Grant write access to the app-search index
domain.grantIndexWrite('app-search', fn);

// Grant read access to the 'app-search/_search' path
domain.grantPathRead('app-search/_search', fn);
The domain can also be created with encryption enabled:
const domain = new es.Domain(this, 'Domain', {
  version: es.ElasticsearchVersion.V7_4,
  ebs: {
    volumeSize: 100,
    volumeType: ec2.EbsDeviceVolumeType.GENERAL_PURPOSE_SSD,
  },
  nodeToNodeEncryption: true,
  encryptionAtRest: {
    enabled: true,
  },
});
This sets up the domain with node to node encryption and encryption at rest. You can also choose to supply your own KMS key to use for encryption at rest.
Elasticsearch domains can be placed inside a VPC, providing a secure communication between Amazon ES and other services within the VPC without the need for an internet gateway, NAT device, or VPN connection.
See Launching your Amazon OpenSearch Service domains within a VPC for more details.
const vpc = new ec2.Vpc(this, 'Vpc');
const domainProps: es.DomainProps = {
  version: es.ElasticsearchVersion.V7_1,
  removalPolicy: RemovalPolicy.DESTROY,
  vpc,
  // must be enabled since our VPC contains multiple private subnets.
  zoneAwareness: {
    enabled: true,
  },
  capacity: {
    // must be an even number since the default az count is 2.
    dataNodes: 2,
  },
};
new es.Domain(this, 'Domain', domainProps);
In addition, you can use the vpcSubnets property to control which specific subnets will be used, and the securityGroups property to control
which security groups will be attached to the domain. By default, CDK will select all private subnets in the VPC, and create one dedicated security group.
Helper methods exist to access common domain metrics for example:
declare const domain: es.Domain;
const freeStorageSpace = domain.metricFreeStorageSpace();
const masterSysMemoryUtilization = domain.metric('MasterSysMemoryUtilization');
This module is part of the AWS Cloud Development Kit project.
The domain can also be created with a master user configured. The password can be supplied or dynamically created if not supplied.
const domain = new es.Domain(this, 'Domain', {
  version: es.ElasticsearchVersion.V7_1,
  enforceHttps: true,
  nodeToNodeEncryption: true,
  encryptionAtRest: {
    enabled: true,
  },
  fineGrainedAccessControl: {
    masterUserName: 'master-user',
  },
});

const masterUserPassword = domain.masterUserPassword;
For convenience, the domain can be configured to allow unsigned HTTP requests that use basic auth. Unless the domain is configured to be part of a VPC this means anyone can access the domain using the configured master username and password.
To enable unsigned basic auth access the domain is configured with an access policy that allows anyonmous requests, HTTPS required, node to node encryption, encryption at rest and fine grained access control.
If the above settings are not set they will be configured as part of enabling unsigned basic auth. If they are set with conflicting values, an error will be thrown.
If no master user is configured a default master user is created with the
username admin.
If no password is configured a default master user password is created and
stored in the AWS Secrets Manager as secret. The secret has the prefix
<domain id>MasterUser.
const domain = new es.Domain(this, 'Domain', {
  version: es.ElasticsearchVersion.V7_1,
  useUnsignedBasicAuth: true,
});

const masterUserPassword = domain.masterUserPassword;
If the domain requires custom access control it can be configured either as a constructor property, or later by means of a helper method.
For simple permissions the accessPolicies constructor may be sufficient:
const domain = new es.Domain(this, 'Domain', {
  version: es.ElasticsearchVersion.V7_1,
  accessPolicies: [
    new iam.PolicyStatement({
      actions: ['es:*ESHttpPost', 'es:ESHttpPut*'],
      effect: iam.Effect.ALLOW,
      principals: [new iam.AccountPrincipal('123456789012')],
      resources: ['*'],
    }),
  ]
});
For more complex use-cases, for example, to set the domain up to receive data from a
cross-account Kinesis Firehose the addAccessPolicies helper method
allows for policies that include the explicit domain ARN.
const domain = new es.Domain(this, 'Domain', {
  version: es.ElasticsearchVersion.V7_1,
});

domain.addAccessPolicies(
  new iam.PolicyStatement({
    actions: ['es:ESHttpPost', 'es:ESHttpPut'],
    effect: iam.Effect.ALLOW,
    principals: [new iam.AccountPrincipal('123456789012')],
    resources: [domain.domainArn, `${domain.domainArn}/*`],
  }),
  new iam.PolicyStatement({
    actions: ['es:ESHttpGet'],
    effect: iam.Effect.ALLOW,
    principals: [new iam.AccountPrincipal('123456789012')],
    resources: [
      `${domain.domainArn}/_all/_settings`,
      `${domain.domainArn}/_cluster/stats`,
      `${domain.domainArn}/index-name*/_mapping/type-name`,
      `${domain.domainArn}/roletest*/_mapping/roletest`,
      `${domain.domainArn}/_nodes`,
      `${domain.domainArn}/_nodes/stats`,
      `${domain.domainArn}/_nodes/*/stats`,
      `${domain.domainArn}/_stats`,
      `${domain.domainArn}/index-name*/_stats`,
      `${domain.domainArn}/roletest*/_stat`,
    ],
  }),
);
Audit logs can be enabled for a domain, but only when fine-grained access control is enabled.
const domain = new es.Domain(this, 'Domain', {
  version: es.ElasticsearchVersion.V7_1,
  enforceHttps: true,
  nodeToNodeEncryption: true,
  encryptionAtRest: {
    enabled: true,
  },
  fineGrainedAccessControl: {
    masterUserName: 'master-user',
  },
  logging: {
    auditLogEnabled: true,
    slowSearchLogEnabled: true,
    appLogEnabled: true,
    slowIndexLogEnabled: true,
  },
});
UltraWarm nodes can be enabled to provide a cost-effective way to store large amounts of read-only data.
const domain = new es.Domain(this, 'Domain', {
  version: es.ElasticsearchVersion.V7_10,
  capacity: {
    masterNodes: 2,
    warmNodes: 2,
    warmInstanceType: 'ultrawarm1.medium.elasticsearch',
  },
});
Custom endpoints can be configured to reach the ES domain under a custom domain name.
new es.Domain(this, 'Domain', {
  version: es.ElasticsearchVersion.V7_7,
  customEndpoint: {
    domainName: 'search.example.com',
  },
});
It is also possible to specify a custom certificate instead of the auto-generated one.
Additionally, an automatic CNAME-Record is created if a hosted zone is provided for the custom endpoint
Advanced cluster settings can used to configure additional options.
new es.Domain(this, 'Domain', {
  version: es.ElasticsearchVersion.V7_7,
  advancedOptions: {
    'rest.action.multi.allow_explicit_index': 'false',
    'indices.fielddata.cache.size': '25',
    'indices.query.bool.max_clause_count': '2048',
  },
});
To migrate from this module (@aws-cdk/aws-elasticsearch) to the new @aws-cdk/aws-opensearchservice module, you must modify your CDK application to refer to the new module (including some associated changes) and then perform a CloudFormation resource deletion/import.
Make the following modifications to your CDK application to migrate to the @aws-cdk/aws-opensearchservice module.
Rewrite module imports to use '@aws-cdk/aws-opensearchservice to '@aws-cdk/aws-elasticsearch.
For example:
import * as es from '@aws-cdk/aws-elasticsearch';
import { Domain } from '@aws-cdk/aws-elasticsearch';
...becomes...
import * as opensearch from '@aws-cdk/aws-opensearchservice';
import { Domain } from '@aws-cdk/aws-opensearchservice';
Replace instances of es.ElasticsearchVersion with opensearch.EngineVersion.
For example:
const version = es.ElasticsearchVersion.V7_1;
...becomes...
const version = opensearch.EngineVersion.ELASTICSEARCH_7_1;
Replace the cognitoKibanaAuth property of DomainProps with cognitoDashboardsAuth.
For example:
new es.Domain(this, 'Domain', {
  cognitoKibanaAuth: {
    identityPoolId: 'test-identity-pool-id',
    userPoolId: 'test-user-pool-id',
    role: role,
  },
  version: elasticsearchVersion,
});
...becomes...
new opensearch.Domain(this, 'Domain', {
  cognitoDashboardsAuth: {
    identityPoolId: 'test-identity-pool-id',
    userPoolId: 'test-user-pool-id',
    role: role,
  },
  version: openSearchVersion,
});
Rewrite instance type suffixes from .elasticsearch to .search.
For example:
new es.Domain(this, 'Domain', {
  capacity: {
    masterNodeInstanceType: 'r5.large.elasticsearch',
  },
  version: elasticsearchVersion,
});
...becomes...
new opensearch.Domain(this, 'Domain', {
  capacity: {
    masterNodeInstanceType: 'r5.large.search',
  },
  version: openSearchVersion,
});
Any CfnInclude'd domains will need to be re-written in their original template in
order to be successfully included as a opensearch.CfnDomain
Follow these steps to migrate your application without data loss:
RemovalPolicy.RETAIN. This is the default for the domain construct, so nothing is required unless you have specifically set the removal policy to some other value.@aws-cdk/aws-opensearchservice module by applying the necessary modifications listed above. Synthesize your application and obtain the resulting stack templates.FAQs
The CDK Construct Library for AWS::Elasticsearch
The npm package @aws-cdk/aws-elasticsearch receives a total of 18,422 weekly downloads. As such, @aws-cdk/aws-elasticsearch popularity was classified as popular.
We found that @aws-cdk/aws-elasticsearch demonstrated a not healthy version release cadence and project activity because the last version was released a year ago. It has 4 open source maintainers collaborating on the project.
Did you know?

Socket for GitHub automatically highlights issues in each pull request and monitors the health of all your open source dependencies. Discover the contents of your packages and block harmful activity before you install or update your dependencies.

Product
Socket Fix 2.0 brings targeted CVE remediation, smarter upgrade planning, and broader ecosystem support to help developers get to zero alerts.

Security News
Socket CEO Feross Aboukhadijeh joins Risky Business Weekly to unpack recent npm phishing attacks, their limited impact, and the risks if attackers get smarter.

Product
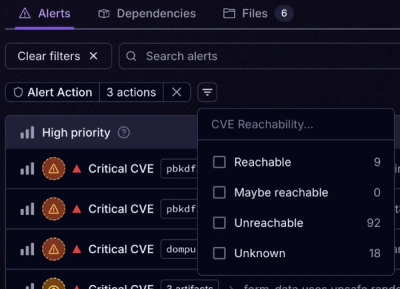
Socket’s new Tier 1 Reachability filters out up to 80% of irrelevant CVEs, so security teams can focus on the vulnerabilities that matter.