
Research
Security News
Lazarus Strikes npm Again with New Wave of Malicious Packages
The Socket Research Team has discovered six new malicious npm packages linked to North Korea’s Lazarus Group, designed to steal credentials and deploy backdoors.
@bentley/imodeljs-editor-frontend
Advanced tools
Copyright © Bentley Systems, Incorporated. All rights reserved. See LICENSE.md for license terms and full copyright notice.
The @bentley/imodeljs-editor-frontend package contains frontend classes for editing iModels.
See the iTwin.js documentation for more information.
The following key-ins are available for this package.
EditorOptions.registerUndoRedoToolseditor undo all - Undo all changes to elements.editor undo single - Undo last change to elements.editor redo - Redo last undone change to elements.EditorOptions.registerBasicManipulationToolseditor delete elements - Delete selected elements.editor move elements - Move selected elements.editor rotate elements - Rotate selected elements. Accepts 0-3 arguments:
method=0|1 How rotate angle will be specified. 0 for by 3 points, 1 for by specified angle.about=0|1|2 Location to rotate about. 0 for point, 1 for placement origin, and 2 for center of range.angle=number Rotation angle in degrees when not defining angle by points.EditorOptions.registerSketchToolseditor create arc - Create a new arc element or add an arc to an existing open path. Accepts 0-3 arguments:
method=0|1|2|3 How arc will be defined. 0 for center/start, 1 for start/center, 2 for start/mid/end, and 3 for start/end/mid.radius=number Arc radius for start/center or center/start, 0 to define by points.sweep=number Arc sweep angle in degrees for start/center or center/start, 0 to define by points.editor create linestring - Create a new linestring element or add a linestring to an existing path.EditorOptions.registerProjectLocationToolseditor project location show - Show the decoration for editing the iModel's project extents and geolocation.
editor project location hide - Hide the decoration preserving unsaved changes (call show to redisplay).
editor project location cancel - Clear the decoration and abandon unsaved changes.
editor project location save - Save the modified project extents or geolocation.
editor project geolocation point - Enter latitude, longitude, altitude, and north angle for a known location. Accepts 0-4 arguments:
latitude=number Latitude of accept point in degrees.longitude=number Longitude of accept point in degrees.altitude=number Height above ellipsoid of accept point.north=number North direction in degrees of accept point.editor project geolocation north - Define north direction by two points.
editor project geolocation move - Tweak geolocation by defining a translation from two points.
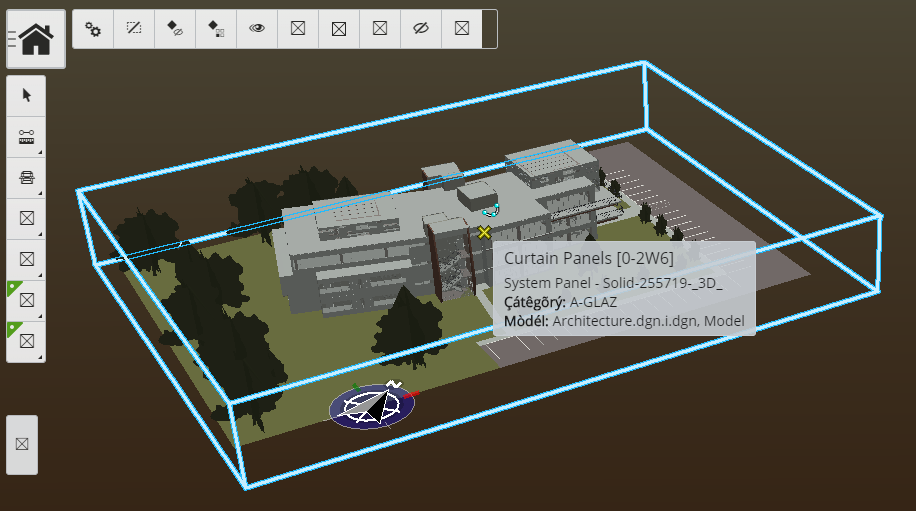
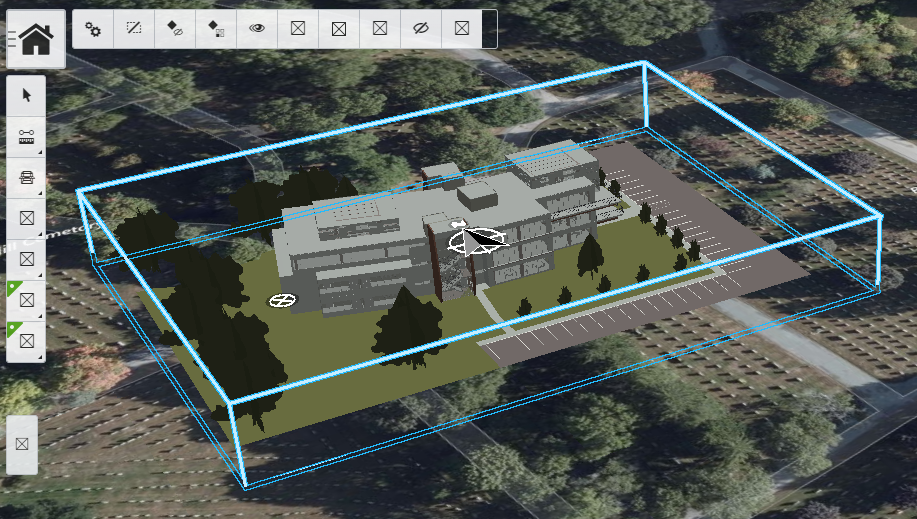
Running the editor project location show command, with a spatial view active, enables the display of the project extents and geolocation controls.
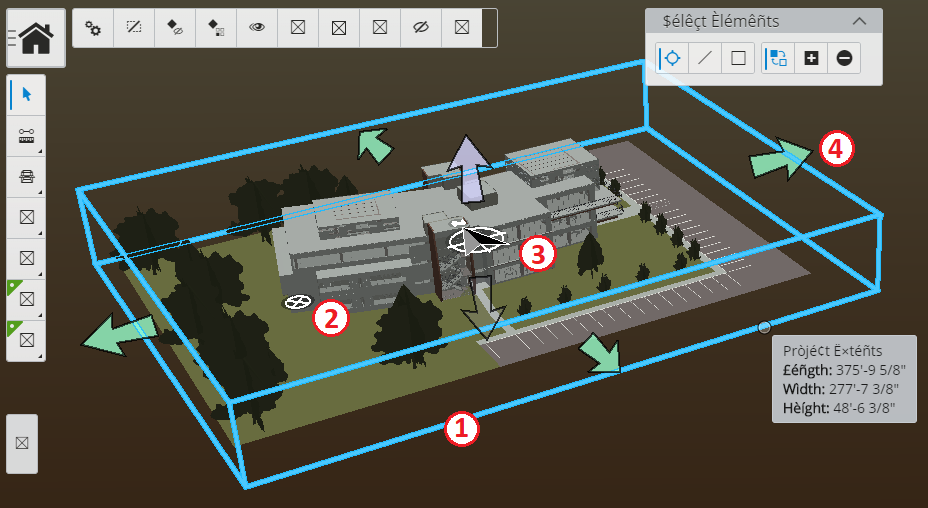
editor project geolocation point command.editor project geolocation north command.The decorations and controls are expected to be selectable and modifiable by the default tool.
Use the arrow controls (#4) to resize the project extents.
If making the project extents larger, it is helpful to have the background map displayed to avoid decoration clipping.
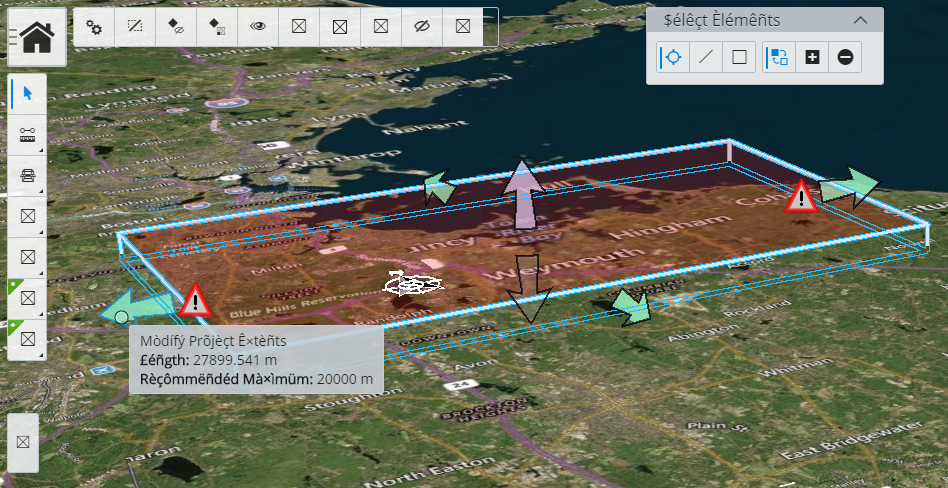
While there isn't hard limit imposed on the size of the project extents, when any dimension exceeds the recommend maximum a warning symbol is displayed.
For the project extents height, the recommended maximum is 2 km.
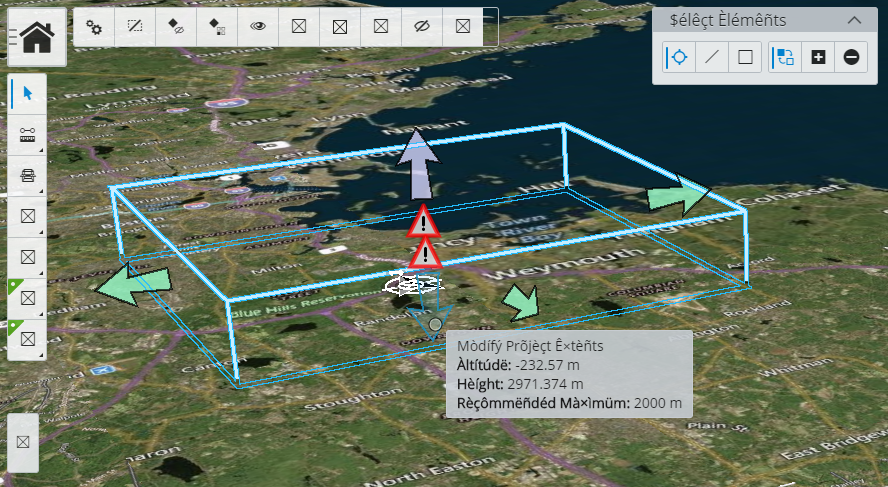
For the project extents length and width, the recommended maximum when a GCS is defined is 350 km, and 20 km for imodels that aren't map projections (only ECEF transform defined). In addition to the warning symbols near the arrow controls, a red transparent fill is also displayed to help indicate the xy extents may be too large.
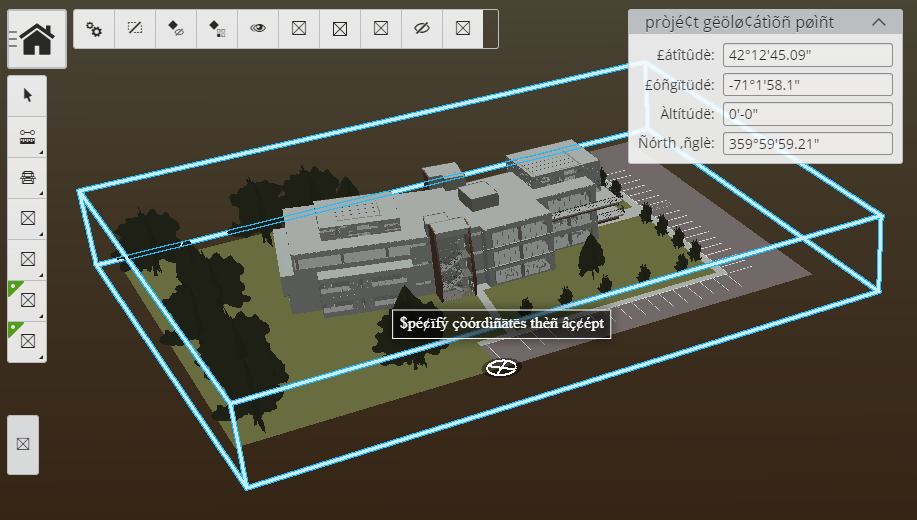
If an imodel is not currently geolocated, or is incorrectly geolocated without a valid GCS defined, the geolocation control (#2) will be displayed. Clicking on this control runs the editor project geolocation point command, and after snapping to a known coordinate you will be prompted to enter new values for latitude, longitude, altitude, and north angle.
If the imodel is already geolocated, the tool settings is populated with the current values for the snapped coordinate. If you don't know the north direction angle, not to worry, this can be defined interactively with another control once the model has an ECEF origin defined.
The north direction can set interactively by 2 points, click on the north direction control (#3) to run the editor project geolocation north command.
After zooming out far enough, only the north direction control will be displayed in the view. This may be helpful for seeing where the project is located on the globe or visually confirming the proper north direction.
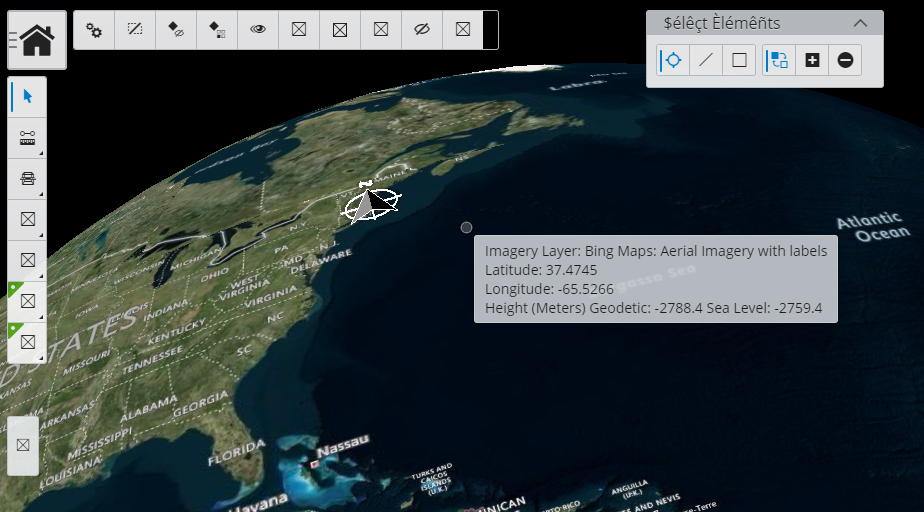
The north direction control is only displayed after an imodel has been geolocated.
If the geolocation is almost correct, the latitude, longitude, and altitude can be interactively adjusted by defining a translation by 2 points.
For example, running the editor project geolocation move command can be used to correct an incorrect altitude for the building below that is half buried in the terrain.
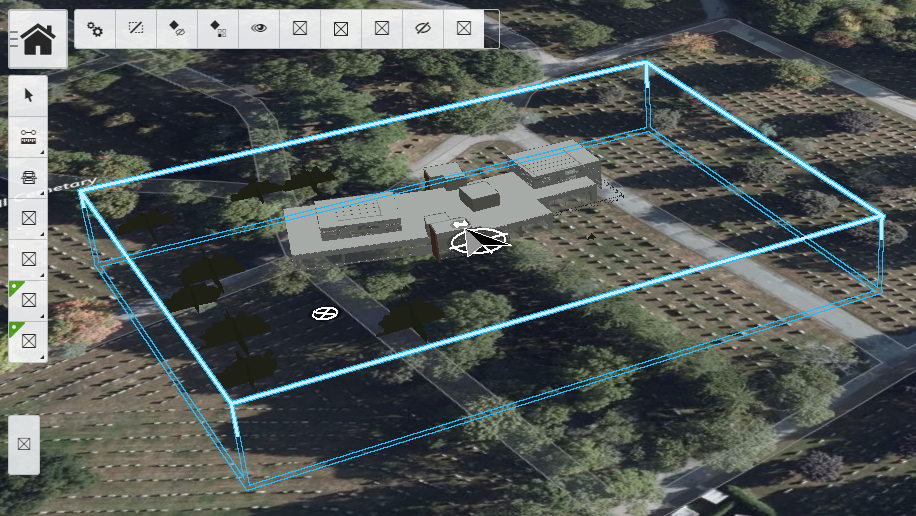
First identify a point on the building to move from, it can be helpful turning off map locate for this point if it's below the terrain. For the second point, with map locate re-enabled and the active snap mode set to nearest, identify a point on the terrain to complete the adjustment.
AccuDraw can be very helpful when adjusting altitude. Use the T/F/S shortcuts to orient the AccuDraw compass, use Enter (smartlock) to lock an axis to snap the 2nd point. For this example F and Enter were used to lock the up direction before changing to nearest snap for the 2nd point.
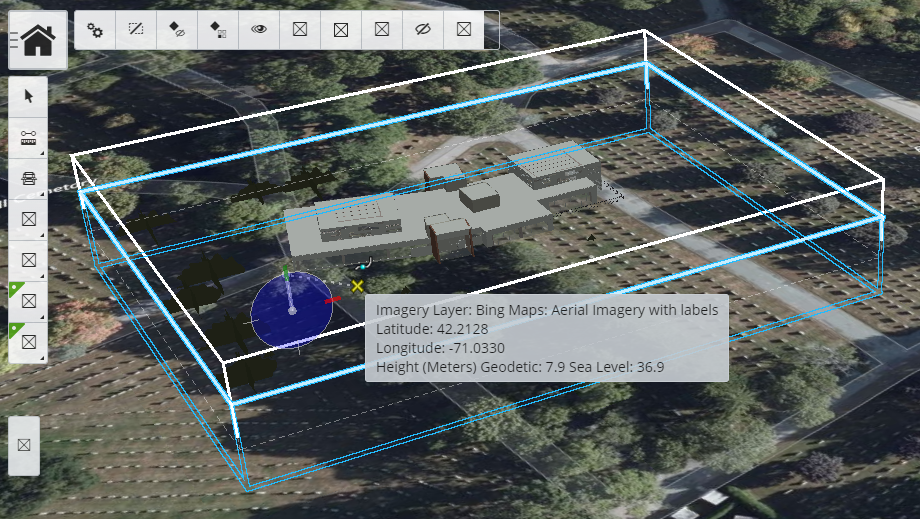
Now we can see the building correctly adjusted for the terrain.
To abandon changes to the project extents or geolocation currently being previewed, run the editor project location cancel command.
To turn off the display of decorations while preserving unsaved changes, run the editor project location hide command. Use editor project location show to restore preview of unsaved changes.
To save the changes being previewed, run the editor project location save command.
FAQs
iModel.js frontend components
The npm package @bentley/imodeljs-editor-frontend receives a total of 4 weekly downloads. As such, @bentley/imodeljs-editor-frontend popularity was classified as not popular.
We found that @bentley/imodeljs-editor-frontend demonstrated a not healthy version release cadence and project activity because the last version was released a year ago. It has 3 open source maintainers collaborating on the project.
Did you know?

Socket for GitHub automatically highlights issues in each pull request and monitors the health of all your open source dependencies. Discover the contents of your packages and block harmful activity before you install or update your dependencies.

Research
Security News
The Socket Research Team has discovered six new malicious npm packages linked to North Korea’s Lazarus Group, designed to steal credentials and deploy backdoors.

Security News
Socket CEO Feross Aboukhadijeh discusses the open web, open source security, and how Socket tackles software supply chain attacks on The Pair Program podcast.

Security News
Opengrep continues building momentum with the alpha release of its Playground tool, demonstrating the project's rapid evolution just two months after its initial launch.