Product
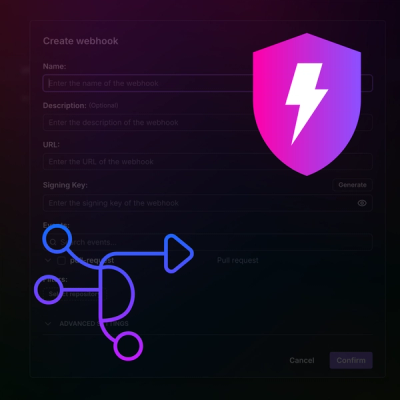
Introducing Webhook Events for Pull Request Scans
Add real-time Socket webhook events to your workflows to automatically receive pull request scan results and security alerts in real time.
By Jeppe Hasseriis - Oct 22, 2025
@blinkk/fileset
Advanced tools
[![NPM Version][npm-image]][npm-url] [![GitHub Actions][github-image]][github-url] [![Dependency Status][david-image]][david-url] [![Known Vulnerabilities][snyk-image]][snyk-url] [![codecov][codecov-image]][codecov-url] [![TypeScript Style Guide][gts-imag

![]()

![]()
![]()
![]()
Fileset is a light, high-performance TypeScript static web server intended for high-traffic static sites. Features include:
The server runs on Google App Engine and proxies requests to Google Cloud Storage.
Many websites can be built and deployed as fully static content (i.e. just HTML, CSS, and JavaScript – with no dynamic backend). Despite being static content, websites may still have other requirements such as localization, redirects, or atomic deployments that end up adding slight dynamic functionality to an otherwise fully static project.
Fileset aims to bridge the gap by offering a thin middle layer on top of Google Cloud Storage: static files are uploaded to Google Cloud Storage via the CLI, with the Fileset server handling request traffic. The server determines whether to issue a response sprinkled with one of the above dynamic features, and otherwise proxies traffic directly to Google Cloud Storage – leveraging Google's global network for performance.
There are two main tasks required in order to use Fileset:
Within your project, create a directory to house the server configuration, e.g.
./backend/server.
Copy the files from ./example/server/ into this directory.
Modify the settings in app.yaml and secrets.yaml.
Setup and deploy the app using the provided
Makefile. The app will be deployed to an App
Engine service named fileset, so it will not conflict with your current
deployment.
make project=<AppId> setup
make project=<AppId> deploy
fileset.yaml configuration file. The minimum example is below. See
the example fileset.yaml for full configuration
options.google_cloud_project: <AppId>
Generate your files. Use a static site generator or just manually create a directory containing files
to upload. In step (3) below, the files in the directory ./build are
uploaded.
Upload your files. The uploader will look for fileset.yaml within the
specified directory first. If it's not found, it will look up in the parent
folder. If the config file doesn't exist in either folder, the uploader will
abort.
npx fileset upload ./build
That's it! Files have been uploaded to Google Cloud Storage and the uploaded directory is now being served by the application server. You can verify by visiting:
https://fileset-dot-<AppId>.appspot.com
You'll need to be authenticated to upload files and deploy the serving manifests.
If you are testing locally, your user account can be used to authenticate to Cloud Datastore and Cloud Storage. Simply run the below command to create credentials used for authentication:
gcloud auth application-default login
If you are using a service account for deployment, you'll need to ensure it has
the right permissions. When using Fileset with Google Cloud Build, simply run
make setup from the example/server directory to configure your project's
Cloud Build Service account with the right permissions.
The following permissions are needed:
datastore.owner)storage.objectAdmin)If using the Cloud Build service account (or any other service account), you'll
need to add the above two permissions to the account. That can be done via the
IAM page (https://console.cloud.google.com/access/iam?project=<AppId>) or via
the gcloud CLI.
The provided Makefile also sets up Google Cloud Build permissions for you.
make project=<AppId> setup
Fileset uses Git branches to determine whether files should be in production
(and public) or in staging (and restricted via Google Account authentication).
The Git branch is determined by inspecting the local Git environment when the
upload command is invoked.
The best way to understand how this works is by following the examples below:
# main branch
# ✓ public
# ✓ production URL
# ✓ also available from staging URLs (restricted)

(main) $ npx fileset upload build
...
Public URL:            https://appid.appspot.com
URL (via commit):      https://f3a9abb-dot-fileset-dot-appid.appspot.com
URL (via branch name): https://master-dot-fileset-dot-appid.appspot.com
# staging branch
# ✓ not public
# ✓ staging URL only (restricted)

(staging) $ npx fileset upload build
...
URL (via commit):      https://4fb48ce-dot-fileset-dot-appid.appspot.com
URL (via branch name): https://staging-dot-fileset-dot-appid.appspot.com
You can verify Fileset server is working as you expect by looking for the following headers:
| Header | Description |
|---|---|
x‑fileset‑site | The site being served. Usually this will be default but for multi-site installations, this will be useful for determining which site is serving. |
x‑fileset‑ref | The Git commit sha that corresponds to the serving manifest that is handling your request. |
x‑fileset‑blob | The blob directory key corresponding to the file being served. This is the SHA-1 hash of the file's content. |
x‑fileset‑ttl | For scheduled deployments, the value of this header will correspond to the timestamp for the timed deployment being served. |
You can simulate geolocation behavior using query parameters:
| Parameter | Name | Description |
|---|---|---|
hl | Language | Overrides the incoming accept-language header. |
gl | Geolocation | Overrides the incoming x-appengine-country header. |
ncr | No country redirect | Disables localization-aware redirects. |
The absolute path to the fileset executable can be specified to invoke the CLI.
./node_modules/.bin/fileset upload build
First, build the site to the ./build directory. Then, upload the directory to Fileset.
npx @blinkk/amagaki build
npx @blinkk/fileset upload build
First, build the site to the ./build directory. Then, upload the directory to Fileset.
grow build --deployment=prod
npx @blinkk/fileset upload build
FAQs
[![NPM Version][npm-image]][npm-url] [![GitHub Actions][github-image]][github-url] [![Dependency Status][david-image]][david-url] [![Known Vulnerabilities][snyk-image]][snyk-url] [![codecov][codecov-image]][codecov-url] [![TypeScript Style Guide][gts-imag
The npm package @blinkk/fileset receives a total of 2,926 weekly downloads. As such, @blinkk/fileset popularity was classified as popular.
We found that @blinkk/fileset demonstrated a not healthy version release cadence and project activity because the last version was released a year ago. It has 4 open source maintainers collaborating on the project.
Did you know?

Socket for GitHub automatically highlights issues in each pull request and monitors the health of all your open source dependencies. Discover the contents of your packages and block harmful activity before you install or update your dependencies.
Product
Add real-time Socket webhook events to your workflows to automatically receive pull request scan results and security alerts in real time.

Research
The Socket Threat Research Team uncovered malicious NuGet packages typosquatting the popular Nethereum project to steal wallet keys.

Product
A single platform for static analysis, secrets detection, container scanning, and CVE checks—built on trusted open source tools, ready to run out of the box.