Security News
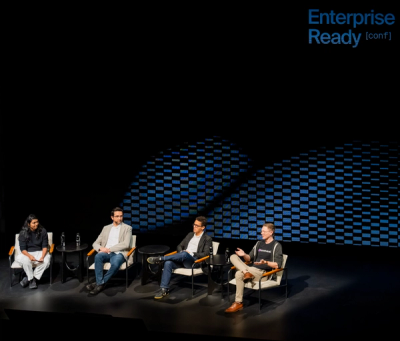
How Enterprise Security Is Adapting to AI-Accelerated Threats
Socket CTO Ahmad Nassri discusses why supply chain attacks now target developer machines and what AI means for the future of enterprise security.
@brainfish-ai/web-widget
Advanced tools
This package provides a simple way to integrate a Brainfish in-app widget in your website or web application. It supports popup widgets with contextual help functionality.
npm install @brainfish-ai/web-widget
<script type="module">
    import Brainfish from "https://cdn.jsdelivr.net/npm/@brainfish-ai/web-widget@latest/dist/web.js"
    Brainfish.Widgets.init({ widgetKey: "your-key" });
</script>
The popup widget provides a floating button that opens a search interface in a modal overlay.
<!-- The widget will automatically create a floating button -->
<script>
    Brainfish.Widgets.init({
        widgetKey: "your-widget-key",
        environment: "production" // or "staging", "local"
    });
</script>
// Open the widget
Brainfish.Widgets.open();

// Open the widget with custom positioning
Brainfish.Widgets.open({
    position: 'bottom-right' // 'bottom-left' | 'bottom-right' | 'top-left' | 'top-right'
});

// Close the widget
Brainfish.Widgets.close();

// Check if widget is ready
if (Brainfish.Widgets.isReady) {
    // Widget is ready to use
}
// Identify a user
Brainfish.Widgets.identify({
    name: "John Doe",
    email: "john@example.com",
    userId: "user_123"
});

// Set secret attributes (for internal use)
Brainfish.Widgets.setSecretAttributes("internal_data_123");
Customize your widget's appearance and behavior using the overrides configuration:
Brainfish.Widgets.init({
    widgetKey: "your-widget-key",
    overrides: {
        // Suggested questions that appear when widget opens
        suggestions: [
            'How do I reset my password?',
            'How do I contact support?',
            'What are your pricing plans?'
        ],

        // Theme customization
        theme: {
            inputButtonBgColor: '#3b82f6',
            inputButtonColor: '#ffffff'
        },

        // Widget settings
        panelTitle: 'Help Center',
        placeholder: 'Ask a question...',

        // Action buttons
        bodyActionButtons: [
            {
                icon: 'Calendar',
                type: 'link',
                label: 'Book a Demo',
                value: 'https://calendly.com/your-company'
            }
        ]
    }
});
📚 For complete customization options, see:
Both open() and onContextHelp() methods support custom positioning to control where the widget appears on screen. This is useful for creating contextual experiences or avoiding UI conflicts.
Available Positions:
'bottom-left' - Widget appears in bottom-left corner (default)'bottom-right' - Widget appears in bottom-right corner'top-left' - Widget appears in top-left corner'top-right' - Widget appears in top-right cornerUsage Examples:
// Open widget in different positions
Brainfish.Widgets.open({ position: 'top-right' });
Brainfish.Widgets.open({ position: 'bottom-left' });

// Contextual help with positioning
Brainfish.Widgets.onContextHelp("How do I reset my password?", {
    position: 'top-left'
});

// Dynamic positioning based on user interaction
function showHelpNearElement(question, element) {
    const rect = element.getBoundingClientRect();
    const position = rect.left < window.innerWidth / 2 ? 'bottom-left' : 'bottom-right';

    Brainfish.Widgets.onContextHelp(question, { position });
}
The contextual help feature allows you to open the widget with a pre-filled question based on user interaction.
// Trigger contextual help with a specific question
Brainfish.Widgets.onContextHelp("How do I reset my password?");

// Trigger contextual help with custom positioning
Brainfish.Widgets.onContextHelp("How do I reset my password?", {
    position: 'top-left' // 'bottom-left' | 'bottom-right' | 'top-left' | 'top-right'
});
HTML with Help Icons:
<div class="form-field">
    <label>Email Address</label>
    <input type="email" value="user@example.com">
    <button class="help-icon"
            data-question="How do I change my email address?"
            data-position="top-left">
        <i class="ph ph-question"></i>
    </button>
</div>

<script>
// Add event listeners to help icons with custom positioning
document.querySelectorAll('.help-icon').forEach(icon => {
    icon.addEventListener('click', (e) => {
        const question = e.target.dataset.question;
        const position = e.target.dataset.position || 'bottom-right';
        Brainfish.Widgets.onContextHelp(question, { position });
    });
});
</script>
Direct Button Integration:
<button onclick="Brainfish.Widgets.onContextHelp('How do I reset my password?', { position: 'top-right' })">
    Reset Password
</button>
Programmatic Usage:
function showHelp(question, position = 'bottom-right') {
    Brainfish.Widgets.onContextHelp(question, { position });
}

// Usage with different positions
showHelp("How do I update my profile?", 'top-left');
showHelp("How do I contact support?", 'bottom-right');
The widget emits events when it opens and closes. You can listen to these events:
// Set up the abort controller
const controller = new AbortController();
const { signal } = controller;

// Listen for widget events
window.addEventListener('onBrainfishWidgetOpen', (event) => {
    console.log('Widget opened');
    // Your custom logic here
}, { signal });

window.addEventListener('onBrainfishWidgetClose', (event) => {
    console.log('Widget closed');
    // Your custom logic here
}, { signal });

// Clean up event listeners when no longer needed
controller.abort();
The widget automatically tracks analytics events:
Run the following command to build the widget:
yarn build:web-widget
cd packages/web-widget
npx serve ./ -p 8000 -C
The playground provides a comprehensive testing environment for the Brainfish widget:
open http://localhost:8000/playground/index.html
The playground includes:
You can test the widget in different environments by passing the env parameter:
# Local environment
open http://localhost:8000/playground/index.html?env=local

# Staging environment
open http://localhost:8000/playground/index.html?env=staging

# Production environment
open http://localhost:8000/playground/index.html?env=prod
If you want to test with the agent widget (Next.js app), start it locally:
cd packages/agent-widget
npm run dev
This will run the agent widget on port 3000, which the playground will automatically connect to in local development mode.
FAQs
Brainfish Widgets Manager
The npm package @brainfish-ai/web-widget receives a total of 2,469 weekly downloads. As such, @brainfish-ai/web-widget popularity was classified as popular.
We found that @brainfish-ai/web-widget demonstrated a healthy version release cadence and project activity because the last version was released less than a year ago. It has 3 open source maintainers collaborating on the project.
Did you know?

Socket for GitHub automatically highlights issues in each pull request and monitors the health of all your open source dependencies. Discover the contents of your packages and block harmful activity before you install or update your dependencies.

Security News
Socket CTO Ahmad Nassri discusses why supply chain attacks now target developer machines and what AI means for the future of enterprise security.

Security News
Learn the essential steps every developer should take to stay secure on npm and reduce exposure to supply chain attacks.

Security News
Experts push back on new claims about AI-driven ransomware, warning that hype and sponsored research are distorting how the threat is understood.