Research
Malicious fezbox npm Package Steals Browser Passwords from Cookies via Innovative QR Code Steganographic Technique
A malicious package uses a QR code as steganography in an innovative technique.
@contentful/experiences-components-react
Advanced tools
A basic set of components to use with Studio Experiences
Experience Builder is currently in a private alpha and not available publicly. If you are interested in participating in the alpha, please reach out to your Contentful account team.
This folder contains the source code for the default/example components that can be used with Experience Builder. These components can be used as-is to kick start building your experiences, or used as an example for building your own components.
The following components are available:
npm install @contentful/experiences-components-react
By default, the components are unstyled. This allows you to style the components to match your brand and design system. If you want a set of default styles to get started, see below.
A set of optional, default styles are included with the components. To include them, import the styles.css file from the @contentful/experiences-components-react package:
import '@contentful/experiences-components-react/styles.css';
Each component has a css class that you can use to add your own styles. The classes are named in the style of cf-{component-name} (ie cf-button).
For example, to style the Button component, you can do the following:
.cf-button {
  /* your styles here */
}
All components also support passing in custom class names via the className prop. This allows you to add your own class names to the component, which you can then use to style the component.
We provide a helper function (as a higher-order-component) to make it easier to register your own custom components with Experience Builder. This function helps ensure your component has all the required props and is properly registered with Experience Builder.
import { withExperienceBuilder } from '@/utils/withExperienceBuilder';
import { MyComponent } from './MyComponent';

export const ExperienceBuilderMyComponent = withExperienceBuilder(
  // Your component
  MyComponent,
  // component registration configuration for EB
  {
    id: 'my-component',
    name: 'My Component',
    category: 'Custom',
    variables: {
      label: {
        type: 'Text',
        defaultValue: 'My Component',
      },
    },
  },
);
By default, the withExperienceBuilder function will not wrap your component in a container. However, it is often useful to have your component wrapped. If the components is wrapped, all the styles generated from Experience Builder will be applied to the wrapping container instead of the component itself. This will make it so the additional styles don't interfere with your component's styles.
To wrap your component, pass in the wrapComponent option:
export const ExperienceBuilderMyComponent = withExperienceBuilder(
  // Your component
  MyComponent,
  // component registration configuration for EB
  { /* EB config */ },
  // wrap the component with a container (defaults to false)
  { wrapComponent: true }
);
You can also provide the tag name the container will use (which defaults to 'div'):
{ wrapComponent: true, wrapContainerTag: 'span' }
FAQs
A basic set of components to use with Studio Experiences
The npm package @contentful/experiences-components-react receives a total of 5,380 weekly downloads. As such, @contentful/experiences-components-react popularity was classified as popular.
We found that @contentful/experiences-components-react demonstrated a healthy version release cadence and project activity because the last version was released less than a year ago. It has 4 open source maintainers collaborating on the project.
Did you know?

Socket for GitHub automatically highlights issues in each pull request and monitors the health of all your open source dependencies. Discover the contents of your packages and block harmful activity before you install or update your dependencies.

Research
A malicious package uses a QR code as steganography in an innovative technique.

Research
/Security News
Socket identified 80 fake candidates targeting engineering roles, including suspected North Korean operators, exposing the new reality of hiring as a security function.

Application Security
/Research
/Security News
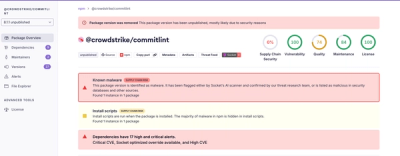
Socket detected multiple compromised CrowdStrike npm packages, continuing the "Shai-Hulud" supply chain attack that has now impacted nearly 500 packages.