Security News
Crates.io Users Targeted by Phishing Emails
The Rust Security Response WG is warning of phishing emails from rustfoundation.dev targeting crates.io users.
@georapbox/capture-photo-element
Advanced tools
A custom element that implements the MediaDevices.getUserMedia() method of the MediaDevices interface to capture a photo in the browser.
A custom element that implements the MediaDevices.getUserMedia() method of the MediaDevices interface to capture a photo in the browser.
$ npm install --save @georapbox/capture-photo-element
import { CapturePhoto } from './node_modules/@georapbox/capture-photo-element/dist/capture-photo.js';

// Manually define the element.
CapturePhoto.defineCustomElement();
Alternatively, you can import the automatically defined custom element.
import './node_modules/@georapbox/capture-photo-element/dist/capture-photo-defined.js';
<capture-photo facing-mode="environment" camera-resolution="320x240"></capture-photo>
By default, the component is style-free to remain as less opinionated as possible. However, you can style the various elements of the component using the ::part() CSS pseudo-elements provided for this purpose. Below are demonstrated all available parts for styling.
capture-photo::part(video) {
  /* The video element */
}

capture-photo::part(actions-container) {
  /* Actions container element - where actions buttons are placed */
}

capture-photo::part(capture-button) {
  /* The button responsible to take picture */
}

capture-photo::part(output-container) {
  /* Output container - where the final output photo is placed */
}

capture-photo::part(output-image) {
  /* The generated photo */
}
| Name | Reflects | Type | Required | Default | Description |
|---|---|---|---|---|---|
autoPlayauto-play | ✓ | Boolean | - | false | Determines if the video stream should start playing automatically when the component is connected to the DOM. If set to false, you can start the video stream manually using startVideoStream() method. |
noImageno-image | ✓ | Boolean | - | false | Determines if the generated image is added in DOM. Use it if you don't need to display the generated image or if you need to display it somewhere else in DOM. |
facingModefacing-mode1 | ✓ | String | - | "environment" | The preferred camera to be used if the camera hardware supports more than one (mostly for mobile devices). Available values: "user" and "environment" for the front and the rear camera respectively. Note that this property might not have any effect if you have called startVideoStream() method with a specific video input device as argument because the camera hardware might not support changing the facing mode. |
cameraResolutioncamera-resolution1 | ✓ | String | - | "" | Defines the ideal camera resolution constraint. It must be of the format [width]x[height], eg 640x480. The browser will try to honour this, but may return other resolutions if an exact match is not available. You can access the min & max supported values for width and height, using getTrackCapabilities().width and getTrackCapabilities().height respectively. |
pan1 | ✓ | Number | - | 0 | Defines the camera's pan level if supported by the camera hardware. You can access the min & max supported values for pan level, using getTrackCapabilities().pan. |
tilt1 | ✓ | Number | - | 0 | Defines the camera's tilt level if supported by the camera hardware. You can access the min & max supported values for tilt level, using getTrackCapabilities().tilt. |
zoom1 | ✓ | Number | - | 1 | Defines the camera's zoom level if supported by the camera hardware. You can access the min & max supported values for zoom level, using getTrackCapabilities().zoom. |
torch1 | ✓ | Boolean | - | false | Determines if the camera's fill light should be turned on if supported by the camera hardware. This works only when facingMode is set to environment or the selected video input device supports it. You can access the supported values for torch, using getTrackCapabilities().torch. NOTE: The support for this feature is known to be limited and heavily dependent on the device, browser, and operating system. |
calculateFileSizecalculate-file-size | ✓ | Boolean | - | false | Indicates if the component should calculate the file size of the generated image. If set to true the file size (in bytes) will be included in the event detail object when the capture-photo:success event is fired. The reason for not calculating the file size by default is that it might be an "expensive" operation, especially for large images, therefore it is recommended to set this property to true only if you need the file size. |
loading | ✓ | Boolean | - | false | Readonly. Indicates if the component is ready for interaction. It is used internally but is also exposed as a readonly property for purposes such as styling, etc. |
1 Changing any of these properties/attributes may not always guarantee the desired result, because they all depend on the camera hardware support. For example, zoom=3 might not result to the camera to zoom if the camera hardware does not support zooming. Using getTrackCapabilities() and getTrackSettings() can prove helpful to check the campera hardware support.
[!IMPORTANT] Changing the
facingModeandcameraResolution, properties or equivalent after the video stream has started will not have any effect. You need to stop the video stream and start it again with the new properties. This is to avoid unnecessary camera hardware operations.
| Name | Description |
|---|---|
capture-button | Override the default capture photo button with your own. |
capture-button-content | Override the default content of the capture photo button with your own content. |
actions | Slot to add content inside the actions container element. Useful for adding custom actions, such as a button to switch camera facing mode, or zoom in/out buttons. |
| (default) | Un-named slot to add content inside the component. |
| Name | Description |
|---|---|
video | The video element. |
actions-container | The container element for custom actions. |
capture-button | The capture photo button. |
output-container | The output container element. |
output-image | The output image element. |
| Name | Type | Description | Arguments |
|---|---|---|---|
defineCustomElement | Static | Defines/registers the custom element with the name provided. If no name is provided, the default name is used. The method checks if the element is already defined, hence will skip trying to redefine it. | [elementName='capture-photo'] |
getVideoInputDevices | Static | Returns a promise that resolves with an array of MediaDeviceInfo objects representing the available video input devices. Make sure to call this method after permission is granted to access the camera. | - |
isSupported | Static | Returns true if MediaDevices.getUserMedia() is supported by the platform, otherwise returns false. | - |
capture | Instance | Captures a photo using the element's properties. | - |
getSupportedConstraints | Instance | Returns an object based on the MediaTrackSupportedConstraints dictionary, whose member fields each specify one of the constrainable properties the user agent understands. Read more... | - |
getTrackCapabilities | Instance | Returns a MediaTrackCapabilities object which specifies the values or range of values which each constrainable property, based upon the platform and user agent. Read more... | - |
getTrackSettings | Instance | Returns a MediaTrackSettings object containing the current values of each of the constrainable properties for the current MediaStreamTrack. Read more... | - |
startVideoStream | Instance | Starts the video stream. Use this method to start the video stream manually, if autoPlay is set to false or if you want to restart the video stream after it has been previously stopped by calling stopVideoStream() method. If videoInputId is provided and the camera hardware supports it, the video stream will start using the specified video input device. You can get the available video input devices using getVideoInputDevices() static method. | [videoInputId] |
restartVideoStream | Instance | Same as startVideoStream() method but first stops the video stream if it is already playing. | [videoInputId] |
stopVideoStream | Instance | Stops the video stream and releases the camera. Use this method if you want to stop the video stream manually. | - |
[!IMPORTANT] Instance methods are only available after the component has been defined. To ensure the component is defined, you can use
whenDefinedmethod of theCustomElementRegistryinterface, egcustomElements.whenDefined('capture-photo').then(() => { /* call methods here */ });
| Name | Description | Event Detail |
|---|---|---|
capture-photo:video-play | Emitted when camera's video stream starts playing. It is triggered during initial load, or when facing mode or camera resolution mode change are requested. | { video: HTMLVideoElement } |
capture-photo:success | Emitted when a photo is captured successfully. | { dataURI: string, width: number, height: number, size?: number } |
capture-photo:error | Emitted when an error occurs. An error might occur because camera permission is denied, a photo cannot be captured for any reason, the video stream cannot start for any reason, etc. | { error: DOMException } |
For API updates and breaking changes, check the CHANGELOG.
The project requires Node.js and npm to be installed on your environment. Preferrably, use nvm Node Version Manager and use the version of Node.js specified in the .nvmrc file by running nvm use.
Install the project dependencies by running the following command.
npm install
Watch for changes and start a development server by running the following command.
npm start
Lint the code by running the following command.
npm run lint
Run the tests by running any of the following commands.
npm test
npm run test:watch # watch mode
Create a production build by running the following command.
npm run build
v5.0.0 (2024-10-16)
facingMode property from "user" to "environment", to be as much consistent as possible with the default camera facing mode of most mobile devices.facing-mode-button slot and button to toggle the camera facing mode in favor of consistence with other camera properties thad don't have a dedicated button, such as camera-resolution, torch, pan, tilt and zoom.facingMode and cameraResolution, properties or equivalent attributes after the video stream has started will not have any effect. You need to restart the video stream with the new properties. This is to avoid unnecessary camera hardware operations.getVideoInputDevices() to get the list of available video input devices.deviceInputId as argument to the startVideoStream() method to start the video stream with a specific video input device.restartVideoStream() to restart the video stream with the current properties.FAQs
A custom element that implements the MediaDevices.getUserMedia() method of the MediaDevices interface to capture a photo in the browser.
We found that @georapbox/capture-photo-element demonstrated a healthy version release cadence and project activity because the last version was released less than a year ago. It has 0 open source maintainers collaborating on the project.
Did you know?

Socket for GitHub automatically highlights issues in each pull request and monitors the health of all your open source dependencies. Discover the contents of your packages and block harmful activity before you install or update your dependencies.

Security News
The Rust Security Response WG is warning of phishing emails from rustfoundation.dev targeting crates.io users.

Product
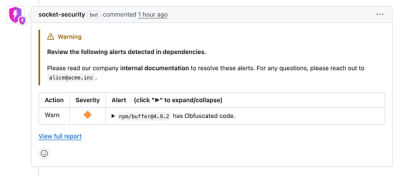
Socket now lets you customize pull request alert headers, helping security teams share clear guidance right in PRs to speed reviews and reduce back-and-forth.

Product
Socket's Rust support is moving to Beta: all users can scan Cargo projects and generate SBOMs, including Cargo.toml-only crates, with Rust-aware supply chain checks.