Product
Rust Support Now in Beta
Socket's Rust support is moving to Beta: all users can scan Cargo projects and generate SBOMs, including Cargo.toml-only crates, with Rust-aware supply chain checks.
@iflow-ai/iflow-cli
Advanced tools

English | 中文 | 日本語 | 한국어 | Français | Deutsch | Español | Русский
iFlow CLI is a powerful AI assistant that runs directly in your terminal. It seamlessly analyzes code repositories, executes coding tasks, understands context-specific needs, and boosts productivity by automating everything from simple file operations to complex workflows.
bash -c "$(curl -fsSL https://cloud.iflow.cn/iflow-cli/install.sh)"
This command automatically installs all necessary dependencies for your terminal.
Windows Users:
npm install -g @iflow-ai/iflow-cli to install iFlow CLIiflow to start iFlow CLIIf you are in China Mainland, you can use the following command to install iFlow CLI:
nvm node_mirror https://npmmirror.com/mirrors/node/ and nvm npm_mirror https://npmmirror.com/mirrors/npm/nvm install 22 to install Node.js 22nvm use 22 to use Node.js 22npm install -g @iflow-ai/iflow-cli to install iFlow CLIiflow to start iFlow CLIiFlow offers two authentication options:

To get your API key:

After generating your key, paste it into the terminal prompt to complete setup.
To launch iFlow CLI, navigate to your workspace in the terminal and type:
iflow
For new projects, simply describe what you want to create:
cd new-project/
iflow
> Create a web-based Minecraft game using HTML
For existing codebases, begin with the /init command to help iFlow understand your project:
cd project1/
iflow
> /init
> Analyze the requirements according to the PRD document in requirement.md file, and output a technical document, then implement the solution.
The /init command scans your codebase, learns its structure, and creates an IFLOW.md file with comprehensive documentation.
For a complete list of slash commands and usage instructions, see here.
iFlow CLI extends beyond coding to handle a wide range of tasks:
> Help me find the best-rated restaurants in Los Angeles and create a 3-day food tour itinerary.
> Search for the latest iPhone price comparisons and find the most cost-effective purchase option.
> Organize the files on my desktop by file type into separate folders.
> Batch download all images from this webpage and rename them by date.
> Analyze the sales data in this Excel spreadsheet and generate a simple chart.
> Extract customer information from these CSV files and merge them into a unified table.
> Analyze the main architectural components and module dependencies of this system.
> I'm getting a null pointer exception after my request, please help me find the cause of the problem.
> Create a script to periodically backup my important files to cloud storage.
> Write a program that downloads stock prices daily and sends me email notifications.
Note: Advanced automation tasks can leverage MCP servers to integrate your local system tools with enterprise collaboration suites.
iFlow CLI can connect to any OpenAI-compatible API. Edit the settings file in ~/.iflow/settings.json to change the model you use.
Here is a settings demo file:
{
    "theme": "Default",
    "selectedAuthType": "iflow",
    "apiKey": "your iflow key",
    "baseUrl": "https://apis.iflow.cn/v1",
    "modelName": "Qwen3-Coder",
    "searchApiKey": "your iflow key"
}
If you encounter runtime crashes, you can enable crash diagnostics to collect detailed information for debugging:
# Enable crash debugging mode
DEBUG=true iflow

# Or with additional Node.js debugging flags
DEBUG=true node --trace-warnings --trace-uncaught node_modules/.bin/iflow
macOS:
# Enable core dumps
ulimit -c unlimited
sudo sysctl -w kern.coredump=1
Linux:
# Configure core dump pattern and enable unlimited core dumps
echo 'core.%p.%t' | sudo tee /proc/sys/kernel/core_pattern
ulimit -c unlimited
When DEBUG=true is enabled, the system will:
Generate crash files - Create crash-[timestamp]-[pid].json files containing:
Create core dumps - Generate system core dumps for advanced debugging
Monitor warnings - Log Node.js warnings and unhandled promise rejections
The generated crash files contain structured JSON data that can help identify:
Share these files when reporting crash issues for faster debugging assistance.
You can also use iFlow CLI in your GitHub Actions workflows with the community-maintained action: iflow-cli-action
If you encounter problems during use, you can directly raise Issues on the GitHub page.
You can also scan the following WeChat group to join the community group for communication and discussion.

FAQs

The npm package @iflow-ai/iflow-cli receives a total of 13,738 weekly downloads. As such, @iflow-ai/iflow-cli popularity was classified as popular.
We found that @iflow-ai/iflow-cli demonstrated a healthy version release cadence and project activity because the last version was released less than a year ago. It has 4 open source maintainers collaborating on the project.
Did you know?

Socket for GitHub automatically highlights issues in each pull request and monitors the health of all your open source dependencies. Discover the contents of your packages and block harmful activity before you install or update your dependencies.

Product
Socket's Rust support is moving to Beta: all users can scan Cargo projects and generate SBOMs, including Cargo.toml-only crates, with Rust-aware supply chain checks.

Product
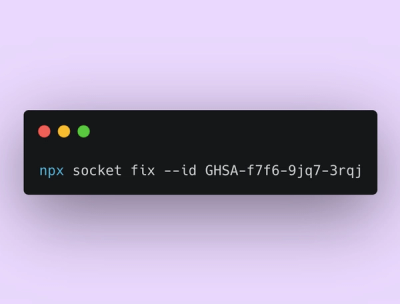
Socket Fix 2.0 brings targeted CVE remediation, smarter upgrade planning, and broader ecosystem support to help developers get to zero alerts.

Security News
Socket CEO Feross Aboukhadijeh joins Risky Business Weekly to unpack recent npm phishing attacks, their limited impact, and the risks if attackers get smarter.