Security News
PodRocket Podcast: Inside the Recent npm Supply Chain Attacks
Socket CEO Feross Aboukhadijeh discusses the recent npm supply chain attacks on PodRocket, covering novel attack vectors and how developers can protect themselves.
@ngxd/core
Advanced tools

🥳 Best way to quickly use Dynamic Components with Angular
Use like NgComponentOutlet but with @Input and @Output auto bindings:
<ng-container *ngxComponentOutlet="component"></ng-container>
Here is a demo example showing NGX Dynamic and Angular in action.
@ngxd/core:npm install --save @ngxd/core
# or
yarn add @ngxd/core
Note: @ngxd/core@12 only supports angular with Ivy is enabled
Note: If you want to use @ngxd/core with a specific angular version, you have to install @ngxd/core which version you need:
- @angular/core@7 => npm install @ngxd/core@7
- @angular/core@8 => npm install @ngxd/core@8
- @angular/core@9 => npm install @ngxd/core@9
- @angular/core@10 => npm install @ngxd/core@10
- @angular/core@11 => npm install @ngxd/core@11
- @angular/core@12 => npm install @ngxd/core@12
- @angular/core@13 => npm install @ngxd/core@13
- @angular/core@14 => npm install @ngxd/core@14
- @angular/core@15 => npm install @ngxd/core@15
- @angular/core@16 => npm install @ngxd/core@16
import { NgxdModule } from '@ngxd/core';

@NgModule({
  declarations: [ AppComponent ],
  // have import NgxdModule here 👇
  imports: [ BrowserModule, NgxdModule ],
  bootstrap: [ AppComponent ]
})
export class AppModule {}
@Component({
  template: `
    <ng-container *ngxComponentOutlet="component"></ng-container>`
    // using @ngxd/core 👆
})
class MyComponent {
  // your dynamic component 👇
  component = DynamicComponent;

  // 🥳 inputs and outputs will binding automatically
  @Input() entity;
  @Output() action;
}
There are several modes of operation of the directive.
A simple variant of binding through the parent component.
@Component({
  template: `
    <ng-container *ngxComponentOutlet="component"></ng-container>`
    // using @ngxd/core 👆
})
class MyComponent {
  // your dynamic component 👇
  component = DynamicComponent;

  // 🥳 inputs and outputs will binding automatically
  @Input() entity;
  @Output() action;
}
Note: You not permitted to passing the outputs using the context. The context will be passing inputs only.
In the example below, you can see the binding through the context. This is useful when you need to display something through *ngFor. Note that the context has a higher priority than the inputs in the component.
<ng-container *ngFor="let color of colors"
  <ng-container *ngxComponentOutlet="
      component; context: { color: color }
  "></ng-container>
</ng-container>
To switch a component, you just need to overwrite it with another one.
class AppComponent {
  ngOnChanges(changes: SimpleChanges): void {
    if ('type' in changes) {
      switch (this.type) {
        case 'number':
          this.component = NumberComponent;
          break;
        case 'text':
          this.component = TextComponent;
          break;
        default:
          this.component = DefaultComponent;
      }
    }
  }
}
If you have a bunch of components, then you go to switch between them. To do this, you can use NgxdResolvePipe and NgxdResolver to help you isolate dynamic component selection.
<ng-container *ngxComponentOutlet="
    resolver | resolve : type
"></ng-container>
If you need to load and display a dynamic component lazily, then you can use lazy import and pass it to the async pipe.
component = import('./my-lazy-component')
  .then(m => m.MyLazyComponent);
<ng-container *ngxComponentOutlet="
    component | async
"></ng-container>
You can also load a bunch of components lazily and render them.
resolver = import('./my-lazy-resolver')
  .then(m => m.myLazyResolver);
<ng-container *ngxComponentOutlet="
    resolver | async | resolve : type
"></ng-container>
If you want to use the <ng-content> and pass the content to your dynamic component, you have to check the example below.
| Feature | NgxComponentOutlet | ComponentFactoryResolver | NgComponentOutlet |
|---|---|---|---|
| Friendliness | ⭐⭐⭐ | ⭐ | ⭐⭐ |
| Dynamic Components | ✅ | ✅ | ✅ |
| AOT support | ✅ | ✅ | ✅ |
| Reactivity | ✅ | ✅ | ✅ |
| Injector | ✅ | ✅ | ✅ |
| NgModule | ✅ | ✅ | ✅ |
| projectionNodes | ✅ | ✅ | ✅ |
| Component Access | ✅ | ✅ | ❌ |
| Lifecycle OnChanges | ✅ | ⭕️ manually | ❌ |
Binding @Input() | ✅ | ⭕️ manually | ❌ |
Binding @Output() | ✅ | ⭕️ manually | ❌ |
| Activate Event | ✅ | ⭕️ manually | ❌ |
| Deactivate Event | ✅ | ⭕️ manually | ❌ |
| Input | Type | Default | Required | Description |
|---|---|---|---|---|
[ngxComponentOutlet] | Type<any> | n/a | yes | |
[ngxComponentOutletContext] | any | n/a | no | |
[ngxComponentOutletInjector] | Injector | n/a | no | |
[ngxComponentOutletContent] | any[][] | n/a | no |
| Output | Type | Description |
|---|---|---|
(ngxComponentOutletActivate) | any | |
(ngxComponentOutletDeactivate) | any |
FAQs
NGXD is a dynamic pattern + library for Angular
The npm package @ngxd/core receives a total of 2,595 weekly downloads. As such, @ngxd/core popularity was classified as popular.
We found that @ngxd/core demonstrated a not healthy version release cadence and project activity because the last version was released a year ago. It has 1 open source maintainer collaborating on the project.
Did you know?

Socket for GitHub automatically highlights issues in each pull request and monitors the health of all your open source dependencies. Discover the contents of your packages and block harmful activity before you install or update your dependencies.

Security News
Socket CEO Feross Aboukhadijeh discusses the recent npm supply chain attacks on PodRocket, covering novel attack vectors and how developers can protect themselves.

Security News
Maintainers back GitHub’s npm security overhaul but raise concerns about CI/CD workflows, enterprise support, and token management.

Product
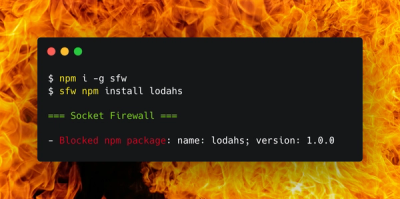
Socket Firewall is a free tool that blocks malicious packages at install time, giving developers proactive protection against rising supply chain attacks.