Product
Announcing Bun and vlt Support in Socket
Bringing supply chain security to the next generation of JavaScript package managers
By Ricky Reusser, Eli Insua - Nov 19, 2025
@notifi-network/notifi-frontend-client
Advanced tools
The Notifi Frontend Client SDK is a JavaScript (Typescript) library that allows you to integrate the Notifi Network into your decentralized application (dApp). Dapp will be able to access Notifi services using client methods.
@notifi/notifi-frontend-client package is not framework specific, it means you can use it with any JavaScript framework like React, Angular, Vue, svelte, etc.
Note: if you are using React, Notifi has a React SDK that is built on top of this SDK, @notifi-network/notifi-react
npm i @notifi-network/notifi-frontend-client
Instantiate the client object at your dapp to interact with the Notifi core services by providing your notifi Notifi tenant credentials and the user's wallet information.
const tenantId = '<notifi-tenent-id>'; // dappAddress
const env = 'Production'; // or 'Development'
const walletBlockchain = '<the-blockchain-of-your-choice>'; // e.g. 'Ethereum'

const client = instantiateFrontendClient({
  walletBlockchain,
  // ⬇ Users wallet credentials (public key, address, user account ... etc), properties differ depending on the blockchain (below is an example for Evm chains)
  walletPublicKey: '<user-wallet-public-key>',
  // ⬇ Notifi tenant credentials
  tenantId,
  env,
});

const newUserState = await client.initialize();
Reference:
- You can register a new tenant to get tenantId (dappAddress) at Notifi Admin Panel for free.
- The interface of input argument differs depending on the blockchain, see the type doc here
There are two authentication categories to onboard the users with Notifi:
On-chain (blockchain) authorization
Off-chain (OpenID Connect) authorization
Authorize users using logIn client method by providing a signMessage callback function.
const signMessage: AptosSignMessageFunction = async (message, nonce) => {
  // Implement your signing logic here ...

  return signature; // string (if the signature is not string format, you will need to convert it to string)
};

const loginResult = await client.logIn({
  walletBlockchain: `the-blockchain-of-your-choice`,
  signMessage,
});
NOTE:
- The format of the returned signature differs depending on the blockchain, see the type doc here
- The example of implementing
signMessagecallback function: notifi-svelte-example- Notifi supported blockchains: WalletBlockchain Enum documentation
Authorize users by using beginLoginViaTransaction method and completeLoginViaTransaction client method. The beginLoginViaTransaction method will return a nonce that should be appended to the transaction data before signing the transaction. The completeLoginViaTransaction method will take the transaction signature and the nonce to complete the login process. The following examples show how to authorize a user using the transaction signature method on EVM (Ethereum virtual machine) compatible blockchains.
const smartContract = new ethers.Contract(
  `<contract-address>`,
  `<contract-abi>`,
  provider.getSigner(),
);

// Assume the smart contract has an "example" method with one argument uint amount
const amount = ethers.utils.parseUnits('0.1', 'ether');

// Step 1: Get the calldata for the smart contract method call
const calldata = smartContract.interface.encodeFunctionData('example', [
  amount,
]);

// Step 2: Get notifi nonce
const { nonce } = await notifiClient.beginLoginViaTransaction({
  walletBlockchain,
  walletAddress,
});
console.log({ notifiNonce: nonce }); // notifiNonce will be a 32 bytes hex string

// Step 3: Append notifi nonce to the calldata
const txParams = {
  to: smartContract.address,
  data: calldata + nonce.replace('0x', ''),
};

// Step 4: Sign the transaction with new calldata
const { hash } = await provider.getSigner().sendTransaction(txParams);

// Step 5: Use the transaction signature to login to notifi
const notifiLoginResult = await notifiClient.completeLoginViaTransaction({
  walletAddress,
  walletAddress,
  transactionSignature: hash,
  walletBlockchain,
});
IMPORTANT NOTE:
Message: Invalid token value; should be exactly xx hex digits long error in this case.Authorize users by using logIn client method by providing a signIn callback function.
const signIn: OidcSignInFunction = async () => {
  // other logic here to generate the OIDC token id (JWT token)
  const jwt = '<the-oidc-id-token-here>';
  return {
    oidcProvider: 'GOOGLE',
    jwt,
  };
};

const loginResult = await client.logIn({
  walletBlockchain: 'OFF_CHAIN',
  signIn,
});
NOTE
- Respective OIDC
loginarguments- Notifi supported OIDC providers: OidcProvider Enum document
- To enable OIDC login, it requires additional setup to integrate your OIDC provider with Notifi tenant using Notifi Admin Portal check on the Notifi Documentation (WIP: coming soon)
The fetchFusionData client method is used to fetch the user's data, including their:
targetGroup: contact informationsalerts: subscribed alertsNOTE:
The ensureTargetGroup client method is used to create a target group for the user's contact information.
Notifi supports the following destination types:
const targetGroup = client.ensureTargetGroup({
  name: 'Default',
  emailAddress: '<user-email>',
  // ... other destination types if needed
});
Reference: ensureTargetGroup
There are two key concepts of Notifi's notification source: Alert and Topic.
Topic is the event allowed to be subscribed (Tenant specific).Alert is the subscription of the Topic (User specific).
Topicis the prototype of theAlert.
We can get the available topics of the tenant by calling fetchTenantConfig client method.
const id = '<ui-card-config-of-the-tenant>';
const tenantConfig = await client.fetchTenantConfig({
  id,
  type: 'SUBSCRIPTION_CARD',
});
const topics = tenantConfig.fusionEventTopics;
NOTE:
- interface
- You can config your card in the Notifi Admin Panel
We can subscribe users to a topic by creating an alert object by using the ensureFusionAlerts client method.
The following methods are used to get and delete alerts:
getAlertsdeleteAlertThe full example of getting, deleting, and creating an alert is shown below:
import { resolveObjectArrayRef } from '@notifi-network/notifi-frontend-client';

const topic = topics[0];
const fusionEventDescriptor = topic.fusionEventDescriptor;
const fusionEventMetadataJson = fusionEventDescriptor.metadata;
const fusionEventId = fusionEventDescriptor.id;

if (fusionEventMetadataJson && fusionEventId) {
  const fusionEventMetadata = getFusionEventMetadata(topic);
  const filters = fusionEventMetadata?.filters?.filter(isAlertFilter);
  const fusionFilterOptionsInput: FusionFilterOptions['input'] = {};
  if (filters && filters.length > 0) {
    // NOTE: for now we only consider 1 to 1 relationship (1 filter for 1 topic)
    const userInputParams = filters[0].userInputParams;
    const userInputOptions: UserInputOptions = {};
    userInputParams.forEach((userInputParm) => {
      userInputOptions[userInputParm.name] = userInputParm.defaultValue;
    });
    fusionFilterOptionsInput[filters[0].name] = userInputOptions;
  }
  const filterOptions: FusionFilterOptions = {
    version: 1,
    input: fusionFilterOptionsInput,
  };
  /** Error caught here often caused by incorrect `inputs` format  */
  const subscriptionValueOrRef =
    fusionEventMetadata?.uiConfigOverride?.subscriptionValueOrRef;
  const subscriptionValue = subscriptionValueOrRef
    ? resolveObjectArrayRef('', subscriptionValueOrRef, inputs) // See the related information section for more details
    : null;

  const alertToCreate = fusionEventId;
  const createAlertInputs = [
    {
      fusionEventId: fusionEventId,
      name: alertToCreate,
      targetGroupId,
      subscriptionValue: subscriptionValue?.[0]?.value,
      filterOptions: JSON.stringify(filterOptions),
    },
  ];
}
const existingAlerts = await getAlerts()) ?? [];
const existingAlertNames = alerts.map((alert) => alert.name);

// Alerts are immutable, delete the existing instead
if (existingAlertNames.includes(alerToCreate)) {
  const id = existingAlerts[alerToCreate].id;
  await client.deleteAlert({ id });
}

// Create the alert
await frontendClient.ensureFusionAlerts({ alerts: createAlertInputs });

// Utils
const getFusionEventMetadata = (
  topic: FusionEventTopic,
): FusionEventMetadata | null => {
  const parsedMetadata = JSON.parse(
    topic.fusionEventDescriptor.metadata ?? '{}',
  );
  if (isFusionEventMetadata(parsedMetadata)) {
    return parsedMetadata;
  }
  return null;
};

const isFusionEventMetadata = (
  metadata: unknown,
): metadata is FusionEventMetadata => {
  const metadataToVerify = metadata as any;
  if (typeof metadataToVerify !== 'object' || !metadataToVerify) {
    return false;
  }
  return (
    'filters' in metadataToVerify && Array.isArray(metadataToVerify.filters)
  );
};
Related Information:
- inputs: it is a concept which is used when a dynamic topic subscription value needs to be adopted. The input is a key-value pair object. The key is the value associated with the Create a new topic section in Admin Portal. The value is the dynamic value that needs to be passed into the topic subscription. The value needs to be an array of InputObject interface. See the doc here
To get notification history, use the getFusionNotificationHistory()
const { nodes, pageInfo } = await client.getFusionNotificationHistory({
  first,
  after,
});

const notifications = nodes.map((node) => {
  return {
    icon: node.detail.icon,
    topicName: node.detail.sourceName,
    message: node.detail.message,
    timestamp: node.createdDate,
  };
});
notifi-dapp-example: A dapp example built with @notifi/notifi-frontend-client and @notifi/notifi-react SDKs.
notifi-react-example-v2: React contexts & components library built with @notifi/notifi-frontend-client.
FAQs
The frontend client for Notifi
We found that @notifi-network/notifi-frontend-client demonstrated a healthy version release cadence and project activity because the last version was released less than a year ago. It has 8 open source maintainers collaborating on the project.
Did you know?

Socket for GitHub automatically highlights issues in each pull request and monitors the health of all your open source dependencies. Discover the contents of your packages and block harmful activity before you install or update your dependencies.
Product
Bringing supply chain security to the next generation of JavaScript package managers
Product
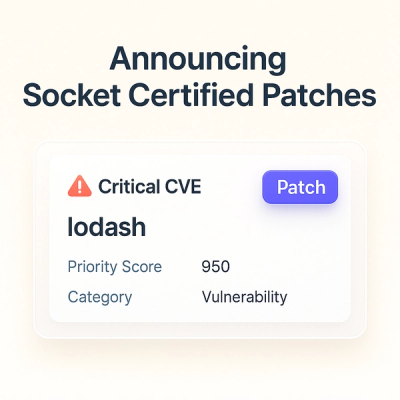
A safer, faster way to eliminate vulnerabilities without updating dependencies

Product
Reachability analysis for Ruby is now in beta, helping teams identify which vulnerabilities are truly exploitable in their applications.