Security News
Package Maintainers Call for Improvements to GitHub’s New npm Security Plan
Maintainers back GitHub’s npm security overhaul but raise concerns about CI/CD workflows, enterprise support, and token management.
@ohmi/gl-react-native
Advanced tools
OpenGL bindings for react-native to implement complex effects over images and components, in the descriptive VDOM paradigm
模板版本:v0.3.0
gl-react-native 本项目基于 gl-react-native@2.57.1 开发。
请到三方库的 Releases 发布地址查看配套的版本信息:@ohmi/gl-react-native Releases 。
进入到工程目录并输入以下命令:
npm install @ohmi/gl-react-native
yarn add @ohmi/gl-react-native
下面的代码展示了这个库的基本使用场景:
[!WARNING] 使用时 import 的库名不变。
import React, { useState } from 'react';
import { View, Text, StyleSheet, Button, ScrollView } from 'react-native';
import { Shaders, Node } from 'gl-react';
import { Surface } from 'gl-react-native';
import { TestSuite, Tester, TestCase } from '@rnoh/testerino';

export default function helloGL() {
  let [flag, setFlag] = useState(false)
  let [flag1, setFlag1] = useState(false)
  let [draw, setDraw] = useState(null)
  const shaders = Shaders.create({
    helloBlue: {
      frag: `
            precision highp float;
            varying vec2 uv;
            void main() {
              gl_FragColor = vec4(uv.x, uv.y, 0.5, 1.0);
            }
            `
    }
  });
  return (
    <ScrollView>
      <Tester>
        <TestSuite name="helloGl">
          <TestCase itShould="渐变,Surface-width,Surface-height,Node-sync,Node-backbuffering,Node-blendFunc,Node-clear,Node-onDraw" tags={['C_API']}>
            <Surface width={300} height={300}
              autoRedraw={true}
            >
              <Node
                width={100}
                height={100}
                sync={flag}
                backbuffering={flag1}
                shader={shaders.helloBlue}
                clear={{color:[0,0,255,0.3]}}
                onDraw={(item) => {
                  if (item) {
                    alert('执行onDraw')
                  }
                  setDraw(item)
                }}
              />
            </Surface>
            <View style={styles.view}>
              <Text>helloGL</Text>
              <Text>shader:gl_FragColor = vec4(uv.x, uv.y, 0.5, 1.0);</Text>
              <Text>Surface-width:300</Text>
              <Text>Surface-height:300</Text>
              <Text>Node-sync:{`${flag}`}</Text>
              <Text>Node-backbuffering:{`${flag1}`}</Text>
              <Text>Node-blendFunc:['srcAlpha', 'oneMinusSrcAlpha']</Text>
              <Text>Node-onDraw:{`${draw}`}</Text>
            </View>
            <View style={{ marginTop: 20 }}>
              <Button title='sync' onPress={() => {
                setFlag(!flag)
              }} />
              <Button title='backbuffering' onPress={() => {
                setFlag1(!flag1)
              }} />
            </View>
          </TestCase>
        </TestSuite>
      </Tester>
    </ScrollView>
  );
};
const styles = StyleSheet.create({
  view: {
    marginBottom: 10,
  },
  text: {
    color: 'white'
  }
});
此步骤为手动配置原生依赖项的指导。
首先需要使用 DevEco Studio 打开项目里的 HarmonyOS 工程 harmony。
为了让工程依赖同一个版本的 RN SDK,需要在工程根目录的 oh-package.json5 添加 overrides 字段,指向工程需要使用的 RN SDK 版本。替换的版本既可以是一个具体的版本号,也可以是一个模糊版本,还可以是本地存在的 HAR 包或源码目录。
关于该字段的作用请阅读官方说明
{
  ...
  "overrides": {
    "@rnoh/react-native-openharmony": "^0.72.38" // ohpm 在线版本
    // "@rnoh/react-native-openharmony" : "./react_native_openharmony.har" // 指向本地 har 包的路径
    // "@rnoh/react-native-openharmony" : "./react_native_openharmony" // 指向源码路径
  }
}
目前有两种方法:
方法一:通过 har 包引入(推荐)
[!TIP] har 包位于三方库安装路径的
harmony文件夹下。
打开 entry/oh-package.json5,添加以下依赖
"dependencies": {
    "@ohmi/gl-react-native": "file:../../node_modules/@ohmi/gl-react-native/harmony/glRN.har"
  }
点击右上角的 sync 按钮
或者在命令行终端执行:
cd entry
ohpm install
打开 entry/src/main/cpp/CMakeLists.txt,添加:
project(rnapp)
cmake_minimum_required(VERSION 3.4.1)
set(CMAKE_SKIP_BUILD_RPATH TRUE)
set(RNOH_APP_DIR "${CMAKE_CURRENT_SOURCE_DIR}")
set(NODE_MODULES "${CMAKE_CURRENT_SOURCE_DIR}/../../../../../node_modules")
+ set(OH_MODULES "${CMAKE_CURRENT_SOURCE_DIR}/../../../oh_modules")
set(RNOH_CPP_DIR "${CMAKE_CURRENT_SOURCE_DIR}/../../../../../../react-native-harmony/harmony/cpp")
set(LOG_VERBOSITY_LEVEL 1)
set(CMAKE_ASM_FLAGS "-Wno-error=unused-command-line-argument -Qunused-arguments")
set(CMAKE_CXX_FLAGS "-fstack-protector-strong -Wl,-z,relro,-z,now,-z,noexecstack -s -fPIE -pie")
set(WITH_HITRACE_SYSTRACE 1) # for other CMakeLists.txt files to use
add_compile_definitions(WITH_HITRACE_SYSTRACE)

# RNOH_BEGIN: manual_package_linking_1
add_subdirectory("../../../../sample_package/src/main/cpp" ./sample-package)
+ add_subdirectory("${OH_MODULES}/@ohmi/gl-react-native/src/main/cpp" ./glRN)
# RNOH_END: manual_package_linking_1

add_library(rnoh_app SHARED
    "./PackageProvider.cpp"
    "${RNOH_CPP_DIR}/RNOHAppNapiBridge.cpp"
)

target_link_libraries(rnoh_app PUBLIC rnoh)

# RNOH_BEGIN: link_packages
target_link_libraries(rnoh_app PUBLIC rnoh_sample_package)
+ target_link_libraries(rnoh_app PUBLIC rnoh_glRN)
# RNOH_END: link_packages
打开 entry/src/main/cpp/PackageProvider.cpp,添加:
...
+ #include "GLRNPackage.h"

using namespace rnoh;

std::vector<std::shared_ptr<Package>> PackageProvider::getPackages(Package::Context ctx) {
    return {
      ...
+     std::make_shared<GLRNPackage>(ctx)
    };
}
[!TIP] 版本 v0.2.22 及以上需要
打开 entry/src/main/ets/RNPackagesFactory.ts,添加:
  ...
+ import { GLRNPackage } from '@ohmi/gl-react-native/ts';

export function createRNPackages(ctx: RNPackageContext): RNPackage[] {
  return [
+   return [new GLRNPackage(ctx)];
  ];
}
找到 function buildCustomRNComponent(),一般位于 entry/src/main/ets/pages/index.ets 或 entry/src/main/ets/rn/LoadBundle.ets,添加:
  ...
+ import { RNCGLCanvas } from '@ohmi/gl-react-native'

  @Builder
  function buildCustomRNComponent(ctx: ComponentBuilderContext) {
    ...
+   if (ctx.componentName === RNCGLCanvas.NAME) {
+     RNCGLCanvas({
+      ctx: ctx.rnComponentContext,
+      tag: ctx.tag
+     })
+   }
    ...
  }
  ...
[!TIP] 本库使用了混合方案,需要添加组件名。
在entry/src/main/ets/pages/index.ets 或 entry/src/main/ets/rn/LoadBundle.ets 找到常量 arkTsComponentNames 在其数组里添加组件名
const arkTsComponentNames: Array<string> = [
  ...
+ RNCGLCanvas.NAME
];
点击右上角的 sync 按钮
或者在终端执行:
cd entry
ohpm install
然后编译、运行即可。
要使用此库,需要使用正确的 React-Native 和 RNOH 版本。另外,还需要使用配套的 DevEco Studio 和 手机 ROM。
请到三方库相应的 Releases 发布地址查看 Release 配套的版本信息:@ohmi/gl-react-native Releases
[!TIP] "Platform"列表示该属性在原三方库上支持的平台。
[!TIP] "HarmonyOS Support"列为 yes 表示 HarmonyOS 平台支持该属性;no 则表示不支持;partially 表示部分支持。使用方法跨平台一致,效果对标 iOS 或 Android 的效果。
Surface:
Name 回调 Description Type Platform HarmonyOS Support children 属性 渲染一些 Node 和/或 Bus 的 React 元素树 元素(node) 所有平台 (All) 是 (yes) width 属性 Surface的宽 数字(number) 所有平台 (All) 是 (yes) height 属性 Surface的高 数字(number) 所有平台 (All) 是 (yes) style 属性 传递到底层 或 的 CSS 样式 对象(object) 所有平台 (All) 是 (yes) preload 属性 在 Surface 开始渲染之前要预加载的事物数组。帮助避免闪烁并提供渲染初始状态所需的纹理 数组(array) 所有平台 (All) 是 (yes) onLoadError 回调 Surface 最初无法加载时调用的回调 函数(function) 所有平台 (All) 是 (yes) onContextLost 回调 当 Surface 上下文丢失时调用的回调 函数(function) 所有平台 (All) 是 (yes) onContextRestored 回调 Surface 恢复并准备就绪时调用的回调 函数(function) 所有平台 (All) 是 (yes) onLoad 回调 在 Surface 准备就绪且刚渲染后调用的回调 函数(function) 所有平台 (All) 是 (yes) Node:
| Name | 回调 | Description | Type | Platform | HarmonyOS Support |
|---|---|---|---|---|---|
| shader | 属性 | 使用 Shaders.create 创建 | 对象(object) | 所有平台 (All) | 是 (yes) |
| uniforms | 属性 | 传递给片段着色器的 uniform 值 | 对象(object) | 所有平台 (All) | 是 (yes) |
| uniformsOptions | 属性 | 允许配置 sampler2D 纹理的插值等内容 | 对象(object) | 所有平台 (All) | 是 (yes) |
| width | 属性 | 以实际像素为单位的宽度 | 数组(array) | 所有平台 (All) | 是 (yes) |
| height | 属性 | 以实际像素单位表示的高度 | 数组(array) | 所有平台 (All) | 是 (yes) |
| sync | 属性 | 如果为 true,则 React 更新将始终强制同步重绘 Node 帧缓冲区 | 布尔(Boolean) | 所有平台 (All) | 是 (yes) |
| backbuffering | 属性 | 启用允许在 uniform 中使用 Backbuffer 的 backbuffering 来获取片段着色器中先前的 framebuffer 纹理状态 | 布尔(Boolean) | 所有平台 (All) | 是 (yes) |
| blendFunc | 属性 | 配置要使用的混合函数 | 函数(function) | 所有平台 (All) | 是 (yes) |
| clear | 回调 | 配置 Clear to use | 函数(function) | 所有平台 (All) | 是 (yes) |
| onDraw | 回调 | 每次为此节点生成绘制时调用的回调 | 函数(function) | 所有平台 (All) | 是 (yes) |
| children | 属性 | 在高级用例中,您可以渲染 Bus 或内容以供 Node 使用 | 函数(function) | 所有平台 (All) | 是 (yes) |
本项目基于 The MIT License (MIT) ,请自由地享受和参与开源。
FAQs
OpenGL bindings for react-native to implement complex effects over images and components, in the descriptive VDOM paradigm
The npm package @ohmi/gl-react-native receives a total of 9 weekly downloads. As such, @ohmi/gl-react-native popularity was classified as not popular.
We found that @ohmi/gl-react-native demonstrated a healthy version release cadence and project activity because the last version was released less than a year ago. It has 5 open source maintainers collaborating on the project.
Did you know?

Socket for GitHub automatically highlights issues in each pull request and monitors the health of all your open source dependencies. Discover the contents of your packages and block harmful activity before you install or update your dependencies.

Security News
Maintainers back GitHub’s npm security overhaul but raise concerns about CI/CD workflows, enterprise support, and token management.

Product
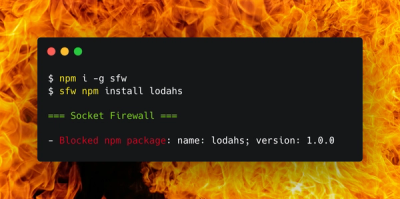
Socket Firewall is a free tool that blocks malicious packages at install time, giving developers proactive protection against rising supply chain attacks.

Research
Socket uncovers malicious Rust crates impersonating fast_log to steal Solana and Ethereum wallet keys from source code.