Product
Socket for Jira Is Now Available
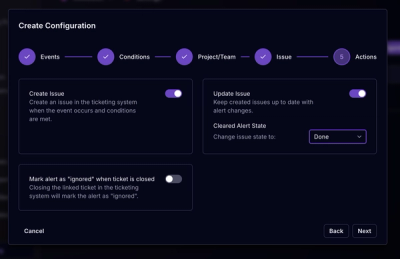
Socket for Jira lets teams turn alerts into Jira tickets with manual creation, automated ticketing rules, and two-way sync.
By Jeppe Hasseriis - Apr 20, 2026
@pinecone-database/pinecone
Advanced tools
The official Pinecone TypeScript SDK for building vector search applications with AI/ML.


The official Pinecone TypeScript SDK for building vector search applications with AI/ML.
Pinecone is a vector database that makes it easy to add vector search to production applications. Use Pinecone to store, search, and manage high-dimensional vectors for applications like semantic search, recommendation systems, and RAG (Retrieval-Augmented Generation).
[!NOTE] For notes on changes between major versions, see the migration guides:
- v2 Migration Guide - Upgrading from v1.x to v2.x
- v1 Migration Guide - Upgrading from v0.x to v1.x
Note for TypeScript users: This SDK uses Node.js built-in modules in its type definitions. If you're using TypeScript, ensure you have @types/node installed in your project:
npm install --save-dev @types/node
npm install @pinecone-database/pinecone
The Pinecone TypeScript SDK is intended for server-side use only. Using the SDK within a browser context can expose your API key(s). If you have deployed the SDK to production in a browser, please rotate your API keys.
This example shows how to create an index, add vectors with embeddings you've generated, and query them. This approach gives you full control over your embedding model and vector generation process.
import { Pinecone } from '@pinecone-database/pinecone';

// 1. Instantiate the Pinecone client
// Option A: Pass API key directly
const pc = new Pinecone({ apiKey: 'YOUR_API_KEY' });

// Option B: Use environment variable (PINECONE_API_KEY)
// const pc = new Pinecone();

// 2. Create a serverless index
const indexModel = await pc.createIndex({
  name: 'example-index',
  dimension: 1536,
  metric: 'cosine',
  spec: {
    serverless: {
      cloud: 'aws',
      region: 'us-east-1',
    },
  },
});

// 3. Target the index
const index = pc.index({ host: indexModel.host });

// 4. Upsert vectors with metadata
await index.upsert({
  records: [
    {
      id: 'vec1',
      values: [0.1, 0.2, 0.3, 0.4, 0.5, 0.6, 0.7, 0.8], // ... dimension should match index (1536)
      metadata: { genre: 'drama', year: 2020 },
    },
    {
      id: 'vec2',
      values: [0.2, 0.3, 0.4, 0.5, 0.6, 0.7, 0.8, 0.9],
      metadata: { genre: 'action', year: 2021 },
    },
  ],
});

// 5. Query the index
const queryResponse = await index.query({
  vector: [0.1, 0.2, 0.3, 0.4, 0.5, 0.6, 0.7, 0.8], // ... query vector
  topK: 3,
  includeMetadata: true,
});

console.log(queryResponse);
This example demonstrates using Pinecone's integrated inference capabilities. You provide raw text data, and Pinecone handles embedding generation and optional reranking automatically. This is ideal when you want to focus on your data and let Pinecone handle the ML complexity.
import { Pinecone } from '@pinecone-database/pinecone';

// 1. Instantiate the Pinecone client
const pc = new Pinecone({ apiKey: 'YOUR_API_KEY' });

// 2. Create an index configured for use with a particular embedding model
const indexModel = await pc.createIndexForModel({
  name: 'example-index',
  cloud: 'aws',
  region: 'us-east-1',
  embed: {
    model: 'multilingual-e5-large',
    fieldMap: { text: 'chunk_text' },
  },
  waitUntilReady: true,
});

// 3. Target the index
const index = pc.index({ host: indexModel.host });

// 4. Upsert records with raw text data
// Pinecone will automatically generate embeddings using the configured model
await index.upsertRecords({
  records: [
    {
      id: 'rec1',
      chunk_text:
        "Apple's first product, the Apple I, was released in 1976 and was hand-built by co-founder Steve Wozniak.",
      category: 'product',
    },
    {
      id: 'rec2',
      chunk_text:
        'Apples are a great source of dietary fiber, which supports digestion and helps maintain a healthy gut.',
      category: 'nutrition',
    },
    {
      id: 'rec3',
      chunk_text:
        'Apples originated in Central Asia and have been cultivated for thousands of years, with over 7,500 varieties available today.',
      category: 'cultivation',
    },
    {
      id: 'rec4',
      chunk_text:
        'In 2001, Apple released the iPod, which transformed the music industry by making portable music widely accessible.',
      category: 'product',
    },
  ],
});

// 5. Search for similar records using text queries
// Pinecone handles embedding the query and optionally reranking results
const searchResponse = await index.searchRecords({
  query: {
    inputs: { text: 'Apple corporation' },
    topK: 3,
  },
  rerank: {
    model: 'bge-reranker-v2-m3',
    topN: 2,
    rankFields: ['chunk_text'],
  },
});

console.log(searchResponse);
The Pinecone Assistant API enables you to create and manage AI assistants powered by Pinecone's vector database capabilities. These Assistants can be customized with specific instructions and metadata, and can interact with files and engage in chat conversations.
import { Pinecone } from '@pinecone-database/pinecone';
const pc = new Pinecone();

// Create an assistant
const assistant = await pc.createAssistant({
  name: 'product-assistant',
  instructions: 'You are a helpful product recommendation assistant.',
});

// Target the assistant for data operations
const myAssistant = pc.assistant({ name: 'product-assistant' });

// Upload a file
await myAssistant.uploadFile({
  path: 'product-catalog.txt',
  metadata: { source: 'catalog' },
});

// Chat with the assistant
const response = await myAssistant.chat({
  messages: [
    {
      role: 'user',
      content: 'What products do you recommend for outdoor activities?',
    },
  ],
});

console.log(response.message.content);
For more information on Pinecone Assistant, see the Pinecone Assistant documentation.
Detailed information on specific ways of using the SDK are covered in these guides:
Index Management:
Data Operations:
Inference:
Assistant:
TypeScript Features:
Additional Resources:
If you notice bugs or have feedback, please file an issue.
You can also get help in the Pinecone Community Forum.
If you'd like to make a contribution, or get setup locally to develop the Pinecone TypeScript SDK, please see our contributing guide
Faiss is a library developed by Facebook AI Research for efficient similarity search and clustering of dense vectors. It is highly optimized for performance and can handle large-scale datasets. Unlike Pinecone, Faiss is more of a low-level library and requires more setup and management.
Annoy (Approximate Nearest Neighbors Oh Yeah) is a C++ library with Python bindings for performing fast approximate nearest neighbor searches. It is particularly useful for read-heavy workloads and is easy to use. However, it lacks some of the advanced features and scalability options provided by Pinecone.
Milvus is an open-source vector database designed for scalable similarity search and AI applications. It supports various indexing methods and is highly scalable. Milvus offers more flexibility and control over the indexing and querying process compared to Pinecone.
FAQs
The official Pinecone TypeScript SDK for building vector search applications with AI/ML.
The npm package @pinecone-database/pinecone receives a total of 447,218 weekly downloads. As such, @pinecone-database/pinecone popularity was classified as popular.
We found that @pinecone-database/pinecone demonstrated a healthy version release cadence and project activity because the last version was released less than a year ago. It has 1 open source maintainer collaborating on the project.
Did you know?

Socket for GitHub automatically highlights issues in each pull request and monitors the health of all your open source dependencies. Discover the contents of your packages and block harmful activity before you install or update your dependencies.
Product
Socket for Jira lets teams turn alerts into Jira tickets with manual creation, automated ticketing rules, and two-way sync.

Company News
Socket won two 2026 Reppy Awards from RepVue, ranking in the top 5% of all sales orgs. AE Alexandra Lister shares what it's like to grow a sales career here.

Security News
NIST will stop enriching most CVEs under a new risk-based model, narrowing the NVD's scope as vulnerability submissions continue to surge.