Security News
PodRocket Podcast: Inside the Recent npm Supply Chain Attacks
Socket CEO Feross Aboukhadijeh discusses the recent npm supply chain attacks on PodRocket, covering novel attack vectors and how developers can protect themselves.
@suprsend/web-sdk
Advanced tools
This library is used to integrate SuprSend features like WebPush, Preferences in to your javascript client environments.
📘 This is v2 version of @suprsend/web-sdk
We have changed the web SDK authentication from workspace key-secret to public key and JWT based authentication. This is done to improve security in frontend applications.
- Refer the v1 SDK documentation
- For migrating to v2, follow this guide
Checkout detailed documentation for this library.
# using npm
npm install @suprsend/web-sdk@latest
# using yarn
yarn add @suprsend/web-sdk@latest
Create suprSendClient instance and use same instance to access all the methods of SuprSend library.
import SuprSend from '@suprsend/web-sdk';

export const suprSendClient = new SuprSend(publicApiKey: string);
| Params | Description |
|---|---|
| publicApiKey* | This is public Key used to authenticate api calls to SuprSend. Get it in SuprSend dashboard ApiKeys -> Public Keys section |
Authenticate user so that all the actions performed after authenticating will be w.r.t that user. This is mandatory step and need to be called before using any other method. This is usually performed after successful login and on reload of page to re-authenticate user (can be changed based on your requirement).
const authResponse = await suprSendClient.identify(
  distinctId: any,
  userToken?: string, // only needed in production environments for security
  { refreshUserToken: (oldUserToken: string, tokenPayload: Dictionary) => Promise<string> }
);
| Properties | Description |
|---|---|
| distinctId* | Unique identifier to identify a user across platform. |
| userToken | Mandatory when enhanced security mode is on. This is ES256 JWT token generated in your server-side. Refer docs to create userToken. |
| refreshUserToken | This function is called by SDK internally to get new userToken before existing token is expired. The returned string is used as the new userToken. |
This will remove user data from SuprSend instance similar to logout action.
await suprSendClient.reset();
Use these methods to manipulate user properties and notification channel data of user
await suprSendClient.user.addEmail(email: string)
await suprSendClient.user.removeEmail(email: string)

// mobile should be as per E.164 standard
await suprSendClient.user.addSms(mobile: string)
await suprSendClient.user.removeSms(mobile: string)

// mobile should be as per E.164 standard
await suprSendClient.user.addWhatsapp(mobile: string)
await suprSendClient.user.removeWhatsapp(mobile: string)

// set custom user properties
await suprSendClient.user.set(arg1: string | Dictionary, arg2?: unknown)

// set properties only once that cannot be overridden
await suprSendClient.user.setOnce(arg1: string | Dictionary, arg2?: unknown)

// increase or decrease property by given value
await suprSendClient.user.increment(arg1: string | Dictionary, arg2?: number)

// Add items to list if user property is list
await suprSend.user.append(arg1: string | Dictionary, arg2?: unknown)

// Remove items from list if user property is list.
await suprSend.user.remove(arg1: string | Dictionary, arg2?: unknown)

// remove user property. If channel needs to be removed pass $email, $sms, $whatsapp
await suprSend.user.unset(arg: string | string[])

//2-letter language code in "ISO 639-1 Alpha-2" format e.g. en (for English)
await suprSendClient.user.setPreferredLanguage(language: string)

// set timezone property at user level in IANA timezone format
await suprSendClient.user.setTimezone(timezone: string)
const response = await suprSendClient.track(event: string, properties?: Dictionary)
While creating SuprSend instance you have to pass vapidKey (get it in SuprSend Dashboard --> Vendors --> WebPush).
If you want to customise serviceworker file name instead of serviceworker.js, you can pass name of it in swFileName.
new SuprSend(publicApiKey: string, {vapidKey?: string, swFileName?: string})
Service worker file is the background worker script which handles push notifications.
Create serviceworker.js file such that it should be publicly accessible from https://<your_domain>/serviceworker.js. Then include below lines of code and replace publicApiKey with key you find in API Keys page in SuprSend Dashboard.
importScripts(
  'https://cdn.jsdelivr.net/npm/@suprsend/web-sdk@2.0.0/public/serviceworker.min.js'
);

initSuprSend(publicApiKey);
Call registerPush in your code, which will perform following tasks:
const response = await suprSendClient.webpush.registerPush();
// get full user preferences data
const preferencesResp = await suprSendClient.user.preferences.getPreferences(args?: {tenantId?: string});

// update category level preference
const updatedPreferencesResp = await suprSendClient.user.preferences.updateCategoryPreference(category: string, preference: 'opt_in'|'opt_out', args?: { tenantId?: string });

// update category level channel preference
const updatedPreferencesResp = await suprSendClient.user.preferences.updateChannelPreferenceInCategory(channel: string, preference: 'opt_in'|'opt_out', category: string, args?: { tenantId?: string });

// update overall channel level preference
const updatedPreferencesResp = await suprSendClient.user.preferences.updateOverallChannelPreference(channel: string, preference: 'all'|'required');
All preferences update api's are optimistic updates. Actual api call will happen in background with 1 second debounce. Since its a background task SDK also provides event listener to get updated preference data based on api call status.
// listen for update in preferences data and update your UI accordingly in callback
suprSendClient.emitter.on('preferences_updated', (preferenceDataResp) => void);

// listen for errors and show error state like toast etc
suprSendClient.emitter.on('preferences_error', (errorResp) => void);
Almost all methods of this library return Promise<ApiResponse>
interface ApiResponse {
  status: 'success' | 'error';
  statusCode?: number;
  error?: { type?: string; message?: string };
  body?: any;
}

// success response
{
  status: "success",
  body?: any,
  statusCode?: number
}

// error response
{
  status: "error",
  error: {
    type: string,
    message: string
  }
}
FAQs
The client side javascript library for interacting with SuprSend
The npm package @suprsend/web-sdk receives a total of 2,105 weekly downloads. As such, @suprsend/web-sdk popularity was classified as popular.
We found that @suprsend/web-sdk demonstrated a healthy version release cadence and project activity because the last version was released less than a year ago. It has 2 open source maintainers collaborating on the project.
Did you know?

Socket for GitHub automatically highlights issues in each pull request and monitors the health of all your open source dependencies. Discover the contents of your packages and block harmful activity before you install or update your dependencies.

Security News
Socket CEO Feross Aboukhadijeh discusses the recent npm supply chain attacks on PodRocket, covering novel attack vectors and how developers can protect themselves.

Security News
Maintainers back GitHub’s npm security overhaul but raise concerns about CI/CD workflows, enterprise support, and token management.

Product
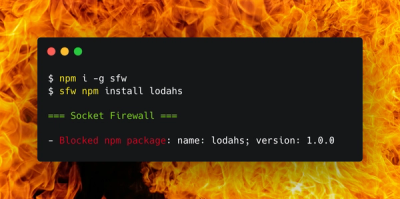
Socket Firewall is a free tool that blocks malicious packages at install time, giving developers proactive protection against rising supply chain attacks.