Security News
Crates.io Users Targeted by Phishing Emails
The Rust Security Response WG is warning of phishing emails from rustfoundation.dev targeting crates.io users.
@wecodeit/ng-magnetic
Advanced tools
Welcome to @wecodeit/ng-magnetic 👋 <img alt="License: MIT" src="https://img.shields.io/badge/License-MI
Angular Wrapper of michaelgudzevskyi/cursor-hover-effect-gsap for a custom cursor and magnetic cursor effect.
npm install @wecodeit/ng-magnetic
Import the NgMagneticModule and NgCursorModule in your app.module.ts:
import { NgMagneticModule, NgCursorModule } from 'ng-magnetic';

@NgModule({
  imports: [
    BrowserModule,
    NgMagneticModule,
    NgCursorModule
  ],
})
export class AppModule { }
####Magnetic Effect
To apply the magnetic effect, simply add the ngMagnetic directive to your element:
<div class="cb-demo-item" ngMagnetic [options]="magneticOptions">
    <div class="cb-demo-item-title">Magnetic</div>
        <div class="cb-demo-item-text">
            Magnetic via [data-magnetic] attribute
        </div>
    </div>
</div>
  /** options of ngMagnetic effect */
  @Input() options: MagneticOptions = {
      hDelta: 0.2, // horizontal delta
      vDelta: 0.2, // vertical delta,
      speed: 0.2, // speed
      releaseSpeed: //release Speed
  };
####Custom Cursor
Use the ng-cursor component inside your main component for example app.component.html:
If you use a smooth-scroll library which uses translate, make sure to place the cursor outside of the transformed element.
<router-outlet></router-outlet>
<ng-cursor></ng-cursor>
To modify your cursor, simply use the following attributes:
    <!--  add size class xl or lg-->
    <div data-cursor="-xl"></div>

    <!--  add opaque effect to the cursor -->
    <div data-cursor="-opaque"></div>

     <!-- you can also use multiple styles at once -->
    <div data-cursor="-xl -opaque"></div>

    <!-- set image of cursor -->
    <div data-cursor-image="https://picsum.photos/200/300"></div>

     <!-- set cursor text -->
    <div data-cursor-text="Hello!"></div>

    <!-- use sticky effect -->
    <div data-cursor="-exclusion -lg" data-cursor-stick="#cursor-stick-area">
        <div class="cb-demo-item-title" id="cursor-stick-area">
            Sticky
        </div>
    </div>
  /** options of the cursor */
  @Input() options: CursorOptions = {
      speed: 0.7,
      ease: 'expo.out',
      visibleTimeout: 300,
  };
👤 Felix Jiricka
Contributions, issues and feature requests are welcome!
Feel free to check issues page.
Give a ⭐️ if this project helped you!
This README was generated with ❤️ by readme-md-generator
FAQs
Welcome to @wecodeit/ng-magnetic 👋 <img alt="License: MIT" src="https://img.shields.io/badge/License-MI
We found that @wecodeit/ng-magnetic demonstrated a not healthy version release cadence and project activity because the last version was released a year ago. It has 1 open source maintainer collaborating on the project.
Did you know?

Socket for GitHub automatically highlights issues in each pull request and monitors the health of all your open source dependencies. Discover the contents of your packages and block harmful activity before you install or update your dependencies.

Security News
The Rust Security Response WG is warning of phishing emails from rustfoundation.dev targeting crates.io users.

Product
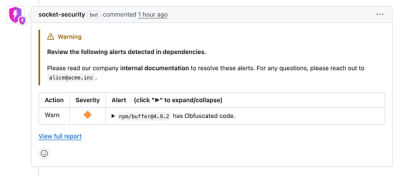
Socket now lets you customize pull request alert headers, helping security teams share clear guidance right in PRs to speed reviews and reduce back-and-forth.

Product
Socket's Rust support is moving to Beta: all users can scan Cargo projects and generate SBOMs, including Cargo.toml-only crates, with Rust-aware supply chain checks.